Blog

  • Best Time to Fly to Paris: Seasons, Weather & Prices

    Best Time to Fly to Paris: Seasons, Weather & Prices

    Paris is one of the most visited cities on earth in every month of the year, which means there is no truly empty season and no truly cheap one. What changes is the balance. Transatlantic demand peaks in summer, when North American families and students arrive in their millions; hotel prices, by contrast, are driven as much by the trade-fair and fashion calendars, which can fill every room in the city in the dead of winter; and the French school holidays and the string of May public holidays reshape demand on European routes. The weather is mild and changeable rather than extreme, though summer heatwaves are now a regular feature. The result is a city where the “best time” depends on whether you are optimising for the fare, the hotel, the weather or the crowds. This guide walks through the weather month by month, the fare seasons, the events that move prices, and how to handle the airports.

    The short answer

    For the best balance of weather, prices and crowds, go in late April to early June, avoiding the May bridge weekends if you can, or from early September to mid-October, when the summer crowds have gone, the city is back at work and the light is golden. The cheapest fares usually come from early January to mid-March, outside the February school holidays and Fashion Week, and in November and the first half of December. The most expensive stretches are June to August for flights from North America, Christmas and New Year, Easter, and the Fashion Weeks and big trade fairs, which push hotel rates to their annual highs without much warning to outsiders. August is a curious case: flights stay expensive, but hotels often soften as business travel stops and Parisians leave town. Whatever you choose, run a flexible-date search on our Paris flights page; a shift of a few days either side of a holiday weekend can change the fare band entirely.
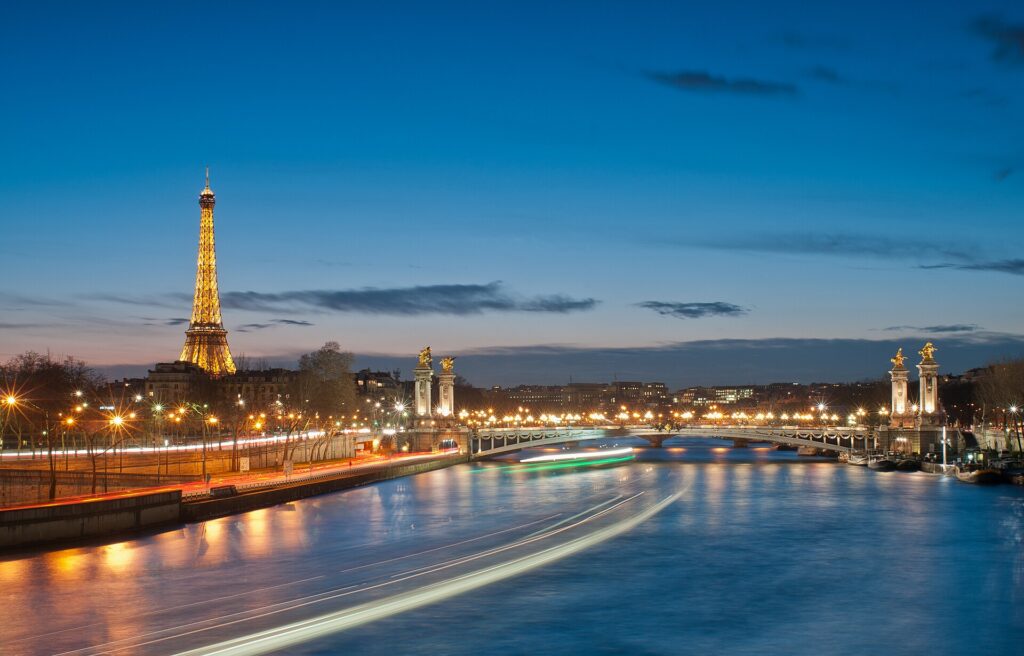
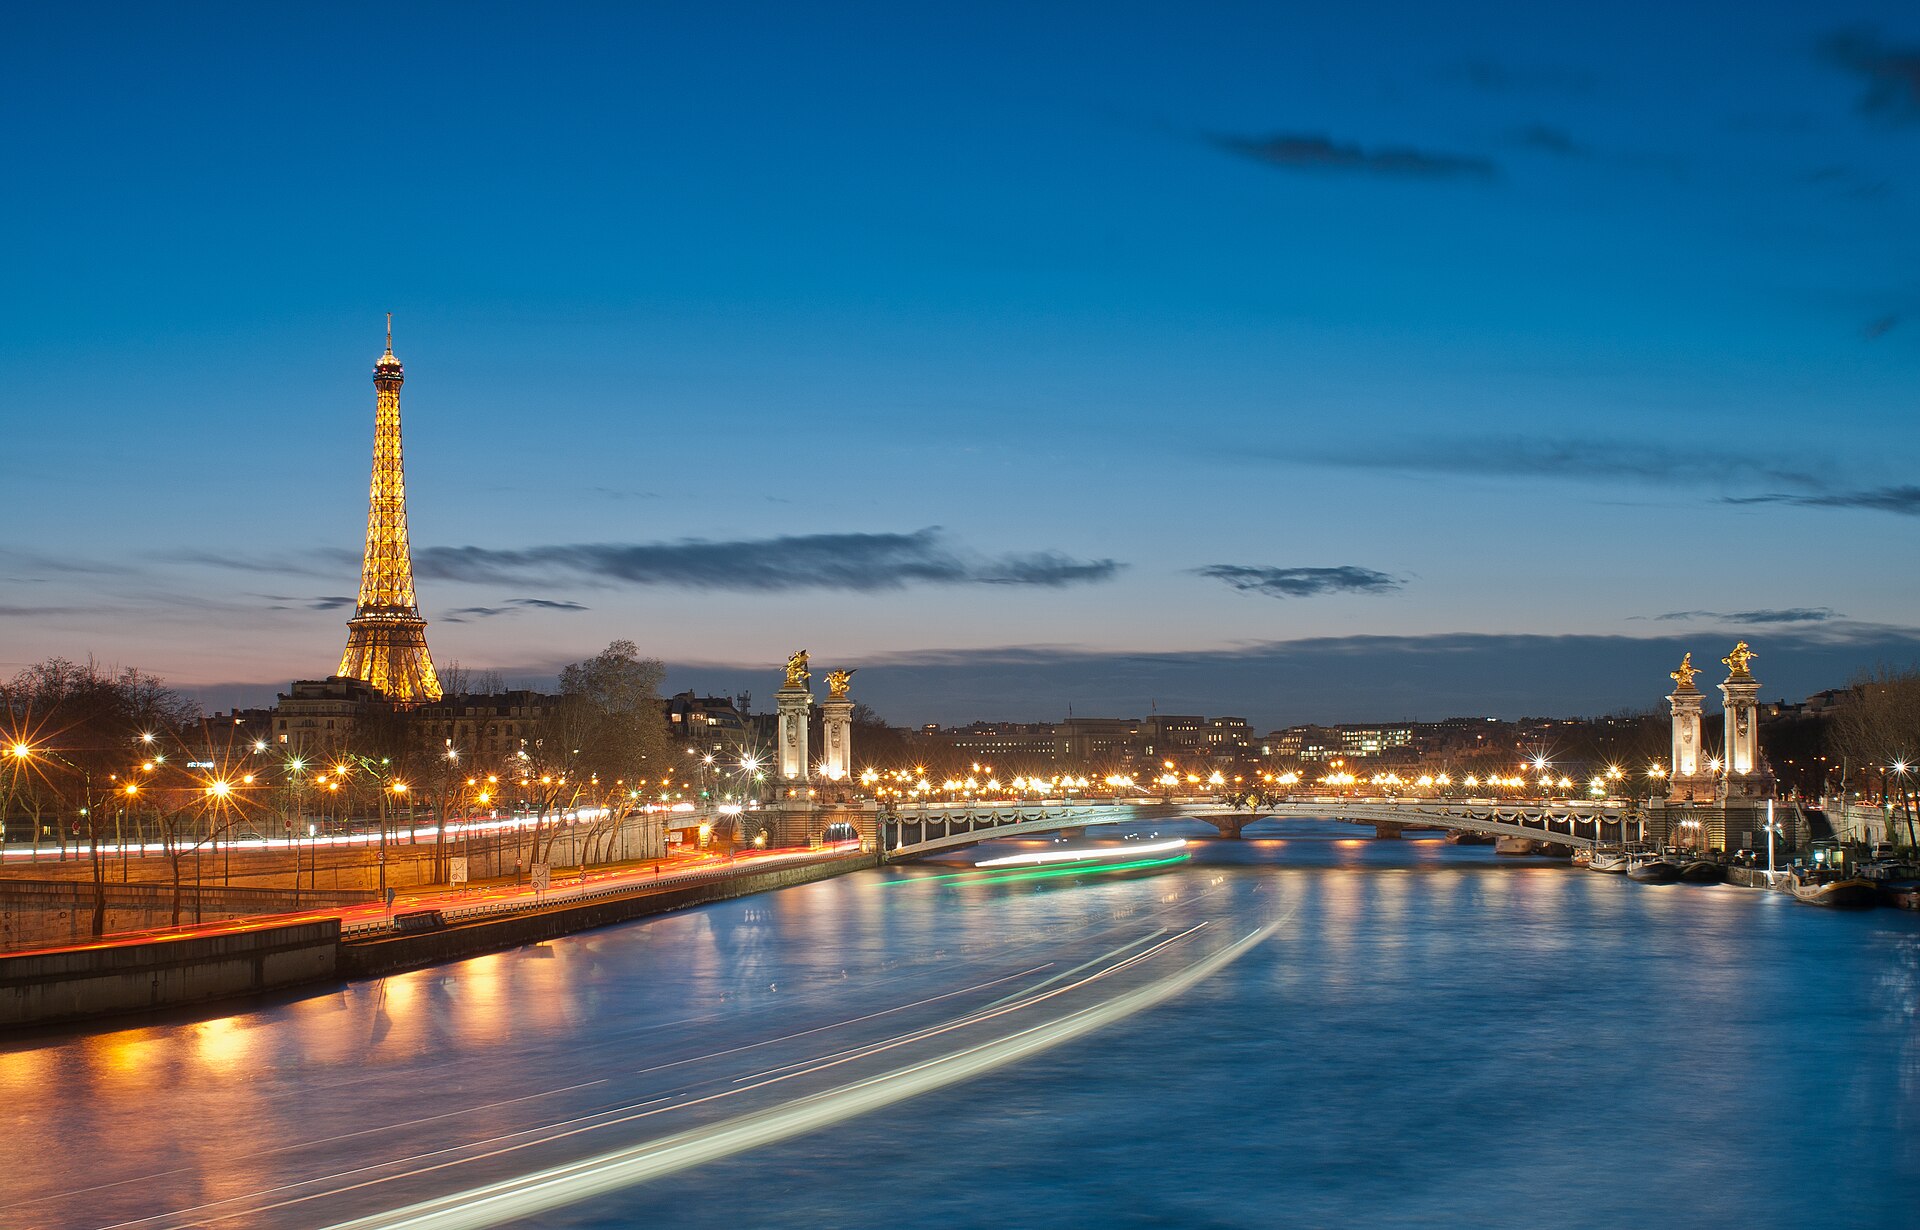
    The Pont Alexandre III across the Seine in central Paris
    The Seine in central Paris, busy in every month of the year (Photo: Getfunky Paris via Wikimedia Commons, CC BY 2.0)

    Paris weather, season by season

    Paris has a temperate, oceanic climate: no dry season, no real wet season, rain spread across the year in frequent light showers rather than downpours, mild winters in which snow is rare and rarely settles, and warm summers with long evenings. The figures below are approximate seasonal patterns based on the long-term climate normals published by Météo-France for central Paris; check the current forecast before you pack, and watch for its heatwave warnings in summer.

    MonthTypical daytime highTypical overnight lowWhat it feels likeFare pressure
    Januaryaround 8 °Caround 3 °CGrey, damp and short-dayed; frost some nights, snow rareLow, except New Year and the fashion and trade-fair weeks
    Februaryaround 9 °Caround 3 °CSimilar, with the light returning; occasional bright cold spellsLow; rises for school holidays and the agriculture show
    Marcharound 13 °Caround 6 °CChangeable; the first mild days and the first café terracesLow to moderate; Fashion Week at the start
    Aprilaround 16 °Caround 8 °CSpring proper, blossom and showers in equal measureModerate; Easter spike
    Mayaround 20 °Caround 11 °COften lovely; the gardens at their bestModerate to high; public-holiday bridge weekends
    Junearound 23 °Caround 14 °CWarm, long evenings light until about ten; thunderstorms possibleHigh
    Julyaround 26 °Caround 16 °CWarm to hot; heatwaves can push well above 35 °CPeak
    Augustaround 25 °Caround 16 °CWarm and quiet; many Parisians leave; storms break the heatHigh for flights, softer for hotels
    Septemberaround 21 °Caround 13 °COften settled and warm; the city returns to workModerate to high; Fashion Week at the end
    Octoberaround 16 °Caround 10 °CCrisp, golden, then wetter; autumn colour in the parksModerate; trade fairs and the autumn holidays
    Novemberaround 11 °Caround 6 °CGrey and damp; the quietest monthLow
    Decemberaround 8 °Caround 4 °CCold, damp and festive; the lights go upLow until mid-month, then peak

    Three things the table cannot show. First, heatwaves: Paris set its all-time record above 40 °C in July 2019, and several recent summers have brought spells of 35 °C or more; many older hotels and apartments have no air conditioning, and the Métro can be stifling, so check whether your room is air-conditioned if you are travelling in July or August. Second, the rain: it falls on roughly one day in three across the year, but usually as drizzle or a passing shower, and it rarely spoils a whole day; an umbrella and a museum plan are enough. Third, the light: in June the sun sets after half past nine and the evenings seem endless, while in December it is dark before five, which changes how much you can fit into a day more than the temperature does.

    How Paris fare seasons work

    Three calendars drive demand into Paris. The first is leisure travel from outside Europe, which peaks in summer and around Christmas and Easter and sets the price of long-haul flights. The second is the French and European holiday calendar: the staggered school holidays in February, April, late October and at Christmas, and the public holidays in May, which move prices on flights and trains within Europe. The third is business and the trade fairs: Paris is one of the world’s great exhibition cities, and the Fashion Weeks and the big salons at the Porte de Versailles and Paris Nord Villepinte exhibition centres can push hotel rates to peak levels in otherwise quiet months. A cheap flight into a trade-fair week is not cheap once the hotel is added.

    Peak season

    June to August, plus roughly December 20 to January 2, and Easter. Transatlantic fares are at their highest from mid-June to mid-August, and July is the busiest month at the big sights, with long queues at the Eiffel Tower, the Louvre and Versailles even with timed tickets. Hotels are expensive in June and July but often soften in August, when business travel stops. If you must travel in peak, book early, book timed entry to everything, fly mid-week, and consider an air-conditioned room.

    Shoulder season

    April to May and September to October. Spring gives you blossom and long days before the summer crowds; the catch is Easter and the May bridge weekends, when Parisians and neighbouring Europeans travel and prices jump. Early autumn is the connoisseur’s choice, with settled weather, new exhibitions after the summer break and the restaurants back from holiday; the catch is Fashion Week at the turn of September and October and a heavy trade-fair calendar that can fill hotels mid-week.

    Low season

    Early January to mid-March and November to mid-December, outside the fashion and trade-fair weeks. Fares from North America are at their lowest, the museums are at their least crowded, the January sales are on, and hotel rates in quieter weeks can be half the summer level. The trade-off is grey, damp weather and short days. Watch the February school holidays and the International Agriculture Show at the turn of February and March.

    As elsewhere, mid-week departures and overnight transatlantic flights on less popular days usually price below Friday and Sunday departures on the same route, and a search across a whole month reveals cheaper pairs of dates close to your first choice. Our guide to the best times to book explains how to read those patterns.

    Paris month by month

    January

    Grey, cool and, after New Year, one of the cheapest months to fly. The winter sales, the soldes, start in the second week and run for a month, and the department stores on Boulevard Haussmann are at their busiest. The museums are quiet, the bistros are warm, and the Epiphany galette des rois fills every bakery window. Menswear and haute couture fashion weeks and the Maison & Objet design fair can push up hotel rates for a few days mid-month; outside those, this is the value window.

    February

    Similar weather with longer days, and low fares outside the French winter school holidays, which are staggered by region across roughly four weeks from mid-February. The Six Nations rugby brings match weekends at the Stade de France, and the International Agriculture Show at the Porte de Versailles, late February into early March, fills the hotels in the south of the city.

    March

    Changeable, occasionally mild, and still good value, apart from women’s Fashion Week in the first days of the month, when the smarter hotels are booked solid. The first café terraces come out on sunny afternoons and the city’s gardens start to turn green by the end of the month.

    April

    Spring arrives properly, with blossom in the parks and along the boulevards and plenty of showers. Easter and the French spring school holidays push fares and hotel rates up for two or three weeks, and the Paris Marathon on a Sunday in April closes central streets. Outside Easter, April is one of the best-value spring months.

    May

    Often the loveliest month, with warm days and the gardens at their peak, and one of the trickiest to book. May has several public holidays, the first and eighth of May, Ascension Thursday and often Whit Monday, and when they fall close to a weekend the French take a long “bridge” weekend and prices on European routes and in hotels jump. Roland-Garros begins in the last week of the month. Book early and aim for mid-week.

    June

    Long, warm and busy, with evenings that stay light until ten. The Fête de la Musique on 21 June fills the streets with free concerts, the end of Roland-Garros, the menswear shows and, in odd-numbered years, the Paris Air Show at Le Bourget lift hotel rates. Transatlantic fares climb steeply through the month as North American schools finish; early June is the value play.

    July

    Peak season. Bastille Day on 14 July brings the military parade on the Champs-Élysées and fireworks at the Eiffel Tower, the Tour de France traditionally finishes on the Champs-Élysées on a Sunday late in the month, and Paris Plages turns the riverbanks into a beach from mid-July. Flights and the big sights are at their busiest, and a heatwave is always possible. Book everything early.

    August

    The month Paris empties of Parisians. Many small restaurants, bakeries and shops close for two or three weeks, usually around the 15 August holiday, while the museums and big sights stay open and crowded with visitors. Flights stay expensive until the last week, but hotel rates often dip as business travel disappears, which makes August better value for the room than for the fare.

    September

    The rentrée: the city comes back to work and school, the new exhibitions open, and the weather is often the most settled of the autumn. The Journées du Patrimoine on the third weekend open buildings closed the rest of the year. Fares fall after the first week, but women’s Fashion Week at the turn of the month and a busy trade-fair calendar can make mid-week hotels surprisingly expensive.

    October

    Crisp and golden early, wetter later, with autumn colour in the Luxembourg and the Tuileries. Fashion Week spills into the first days of the month, the Paris Motor Show fills the Porte de Versailles in even-numbered years, and the autumn school holidays, the two weeks around 1 November, lift family demand at the end of the month. Mid-October is a sweet spot.

    November

    Grey, damp and the quietest month of the year, with some of the lowest fares and hotel rates. The Beaujolais nouveau arrives on the third Thursday, the Christmas lights go up on the Champs-Élysées and the department stores unveil their windows late in the month, and the museums are wonderfully uncrowded.

    December

    Two months in one. The first half keeps November’s prices with the festive lights and the Christmas markets; from about 20 December, fares and hotel rates jump for Christmas and New Year, when Paris is one of the most popular city breaks in Europe. New Year’s Eve on the Champs-Élysées draws huge crowds.
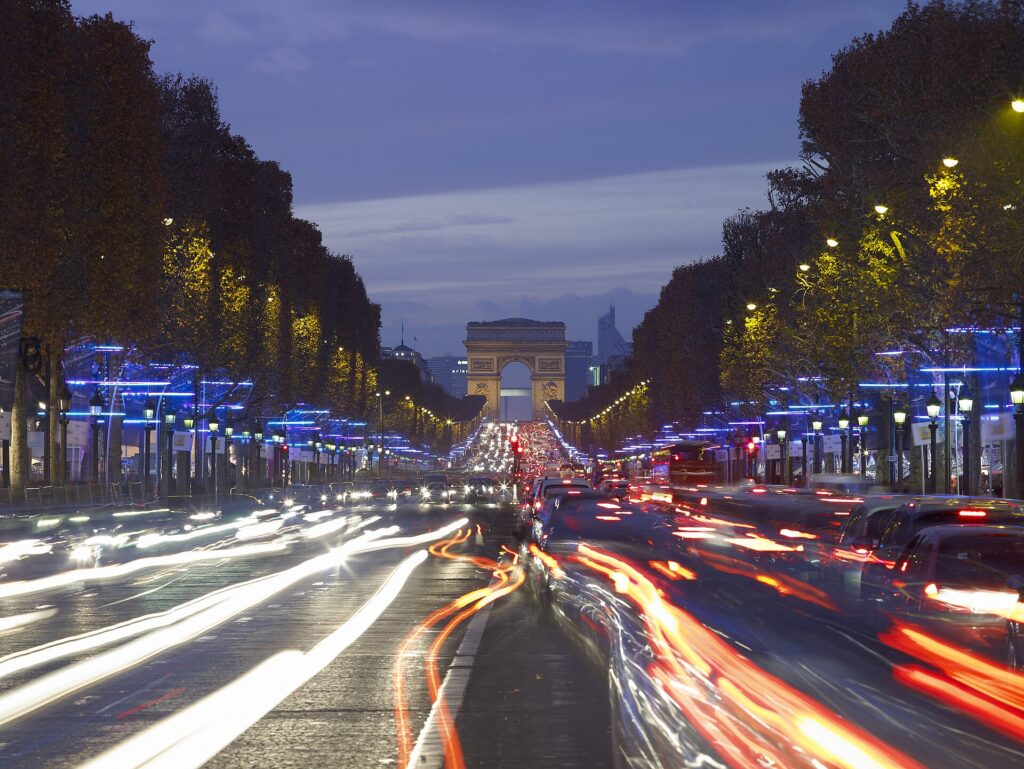
    Christmas lights on the Champs-Élysées in Paris
    The Champs-Élysées in December: festive and good value until the holiday fortnight (Photo: photo by Didier Boy de la Tour copyright ACT lighting design 20011 via Wikimedia Commons, CC BY 3.0)

    Events that move Paris flight and hotel prices

    Cross-check these against your dates before you book. Exact dates shift each year; the Paris tourist office keeps the current calendar.

    • Fashion Weeks: menswear and haute couture in January and late June to early July; women’s collections in late February to early March and late September to early October.
    • French school holidays: winter (mid-February to mid-March, by region), spring (April), summer (July and August), autumn (around 1 November) and Christmas.
    • International Agriculture Show (late February to early March) and the other big salons at the Porte de Versailles and Villepinte.
    • Easter and the May public holidays with their bridge weekends.
    • Roland-Garros (late May to early June).
    • Fête de la Musique (21 June) and, in odd-numbered years, the Paris Air Show in June.
    • Bastille Day (14 July) and the Tour de France finale (a Sunday in late July).
    • Journées du Patrimoine (third weekend of September).
    • PSG and Stade de France fixtures, the Six Nations and stadium concerts. Our Paris events page shows what is on sale for your dates.
    • Christmas to New Year, the most expensive fortnight of the winter.

    Getting in from the airports

    Paris has two main airports, both run by Paris Aéroport. Charles de Gaulle (CDG), about 25 kilometres northeast of the centre, is Air France’s hub and one of the largest airports in Europe, with three terminals, Terminal 2 split into several halls, and an automated shuttle train, CDGVAL, linking them. Nonstop flights arrive from every major North American city and most of the world. The RER B train runs from the airport to Gare du Nord in about 35 minutes and continues through Châtelet, Saint-Michel and Denfert-Rochereau; the Roissybus goes to Opéra; and taxis charge a fixed fare to the Right Bank and a slightly higher fixed fare to the Left Bank. Terminal 2 also has a high-speed rail station with direct TGV services to Lyon, Bordeaux, Marseille, Brussels and beyond, which means you can connect straight from a long-haul flight to the regions without entering Paris. A dedicated express rail link from CDG to Gare de l’Est is under construction. Orly (ORY), about 14 kilometres south, handles many European, domestic and some long-haul flights, and since 2024 Métro line 14 has run directly from Orly into the heart of the city at Châtelet in around half an hour; fixed-fare taxis also serve Orly. Beauvais, about 85 kilometres north, is used by some low-cost airlines and connected to Porte Maillot by a coach that takes over an hour, so price that time in before booking the cheaper fare. Trips to and from the airports on public transport carry a separate airport fare; see our Paris car-versus-transport guide for how tickets work, and our CDG airport guide for the layout.

    A terminal at Paris Charles de Gaulle Airport
    Paris Charles de Gaulle (CDG), Air France's hub and the main long-haul gateway (Photo: Syced via Wikimedia Commons, CC0)

    Timing tricks that work for Paris

    • Search the whole month. Holidays, bridge weekends and Fashion Week create sharp edges in the fare calendar. A calendar search on TicketScanner shows them instantly.
    • Price the hotel before the flight. Trade fairs can make a quiet-looking week the most expensive of the season for rooms. Run a Paris hotel search for the same dates before you commit.
    • Compare CDG and Orly. Both are well connected now that line 14 reaches Orly, so include both in your search; avoid Beauvais unless the saving outweighs the coach.
    • Fly mid-week. Friday and Sunday departures are the priciest on most routes; Tuesday and Wednesday are usually the value.
    • Use August for the hotel, not the fare. If you are flexible, late August combines softening hotel rates with falling fares in the last week.
    • Consider an open-jaw ticket. Fly into Paris and home from London, Rome or Amsterdam to build a multi-city trip; our guide to travelling Europe multi-city explains how, and London is little more than two hours away by Eurostar.
    • Allow time at CDG. Terminal changes and security queues can be long in summer; our guide to how early to arrive covers what to allow.
    • Flying out of Paris instead? The same seasonality applies in reverse; see cheap flights from Paris.

    Spring blossom in front of the church of Saint-Vincent-de-Paul in Paris
    Spring in Paris: blossom and showers, and some of the best value of the year outside Easter (Photo: Tomdesp via Wikimedia Commons, CC BY-SA 4.0)

    What to pack, by season

    Winter (December to February): a warm, water-resistant coat, a scarf, layers, and comfortable waterproof shoes for long days on wet cobblestones. Spring (March to May): layers, a light raincoat and a compact umbrella; a sunny April afternoon can turn to a cold shower in minutes. Summer (June to August): light, breathable clothing, sun protection, a refillable water bottle for the public fountains, and one smarter outfit for dinner; if you are visiting churches, something to cover your shoulders. Autumn (September to November): layers again, a warmer jacket by late October, and an umbrella. In every season, bring shoes you can walk ten or fifteen kilometres in; Paris is a walking city and the Métro has a lot of stairs.

    The best time to fly to Paris for…

    First-time sightseeing

    Late April to early June or September to mid-October, with timed tickets booked for the Louvre, the Eiffel Tower and Versailles.

    The lowest fares

    Early January to mid-March and November, outside the fashion weeks and school holidays. Pair a cheap fare with a museum-heavy itinerary.

    Summer events

    June for the Fête de la Musique and Roland-Garros, July for Bastille Day and the Tour de France finish, booked as early as possible.

    Christmas in Paris

    The first two weeks of December, for the lights and the markets without the holiday prices.

    Families

    Late June before the European school holidays begin, or late August, when hotels soften and the crowds thin in the last week.

    International visitors

    Canadian, American, British and most other visa-exempt travellers can spend up to 90 days in any 180 in the Schengen area without a visa. The EU’s Entry/Exit System now records non-EU travellers’ fingerprints and photo at the border, which can lengthen queues at CDG, and the ETIAS travel authorisation is due to follow; check the official EU travel page for what applies to you, and France-Visas if you need a visa.

    Frequently asked questions

    What is the cheapest month to fly to Paris?

    January and February, outside New Year, the school holidays and the fashion weeks, are consistently the lowest from North America, with November close behind.

    What is the best month to visit Paris for weather?

    May, June and September are the most reliable for warm, pleasant days. July and August are warmer but can bring heatwaves.

    Is August a good time to visit Paris?

    It can be. Hotels are often cheaper and the city is calm, but some small restaurants and shops close, flights stay expensive, and heat is a risk.

    Which airport is better, CDG or Orly?

    Both are well connected. CDG has more long-haul flights and the RER B; Orly is closer and now on Métro line 14. Choose on fare and flight times.

    How far ahead should I book flights to Paris?

    Earlier for summer, Christmas, Easter and the May holidays, when fares tend only to rise; for January to March and November, finding the right dates matters more than booking months ahead.

    Does it snow in Paris?

    Occasionally, for a day or two in some winters, but it rarely settles for long. Expect cold rain rather than snow.

    When is Paris least crowded?

    November and January to early March, when even the Louvre can feel calm on a weekday morning.

    Ready to pick your dates? Compare fares across the whole month on our Paris flights page, then find a room with our Paris hotel search. For what to do when you land, start with our first-timer’s guide to Paris.

  • Things to Do in Paris: A First-Timer’s Guide

    Things to Do in Paris: A First-Timer’s Guide

    Paris is the city everyone thinks they already know, and that is exactly why a first visit can disappoint the people who plan it badly. They queue for the lift at the Eiffel Tower at noon, walk the Louvre from end to end in one exhausted afternoon, eat a mediocre croque-monsieur beside the Champs-Élysées and leave wondering what the fuss was about. Plan it well and Paris repays every hour: a medieval island with a rebuilt cathedral at its heart, the world’s greatest concentration of art, twenty arrondissements that each feel like a separate small town, a food culture built around the daily bread run and the neighbourhood market, and a river that ties it all together. This guide covers the landmarks that earn their queues, the museums worth booking, the neighbourhoods worth a slow half-day, the food, the calendar and the sport, the day trips to Versailles, Giverny and Champagne, and the practical details that turn a checklist into a trip.

    If you are still comparing cheap flights to Paris, read this alongside our guides to the best time to fly to Paris and whether you need a car. Between the three you can plan the whole trip.

    The Eiffel Tower seen across the Trocadéro gardens in Paris
    The Eiffel Tower from the Trocadéro, the classic first view of Paris (Photo: NonOmnisMoriar via Wikimedia Commons, CC BY-SA 3.0)

    Paris at a glance for first-timers

    • Airports: Charles de Gaulle (CDG), about 25 km northeast of the centre, handles most long-haul flights; Orly (ORY), about 14 km south, handles many European and domestic routes. The RER B train, Métro line 14 from Orly, or a fixed-fare taxi gets you in. See our CDG airport guide.
    • Getting around: the Métro reaches within a few minutes’ walk of almost everything, the RER trains cross the city and run to Versailles and Disneyland, and the centre is compact enough to walk from the Louvre to the Latin Quarter in twenty minutes. A car is a liability inside the city.
    • Money: euros. Cards, including contactless, are accepted almost everywhere, though a few bakeries and market stalls still prefer cash for small sums. Service is included in restaurant prices by law, so tipping is optional; rounding up or leaving a euro or two for good service is plenty.
    • Weather: mild and changeable, with grey, damp winters, a soft spring, warm summers that can turn to heatwaves, and a golden early autumn. Rain is frequent but rarely heavy. Our month-by-month guide has the detail.
    • Where to stay: Le Marais for walking everywhere and a lively evening; Saint-Germain or the Latin Quarter for the classic Left Bank; the 7th near the Eiffel Tower for calm; Montmartre or the Canal Saint-Martin for a more local feel and lower prices. Our Paris hotel search covers them all.

    The Eiffel Tower, the Trocadéro and the Seine

    Start where everyone starts, but do it properly. The Eiffel Tower was built for the 1889 World’s Fair and was meant to be temporary; it is now one of the most visited paid monuments in the world, and the queue is the only thing that can spoil it. Book a timed ticket online, go early in the morning or after dark, and consider walking the stairs to the second floor, which is quicker than the lift queue and more interesting. For the classic photograph, cross the river to the terraces of the Trocadéro, and come back after dark, when the tower sparkles with thousands of lights for five minutes at the start of every hour. The lawns of the Champ de Mars below it are the city’s favourite summer picnic ground. From the foot of the tower, a Seine cruise is the laziest and one of the best introductions to the city: an hour on the water passes the Musée d’Orsay, the Louvre, Notre-Dame and a string of bridges, of which the gilded Pont Alexandre III is the grandest.

    The islands: Notre-Dame, Sainte-Chapelle and the Île Saint-Louis

    Paris began on the Île de la Cité, and the island is still its symbolic centre. Notre-Dame reopened in December 2024 after the fire of 2019 and a five-year restoration that rebuilt the spire and the roof and cleaned the interior to a pale, luminous stone that few living Parisians had ever seen; entry to the cathedral is free, the queue moves quickly, and you can reserve a time slot online to skip most of it. The climb up the towers is ticketed separately. A few minutes’ walk away, Sainte-Chapelle, the royal chapel built in the 1240s to hold relics, is the single most beautiful interior in the city: the upper chapel is almost entirely walls of thirteenth-century stained glass, and on a sunny morning it glows. The Conciergerie next door is the prison where Marie Antoinette spent her last weeks. Cross the footbridge behind Notre-Dame to the Île Saint-Louis, a quiet island of seventeenth-century mansions, small shops and the famous Berthillon ice cream, and walk its quays at sunset.

    Notre-Dame de Paris on the Île de la Cité at dusk, seen from the Pont de la Tournelle
    Notre-Dame, reopened in December 2024 after five years of restoration (Photo: Benh LIEU SONG via Wikimedia Commons, CC BY-SA 4.0)

    The Louvre, the Tuileries and the great museums

    The Louvre is the largest art museum in the world, a former royal palace with more than eight centuries of history behind I. M. Pei’s glass pyramid, and no one sees it in a day. Book a timed ticket online, which is required; arrive at opening; and choose a wing rather than trying to cover the whole building. The Mona Lisa, the Venus de Milo and the Winged Victory of Samothrace are the big three and draw the crowds; the Egyptian antiquities and the Napoleon III apartments reward walking further. It is closed on Tuesdays. From the Louvre, the Tuileries Garden runs west to the Place de la Concorde, and at its far end the Musée de l’Orangerie holds Monet’s Water Lilies in two oval rooms designed for them, one of the most serene half-hours in Paris. Across the river, the Musée d’Orsay, in a former Beaux-Arts railway station, has the world’s finest Impressionist and Post-Impressionist collection: Monet, Renoir, Degas, Van Gogh, Cézanne and Manet’s Luncheon on the Grass. It is closed on Mondays. If you plan to visit several major museums, the Paris Museum Pass, sold for two, four or six days, covers most of them.

    The glass pyramid in the Cour Napoléon of the Louvre
    The Louvre's glass pyramid; book a timed ticket and choose one wing (Photo: Benh LIEU SONG (Flickr) via Wikimedia Commons, CC BY-SA 3.0)

    Neighbourhoods worth a half-day

    Le Marais

    Straddling the 3rd and 4th arrondissements on the Right Bank, the Marais is the best-preserved quarter of pre-revolutionary Paris and the most rewarding neighbourhood to wander. The Place des Vosges, laid out in the early 1600s, is the oldest planned square in the city; the streets around it hold aristocratic mansions turned into museums, the Musée Picasso and the Musée Carnavalet, the museum of the history of Paris, whose permanent collection is free. Rue des Rosiers, the heart of the old Jewish quarter, is where to queue for falafel, and the Marché des Enfants Rouges, the city’s oldest covered market, is the lunch stop. Many of its boutiques open on Sundays.

    Saint-Germain and the Latin Quarter

    The Left Bank of legend. Saint-Germain-des-Prés has the literary cafés, the Café de Flore and Les Deux Magots, and the city’s best-dressed shop windows; the Luxembourg Gardens, with the Senate palace, the Medici fountain and the green metal chairs, are the most Parisian park in Paris. East of them, the Latin Quarter climbs past the Sorbonne to the domed Panthéon, where Voltaire, Victor Hugo and Marie Curie are buried, and down the market street of rue Mouffetard.

    Montmartre

    The hill in the north of the city, crowned by the white domes of the Sacré-Cœur, still feels like the village it was when Renoir, Picasso and Toulouse-Lautrec lived there. Entry to the basilica is free and the view from its steps takes in the whole city; the funicular saves the climb and takes a standard transit ticket. The Place du Tertre is crowded with portrait painters, but the lanes behind it, the vineyard, the Musée de Montmartre and the Rue de l’Abreuvoir, are quiet and lovely. Ignore anyone offering to tie a string bracelet on your wrist at the bottom of the steps.

    Canal Saint-Martin and Belleville

    In the northeast, the tree-lined Canal Saint-Martin, with its iron footbridges and locks, is where young Parisians picnic on summer evenings, and the streets around it are full of independent cafés, bakeries and bars. Uphill, Belleville is one of the most diverse neighbourhoods in the city, with Chinese, Vietnamese and North African restaurants, street art and the Parc de Belleville, which has one of the best free views of Paris. Père Lachaise, the cemetery of Chopin, Oscar Wilde and Édith Piaf, is a short walk south.

    The Champs-Élysées and the Arc de Triomphe

    The grand avenue itself is mostly flagship stores and chains now, but the walk from the Place de la Concorde to the Arc de Triomphe is still one of the great urban axes. Climb the arch, about 280 steps, for a rooftop view straight down the twelve avenues that radiate from it, and come at dusk, when the flame over the Tomb of the Unknown Soldier is rekindled.

    More museums, culture and landmarks

    Beyond the big three, Paris has more first-rate museums than any visitor can manage. The Musée Rodin, in an eighteenth-century mansion with a rose garden, has The Thinker and The Kiss, and the garden alone is worth the small entry fee. Les Invalides houses the army museum and Napoleon’s tomb under its golden dome. The Palais Garnier, the nineteenth-century opera house, can be toured by day and is as extravagant inside as out. The Fondation Louis Vuitton, Frank Gehry’s glass sailing ship in the Bois de Boulogne, and the Bourse de Commerce are the two big contemporary art addresses. The Centre Pompidou, the home of modern art, closed in 2025 for a renovation expected to last until around 2030, so check before you plan around it. Underground, the Catacombs at Denfert-Rochereau, a kilometre and a half of tunnels lined with the bones of six million Parisians, sell out days ahead; book online. For music, the Philharmonie de Paris in the Parc de la Villette is one of the world’s best concert halls, and for what is on stage and in the stadiums during your dates, our Paris events page lists concerts, shows and games. The Paris tourist office has current opening hours and exhibition listings.

    The Paris calendar: Bastille Day and the big events

    The biggest day of the Paris year is 14 July, the national holiday the rest of the world calls Bastille Day: a military parade down the Champs-Élysées in the morning, with a fly-past trailing the tricolour, firefighters’ balls in fire stations across the city the night before, and fireworks over the Eiffel Tower after dark, watched by crowds on the Champ de Mars and along the Seine. On 21 June, the Fête de la Musique puts free concerts on every street corner until the small hours. From mid-July to late August, Paris Plages brings sand, deckchairs and activities to the riverbanks and the Bassin de la Villette, and since the 2024 Olympics, supervised swimming spots have opened in the Seine itself in summer. The Journées du Patrimoine, on the third weekend of September, open ministries, palaces and private mansions that are closed the rest of the year. Fashion Weeks in late winter and early autumn fill the hotels and the smartest restaurants, and from late November the department stores on Boulevard Haussmann unveil their Christmas windows and the Champs-Élysées lights up. If you are coming for any of these, book the hotel before the flight.

    Sports

    Paris Saint-Germain, the city’s football club, plays at the Parc des Princes in the southwest of the city, and a match there is one of the loudest nights in European sport; tickets are scarce and sold mainly to members, so plan ahead. The Stade de France in Saint-Denis, reached by RER, hosts the French national football and rugby teams, the Six Nations in February and March, and the biggest stadium concerts. Roland-Garros, the French Open, runs for a fortnight from late May into early June at the clay courts beside the Bois de Boulogne, and ground passes for the outer courts are the best-value tickets in tennis. The Tour de France traditionally finishes in Paris on a Sunday in late July, and watching the riders race past on the Champs-Élysées is free. Check what is on sale in Paris for your dates before you book flights.

    What to eat, and where

    Paris eats around the day’s rhythm, and the best meals are often the simplest. Start at the boulangerie: a croissant in the morning, a baguette tradition at lunchtime, and a pastry in the afternoon; the city holds an annual competition for the best baguette, and the winner supplies the Élysée Palace for a year. At lunch, look for the formule, the fixed-price two- or three-course menu that most bistros offer on weekdays and that is far better value than dinner. The revived bouillons, huge, noisy dining rooms with low prices, serve the classics. The street markets, from the Marché d’Aligre near Bastille to the market streets of rue Cler and rue Mouffetard, are the place to assemble a picnic of cheese, charcuterie, fruit and bread. Beyond French food, eat falafel in the Marais, Vietnamese and Chinese food in the 13th arrondissement, couscous in Belleville, and Breton crêpes around Montparnasse, where Brittany’s trains arrive. Ask for a carafe d’eau and tap water is free; many restaurants close on Sundays or Mondays and for part of August.

    Paris through the seasons

    Paris is a different city in each season, and the best things to do change with it. Winter (December to February) is grey and damp, rarely freezing: the museums are at their least crowded, the Christmas windows fill December, and a long bistro lunch is the answer to a wet afternoon. Spring (March to May) is the season of the songs: the chestnut trees flower along the boulevards in April, the cafés put their tables back out, and the May public holidays give Parisians a string of long weekends. Summer (June to August) is long evenings that stay light until ten, the Fête de la Musique, Bastille Day, Paris Plages and open-air cinema at La Villette; in August many Parisians leave town, some small shops and restaurants close, and the city feels oddly quiet. Autumn (September to November) is the local favourite: the rentrée brings new exhibitions and restaurant openings, the light is golden on the river, the Journées du Patrimoine open closed doors, and November is quiet and cheap. Our month-by-month guide has the fare patterns that go with each season.

    Paris with kids

    Paris is better with children than its reputation suggests. The Luxembourg Gardens have a large playground, a puppet theatre and the pond where children push wooden sailboats with sticks; the Jardin d’Acclimatation in the Bois de Boulogne is an old-fashioned amusement park with rides, animals and play areas. The Jardin des Plantes combines a small historic zoo with the Grande Galerie de l’Évolution, a parade of stuffed animals under a glass roof that children love. The Cité des Sciences at La Villette has hands-on galleries for every age. National museums, including the Louvre and Orsay, are free for under-18s, which makes short visits painless. For a day out, Disneyland Paris is 40 minutes away on the RER A, and Parc Astérix, the French alternative, is north of CDG. Buggies are hard work on the Métro, which has many stairs; the buses are step-free.

    Paris on a budget

    Paris is expensive, but much of its best is free. Notre-Dame and the Sacré-Cœur cost nothing to enter; the permanent collections of the city’s own museums, including the Carnavalet and the Petit Palais, are free; the gardens, the Seine quays, Père Lachaise and the view from the Parc de Belleville cost nothing; and the rooftop terrace of the Galeries Lafayette department store has a free view of the Opéra and the Eiffel Tower. Several national museums are free on the first Sunday of certain months, EU residents under 26 get into national collections free, and the Museum Pass pays for itself if you visit three or four major sites. Eat the lunchtime formule rather than dinner, picnic from the markets, and drink wine at the counter rather than at a table. Stay in the 10th, 11th or 18th rather than the 1st or 7th. Compare rates by neighbourhood on our Paris hotel search.

    Day trips from Paris

    Versailles is the essential one: the Château de Versailles, the Hall of Mirrors, the vast formal gardens, Marie Antoinette’s hamlet and the Trianon palaces, 40 minutes away on the RER C. Book a timed ticket, avoid Mondays, when it is closed, and Tuesdays, when it is busiest, and allow a full day. Giverny, Monet’s house and water garden, is an hour by train from Saint-Lazare to Vernon plus a shuttle, and is open from spring to autumn only. Disneyland Paris is at the end of the RER A. Fontainebleau, a royal château many visitors prefer to Versailles, with a huge forest for walking, is 40 minutes from Gare de Lyon. Reims, the champagne capital, with its Gothic cathedral and the great champagne houses’ cellars, is about 45 minutes by high-speed train from Gare de l’Est. Chartres, with the finest medieval stained glass in Europe, is about an hour from Montparnasse. Mont-Saint-Michel and the Normandy D-Day beaches are possible as long day trips but much better with a night away. All of these work by train; our car-versus-transport guide explains when a rental earns its keep. And London is little more than two hours away by Eurostar; see our guide to things to do in London.

    The Palace of Versailles seen from its formal gardens
    Versailles, 40 minutes from central Paris on the RER C and the essential day trip (Photo: Basile Morin via Wikimedia Commons, CC BY-SA 4.0)

    Two sample itineraries

    Three days, first visit

    Day one: Notre-Dame and Sainte-Chapelle at opening, the Île Saint-Louis, lunch in the Marais and an afternoon among its squares and museums, then dinner in the Latin Quarter. Day two: the Louvre at opening, a walk through the Tuileries to the Orangerie, the Champs-Élysées to the Arc de Triomphe, and the Eiffel Tower after dark with a timed ticket. Day three: the Musée d’Orsay in the morning, lunch in Saint-Germain and an afternoon in the Luxembourg Gardens, then Montmartre for sunset from the Sacré-Cœur and dinner on the hill.

    Five days, with day trips

    Add a full day at Versailles, and a fifth day for Giverny in season, Reims for champagne, or the Canal Saint-Martin, Belleville and Père Lachaise for the Paris most visitors never see.

    Practical details

    • Transit: load tickets onto a Navigo Easy card or your phone through the official app; a weekly Navigo pass runs Monday to Sunday and covers the airports, Versailles and Disneyland. The RATP has maps; our transport guide goes into detail.
    • From the airports: the RER B from CDG to Gare du Nord and Châtelet, Métro line 14 from Orly, or a fixed-fare taxi from either. Paris Aéroport covers ground transport for both.
    • Weather: pack layers and a compact umbrella in every season. Météo-France is the forecast to check, including heatwave warnings in summer.
    • Time zone: Central European Time, one hour ahead of London and six ahead of New York.
    • Entry requirements: Canadian, American, British and most other visa-exempt travellers can spend up to 90 days in any 180 in the Schengen area without a visa. The EU’s Entry/Exit System now records non-EU travellers’ fingerprints and photo at the border, and the ETIAS travel authorisation is due to follow; check the official EU travel page for what applies to you.
    • Safety: violent crime against visitors is rare; pickpocketing on Métro line 1, around the Eiffel Tower and at the Sacré-Cœur is not. Keep bags closed and ignore petition-signers and the “found” gold ring.

    Frequently asked questions

    How many days do you need in Paris?

    Three full days covers the essential landmarks, two major museums and two neighbourhoods; five lets you add Versailles and a slower day, and a week barely scratches the surface.

    What is the number one thing to do in Paris?

    For the view, the Eiffel Tower after dark. For the experience, a slow walk along the Seine from the Île Saint-Louis past Notre-Dame and the Louvre, ending with dinner on the Left Bank.

    Is Paris walkable?

    Very. The historic centre is compact, and walking between the Louvre, Notre-Dame, the Marais and Saint-Germain is faster and more pleasant than the Métro for short hops.

    Do I need a car in Paris?

    No. The Métro and RER cover the city and the main day trips, and parking is scarce and expensive. Rent only for the Loire, Normandy or a road trip, and pick it up on the way out.

    Do I need to book the Louvre and the Eiffel Tower in advance?

    Yes. The Louvre requires a timed ticket, and booking the Eiffel Tower online saves hours in summer. Versailles, the Catacombs and Sainte-Chapelle also sell out.

    Is Paris expensive?

    Hotels and dinners are; transport, bread, markets, parks and many museums are not. Lunch menus and a weekly transit pass stretch a budget a long way.

    Ready to go? Compare flights to Paris, find a place to stay with our Paris hotel search, and see what is on in Paris during your dates.

  • Best Money Belt for Travel: Top Picks for Every Budget

    Best Money Belt for Travel: Top Picks for Every Budget

    A money belt is one of the least glamorous pieces of travel gear and one of the most reassuring. It is a slim pouch worn under your clothes, against your body, where a pickpocket cannot see it and cannot reach it without you noticing. Used well, it holds the things that would turn a bad day into a ruined trip: your passport, a backup card, emergency cash and a copy of your travel documents. Used badly, it becomes a sweaty lump you dig into at the ticket counter, which tells everyone watching exactly where your valuables are. This guide explains how to choose the best money belt for travel and how to use it properly: what a money belt is for and what it is not for, the alternatives worth knowing, which features matter, how to wear one comfortably in heat, what to carry in it, what happens at airport security, the cash reporting rules at borders, and the money belts from our original list.

    The short answer

    Choose a slim, flat, breathable money belt that fits your passport, has a sturdy zipper and an adjustable elastic strap, and comes in a color that does not show through light clothing. Wear it under your waistband, at the front or on your hip, and use it only for reserves: passport, backup card and emergency cash. Carry a small daily wallet with a day’s cash and one card for everyday spending, so you never have to open the money belt in public. RFID blocking is a harmless extra, not a deciding feature. If you are crossing a border with a large amount of cash, remember that many countries require you to declare it, however well hidden it is.

    What a money belt is for, and what it is not

    The single most important idea in this guide is that a money belt is a safe you wear, not a wallet. It works because nobody knows it is there. The moment you pull up your shirt to pay for a coffee, that advantage is gone.

    A money belt is for:

    • Your passport on days when you need to carry it, such as travel days, border crossings and places where you are required to carry ID.
    • A backup card from a different account or network than your main card, so one lost wallet does not cut you off from money.
    • Emergency cash, ideally in a widely accepted currency, for the day your cards do not work.
    • Copies of key documents, such as a photocopy of your passport data page, insurance details and emergency contacts.

    It is not for your phone, your daily spending money, your transit card or anything you need to reach several times a day. Those belong in a secure front pocket, a small wallet or a bag like the ones in our guide to anti-theft backpacks.

    Money belt types and alternatives

    “Money belt” covers a few different designs, and some travelers prefer an alternative altogether. This table compares the main options.

    TypeHow it is wornStrengthsWatch out for
    Under-clothes waist pouchFlat pouch on an elastic strap, under your waistbandHolds a passport, very discreet, the classic choiceCan feel warm and sweaty; awkward to reach
    Belt with hidden zipperA normal-looking belt with a zippered channel insideInvisible, nothing extra to wearHolds only folded cash; no room for a passport or cards
    Neck walletPouch on a cord around your neck, under your shirtHolds a passport, easy to reachCord can show; easier to snatch if visible
    Leg or ankle walletStrapped to your calf or ankle under trousersVery hard for a pickpocket to reachOnly works with long pants; can be uncomfortable when walking a lot
    Clip-on or bra pouchSmall pouch clipped inside clothingTiny and lightHolds little; not for a passport
    Hidden pocket in clothingZippered inner pocket in pants or a jacketNothing extra to wearDepends on what you are wearing that day
    Waist pack worn outsideVisible belt bag at the front of your bodyEasy access, holds moreVisible, so it is a bag, not a hidden stash

    For most travelers, an under-clothes waist pouch is the best all-round choice because it holds a passport comfortably. A hidden-zipper belt is a good complement for a small cash reserve, and a neck wallet suits people who find anything around the waist uncomfortable.

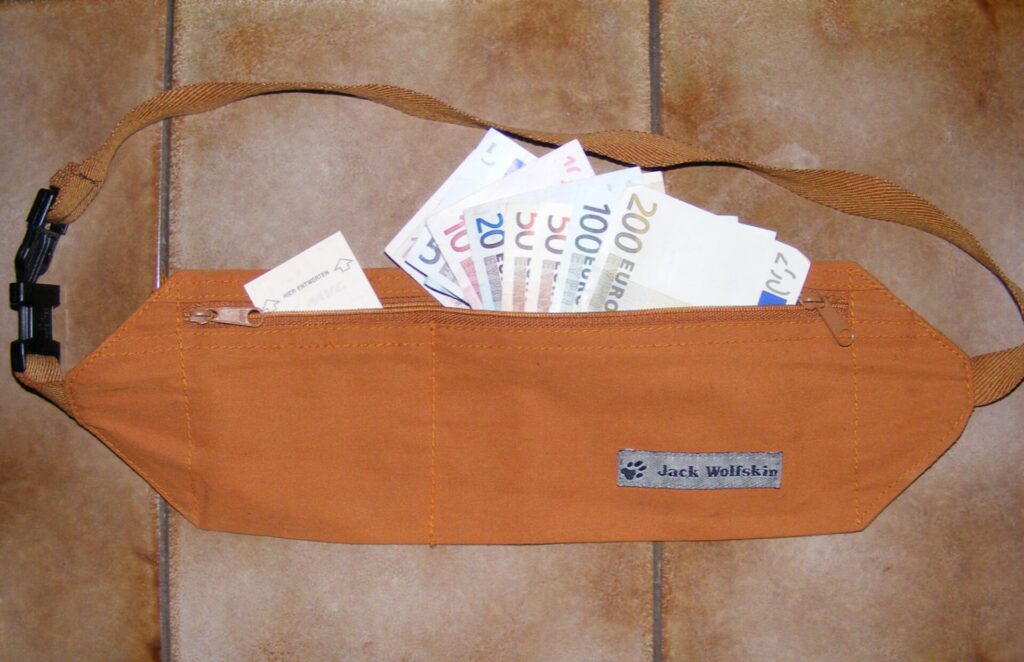
    A brown belt with a hidden zippered compartment for folded cash
    A belt with a hidden zipper holds a folded cash reserve but has no room for a passport (Photo: User:Mattes via Wikimedia Commons, Public domain)

    What to look for

    Size and capacity

    Make sure the pouch fits your passport without bending it, plus a few cards and folded bills. Bigger is not better: a thick, overstuffed money belt shows through clothing and is uncomfortable. Look for two or three compartments so you can separate your passport, cards and cash.

    Comfort and fabric

    You may wear a money belt for many hours in heat. A soft, breathable back panel against your skin makes a big difference. Lightweight nylon or polyester fronts with a mesh or moisture-wicking back are common. Avoid stiff or scratchy materials and bulky seams.

    Strap and buckle

    An adjustable elastic strap lets you wear the belt at your waist or lower on your hips and keeps it snug when you sit. A flat, low-profile buckle is more comfortable and less visible than a chunky one. Check that the strap is long enough for your waist measurement, especially if you want to wear it over a layer.

    Zippers

    The zipper is the part most likely to fail. Look for a smooth, sturdy zipper with a pull you can find by feel, and ideally a design where the zipper faces your body so it cannot be opened from outside.

    Color

    Choose a neutral color that does not show through the clothes you plan to wear. Beige and skin-tone shades disappear under light shirts; black suits dark clothing. Bright colors defeat the purpose.

    Sweat protection

    Sweat can soak through to your passport and cash on hot days. Some money belts include a water-resistant inner layer; if yours does not, keep documents inside a thin zip-top bag within the pouch.

    RFID blocking

    Many money belts advertise RFID-blocking layers that stop radio signals from reaching contactless cards and chipped passports. That does no harm, but remote skimming is a far less common risk for travelers than a hand in a pocket or a lost wallet. Treat RFID blocking as a small bonus, not a reason to choose one belt over another.

    Washability

    A money belt worn against skin needs washing. Check that it can be hand washed and dries quickly.

    How to wear a money belt properly

    • Under your waistband, not over it. Wear the belt against your skin or over a thin base layer, with your pants or skirt waistband over it, and your shirt tucked in or hanging over.
    • At the front or on your hip. At the front, you will feel any interference. On the hip, it can be more comfortable when sitting. At the back, it is harder to monitor.
    • Tuck the pouch into your pants. Many travelers wear the belt around the waist and tuck the pouch just inside the waistband of their pants, which hides it well.
    • Access it in private. If you need something from it, go to a restroom, your hotel room or a quiet corner, not the ticket counter or the market stall.
    • Adjust before you leave. Walk around your room, sit and bend to check it does not slip or show.
    • Choose clothes that help. Loose shirts and pants with a comfortable waistband hide a money belt better than tight-fitting clothes. Our guide to travel pants for men covers pants with room for one.

    The split system: how a money belt fits into your kit

    The safest approach to carrying money is to split it so that no single loss can strand you:

    • Daily wallet: a day’s cash and one card, in a zippered front pocket or a secure bag. This is what you use for everyday spending. A slim organizer like those in our guide to travel wallets for women works well.
    • Money belt: passport (when needed), a backup card and emergency cash.
    • Hotel safe: spare cards, extra cash, your passport on days you do not need it, and valuables such as jewelry; a small case from our guide to travel jewelry cases keeps them together.
    • Digital backup: a photo of your passport data page, card emergency numbers and insurance details stored securely on your phone and in the cloud.

    With that setup, a stolen daily wallet costs you a day’s cash and a card you can freeze from your banking app, and nothing more.

    Money belts from our original list

    The money belts below were featured in the original version of this guide. They are not a ranked test, and they come from small brands whose designs, materials and dimensions change between versions, so check the current product listing for compartment layout, size and materials before you buy. All five follow the same basic idea: a slim pouch worn under clothing, with RFID-blocking material advertised as an extra.

    Peak Gear RFID Blocking Travel Money Belt

    Peak Gear’s money belt is a classic under-clothes waist pouch, sold in neutral colors including beige that disappear under light clothing. A traditional design like this suits most travelers who want a straightforward place for a passport, cards and cash, and who will wear it under a shirt all day.

    Alpha Keeper Money Belt

    Alpha Keeper markets its money belt as a hidden passport holder with RFID blocking and several zippered sections. A layout with separate compartments suits travelers who carry more than one currency, or who want to keep their passport apart from cards and cash so they can reach one without exposing the rest.

    VENTURE 4TH Money Belt

    VENTURE 4TH’s money belt is a slim under-clothes design with a simple layout; the version in our original list was black. A minimal, no-frills belt suits budget travelers and backpackers who want the essentials done well without extra pockets. Choose a lighter color if you mostly wear pale clothes.

    Slim RFID-blocking money belt and passport holder

    The original list also included a generic slim money belt marketed as a low-profile waist pouch that can be worn under clothes, with an RFID-blocking pocket and water-resistant material. Generic designs like this vary a lot in quality, so check the zipper, the strap and the seller’s return policy, and do not rely on water resistance alone to protect a passport from sweat.

    The Belt of Orion Money Belt

    The Belt of Orion sells a slim anti-theft money belt marketed for both men and women, designed to sit flat against the body with space for a passport, cash and small documents. It suits travelers who want a modern, purpose-built design. As with any money belt, check that the current version fits your passport without bending it.

    Choosing between them

    Because these belts share the same basic design, choose on fit and comfort: a pouch that holds your passport flat, a strap that fits your waist comfortably, a color that disappears under your clothes and a zipper that feels sturdy. If you can, compare the listed dimensions against your passport before ordering.

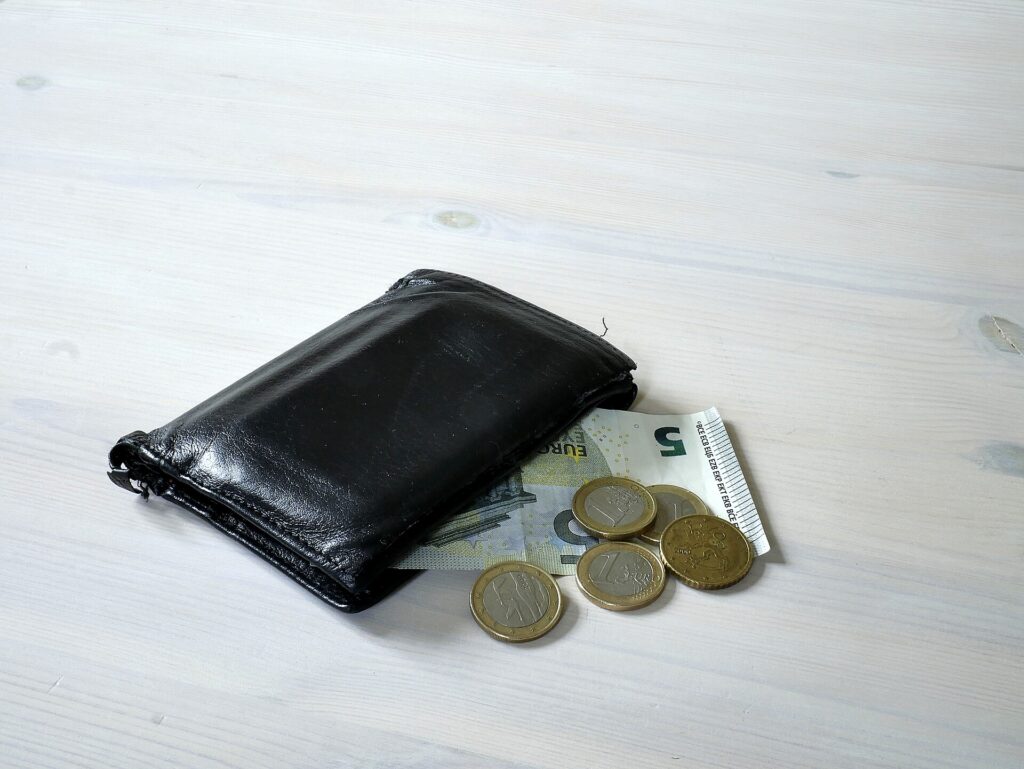
    A wallet with banknotes and coins
    Keep a day's cash and one card in a daily wallet so the money belt stays closed (Photo: Santeri Viinamäki via Wikimedia Commons, CC BY-SA 4.0)

    What to carry in a money belt, and what to leave out

    Put in

    • Your passport on travel days or when ID is required.
    • One backup debit or credit card, ideally on a different network from your main card.
    • Emergency cash in a widely accepted currency, in addition to some local currency.
    • A photocopy of your passport data page and your travel insurance emergency number.
    • A small card with an emergency contact.

    Leave out

    • Your phone, which is too bulky and which you need often.
    • Daily spending money, which should be in your daily wallet.
    • Keys, coins and receipts, which add bulk and noise.
    • Anything you need to reach often, such as transit cards or tickets.

    If you only carry a passport and a card or two, a slim passport holder kept in a hidden pocket of your bag can do the job instead; our passport holder guide covers the options.

    Money belts at airport security

    Security screening procedures vary between countries and airports and change over time. Officers may ask you to remove a money belt and put it through the X-ray, or may screen it on your body, and metal zippers and buckles can trigger a metal detector. To keep things simple, many travelers take the money belt off before the checkpoint and put it inside their carry-on bag, then put it back on in a restroom airside. Keep your boarding pass and passport somewhere easy to reach for the checks before and after security. In the United States, see the TSA’s security screening pages; in Canada, check CATSA’s guidance. Never leave your bag with the money belt inside out of sight at the checkpoint.

    Carrying cash across borders

    A money belt hides cash from pickpockets, not from customs. Many countries require travelers to declare large amounts of cash and other monetary instruments when they enter or leave. Carrying the money is usually legal; failing to declare it can lead to seizure and penalties.

    • Canada: you must report currency and monetary instruments of CAN$10,000 or more to the Canada Border Services Agency when you arrive in or leave Canada. See the CBSA’s page on travelling with CAN$10,000 or more.
    • United States: travelers entering or leaving with more than US$10,000 or its foreign equivalent in currency or monetary instruments must file a report with Customs and Border Protection. See CBP’s page on money and other monetary instruments.
    • Elsewhere: thresholds and rules differ by country, and some apply to families traveling together. Check the official customs site for every country on your itinerary before you go.

    Rules change, so confirm them before each trip rather than relying on any figure in a blog post, this one included.

    Wearing a money belt in hot weather

    Heat is where money belts are least pleasant and where people are most tempted to leave them behind. A few habits help:

    • Choose a belt with a breathable, moisture-wicking back panel.
    • Wear it over a thin, breathable base layer rather than directly against skin if you sweat a lot.
    • Keep documents in a thin zip-top bag inside the pouch.
    • Wear it lower on your hips, where there may be more airflow, or try a neck or leg wallet instead.
    • Leave the passport in the hotel safe on sightseeing days if local rules allow, and carry a copy instead.
    • Wash the belt regularly and let it dry fully.

    At the beach, a money belt is not practical at all. Take only what you need, use the hotel safe for the rest, and consider a small waterproof pouch. Our guide to travel flip-flops covers the rest of a light beach kit.

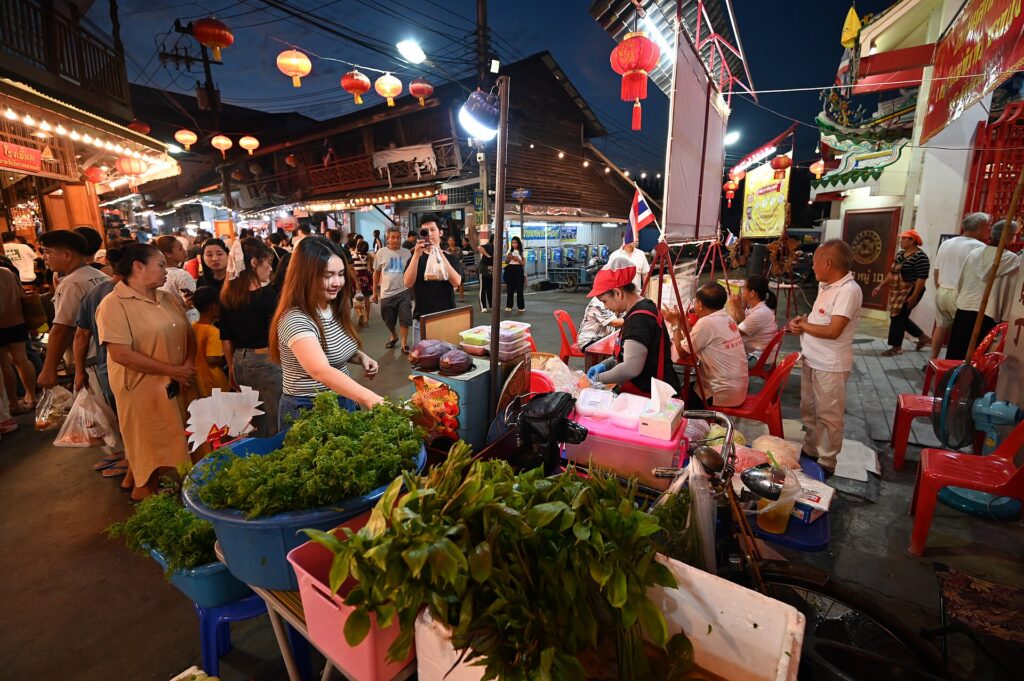
    A crowded evening market with shoppers browsing food stalls under lanterns
    Crowded markets and transit hubs are where a hidden money belt earns its place (Photo: PattayaPatrol via Wikimedia Commons, CC BY-SA 4.0)

    Where money belts make the most sense

    A money belt earns its place most clearly on travel days, border crossings, overnight trains and buses, busy transit hubs, crowded markets and big tourist sights, and in destinations where your government’s advice warns of pickpocketing or bag snatching. Canada’s travel advice and advisories describe common scams and theft risks for each country. In a quiet town where you leave your passport in the hotel safe, a zippered pocket and a daily wallet may be all you need. Walking all day with a money belt is also far more pleasant in comfortable shoes; our guide to walking shoes for travel covers how to choose them.

    If something is lost or stolen

    • Freeze cards first using your banking apps, then call your bank to report the loss.
    • Report the theft to local police and get a report number for your insurer.
    • Replace your passport. Canadians abroad can find help through the Government of Canada’s emergency assistance page. US citizens should follow the State Department’s lost or stolen passport guidance. Contact your embassy or consulate as soon as possible if you have a flight coming up.
    • Use your backups. This is exactly what the backup card, emergency cash and document copies in your money belt are for.
    • Contact your travel insurer promptly, since many policies have time limits and require a police report.

    Common mistakes

    • Using the money belt as a wallet. Every time you open it in public, you show thieves where your valuables are.
    • Overstuffing it. A bulging money belt shows through clothes and is uncomfortable.
    • Wearing it over your clothes. Then it is just a waist pack.
    • Putting everything in one place. Split cards and cash between your daily wallet, the money belt and the hotel safe.
    • Forgetting sweat. Protect documents with a thin plastic bag inside the pouch.
    • Assuming hidden cash is exempt from customs. Declare large sums where required.
    • Choosing a bright color. Neutral colors disappear under clothes.

    Frequently asked questions

    Are money belts still worth it?

    Yes, for travel days, border crossings, crowded cities and overnight transport. With contactless payments and phones, many travelers carry less cash than before, but a passport and backup card still need a safe home. A money belt is one of the simplest ways to protect them.

    Where should I wear a money belt?

    Under your clothes, with the pouch at the front or on your hip and tucked inside your waistband. Avoid wearing it at the back, where you cannot feel it.

    Is a money belt or a neck wallet better?

    A waist money belt is usually more discreet and stable. A neck wallet is easier to reach and can be cooler in heat, but the cord can show. Choose the one you will actually wear all day.

    Do I need RFID blocking?

    It is a harmless extra, but physical theft and lost wallets are much more common risks. Choose a money belt for comfort, size and zippers first.

    Can I wear a money belt through airport security?

    You may be asked to remove it for screening. Many travelers put it in their carry-on before the checkpoint and put it back on afterward. Check the rules for your departure airport.

    How much cash should I carry in a money belt?

    Enough to cover an emergency, such as a night’s accommodation, a meal and transport, until you can reach a bank or replace a card. Remember that many countries require you to declare large amounts at the border.

    Can people tell I am wearing a money belt?

    Not if it is slim, in a neutral color and worn under loose clothing, and if you never open it in public.

    With your valuables secured, the trip itself can take center stage. Compare fares on our flight search, choose a hotel with an in-room safe for your passport and spares on our hotel search, and if you are exploring a big, busy city, our guides to things to do in Rome and things to do in Paris will help you plan days where a well-worn money belt earns its place. For the rest of your kit, start with our main guide to travel luggage.

  • Top Anti-Theft Backpack Options for Travelers and Commuters

    Top Anti-Theft Backpack Options for Travelers and Commuters

    Most travel theft is not dramatic. It is a hand slipping into an outside pocket on a packed metro, a phone lifted from a café table, a bag hooked off the back of a chair or a daypack unzipped in a crowd while you look at a map. An anti-theft backpack is designed to make those quick, opportunistic grabs harder: zippers that face your back or lock, pockets hidden against your body, fabric and straps that resist a blade, and a way to anchor the bag to something solid. None of that makes a bag theft-proof, and the habits you travel with matter at least as much as the bag you carry. This guide explains how bag theft actually happens, what each anti-theft feature does and does not do, how to choose the right style for commuting, business travel, sightseeing or one-bag trips, a handful of well-known options from our original list, and what to do if something is taken anyway.

    The short answer

    For most travelers, the features that matter most are main zippers that sit against your back or can be locked, a hidden pocket for your passport and cards that is hard to reach while you wear the bag, and sturdy straps and fabric. Cut-resistant panels, locking cables and RFID-blocking pockets are useful extras, but they address less common risks. Choose the size by how you travel: a sling or small daypack for sightseeing, a laptop backpack for commuting and business trips, or a carry-on travel backpack if it is your main bag. Then pair the bag with good habits: wear it in front in crowds, never hang it on a chair and keep your phone out of outside pockets.

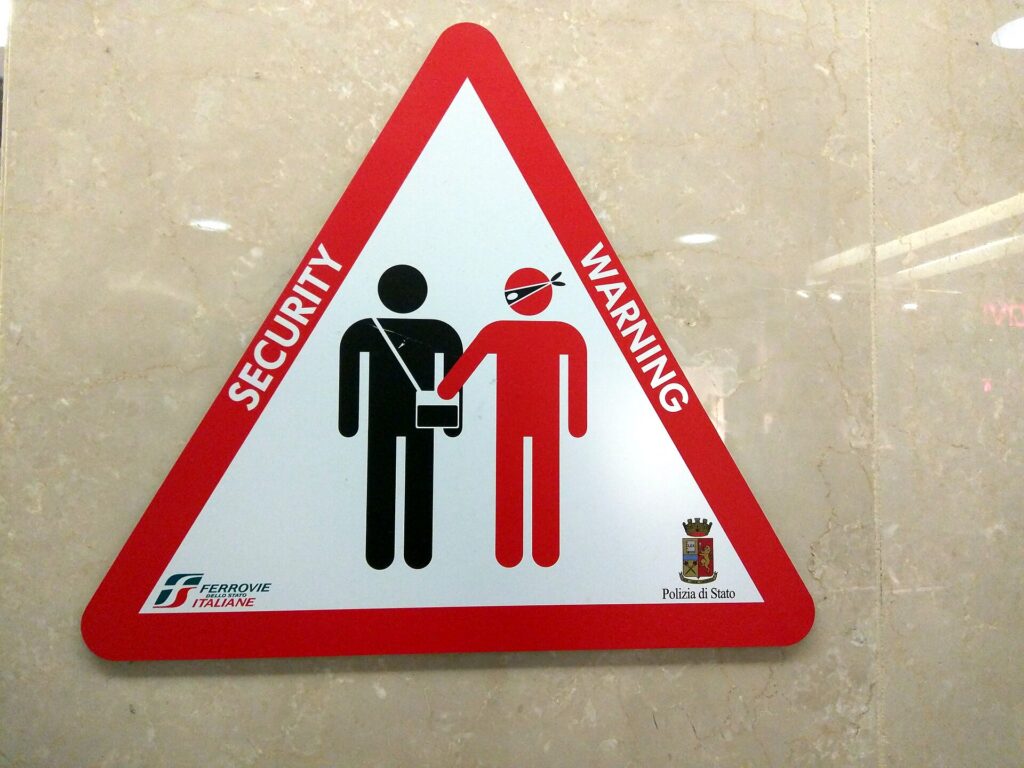
    A pickpocket warning sign in a railway station
    Stations, metros and busy squares are where quick bag thefts happen most, which is why back-facing and locking zippers matter (Photo: Cory Doctorow from Beautiful Downtown Burbank, USA via Wikimedia Commons, CC BY-SA 2.0)

    How bag theft actually happens

    Understanding the common methods tells you which features are worth paying for.

    • Pickpocketing in crowds. On busy trains, buses, escalators and in tourist hot spots, thieves open outside pockets and main zippers on bags worn on the back. This is the most common threat for travelers, and hidden or locking zippers address it directly.
    • Distraction. Someone asks for directions, spills something on you, or creates a commotion while a partner opens your bag. No feature beats awareness here, but a bag that takes several seconds to open helps.
    • Grab and run. A bag left on a chair, the floor beside a table or a luggage rack is simply picked up. A strap looped around your leg or a locking cable to a fixed object stops this.
    • Snatching. A thief grabs a bag or phone and runs, sometimes from a scooter. Strong straps and wearing the bag on both shoulders or across the body help.
    • Slashing. Cutting a bag or strap to get at the contents is much less common, but it is the risk cut-resistant materials are designed for.
    • Opportunistic theft from rooms and cars. Valuables left in view in a parked car or out on a hotel room desk are easy targets. Here the fix is the room safe, the trunk and not leaving the bag at all.

    Anti-theft features explained

    Hidden and back-facing zippers

    The most effective anti-theft design is also the simplest: put the main compartment zipper against your back, or hide it under a flap, so nobody can open it while you are wearing the bag. Some designs open only from the back panel. The trade-off is convenience; you have to take the bag off to get into it, which is exactly the point.

    Locking zipper pulls

    Many travel-focused bags let you clip zipper pulls together or into a catch, so a zipper cannot be quietly opened. Some accept a small padlock. This slows a pickpocket down enough to make your bag a worse target than the next one.

    Cut-resistant fabric and straps

    Some bags build a wire mesh or cut-resistant layer into the body and a steel cable into the straps. That defends against slashing and against a strap being cut in a snatch. It adds weight and cost, so it matters most for travelers in areas where that kind of theft is a known problem.

    Locking cable or anchor strap

    A strap or cable that wraps around a chair leg, a table or a luggage rack and locks to the bag stops a grab-and-run at a café or on an overnight train. It is one of the most underrated features for travelers who work in coffee shops or sleep on trains.

    Hidden pockets against your back

    A slim pocket in the back panel, reachable only when the bag is off, is the right place for a passport, a spare card and emergency cash. It is also useful on any bag, anti-theft or not.

    RFID-blocking pockets

    RFID-blocking pockets are lined to block radio signals from contactless cards and passports with chips. They do no harm and many travelers like the reassurance, but remote skimming is a far less common risk than a hand in your pocket. Treat RFID blocking as a small extra, not a reason to choose one bag over another.

    Water resistance and USB ports

    Water-resistant fabric protects a laptop and documents in rain, which is genuinely useful. USB ports on backpacks are usually a pass-through cable: you still need to put your own power bank inside, and the port itself does not store power.

    FeatureProtects againstHow much it matters
    Back-facing or hidden zippersPickpocketing in crowdsHigh for most travelers
    Locking zipper pullsQuiet opening while you walk or standHigh in busy cities and on transit
    Hidden back-panel pocketLoss of passport, cards and cashHigh; worth having on any bag
    Anchor strap or locking cableGrab-and-run at cafés, trains, stationsMedium to high for café workers and rail travelers
    Cut-resistant body and strapsSlashing and strap cuttingMedium; depends on destination
    RFID-blocking pocketRemote card skimmingLow; a small extra
    Water-resistant fabricRain damage to electronicsMedium; useful everywhere

    Choosing the right style for how you travel

    Daily commuting

    For a commute with a laptop, look for a slim backpack with a padded laptop compartment, a back-facing or hidden main zipper and a quick-access pocket that sits against your back for a transit card. Keep it light; you carry it every day.

    Business and tech travel

    A larger laptop backpack with organized pockets for chargers and cables, a sleeve for your laptop and a luggage pass-through strap that slides over a suitcase handle is the most practical combination. If you would rather not carry a heavy tech bag at all, our guide to rolling laptop bags covers wheeled options, and our list of laptop travel accessories helps keep the contents organized.

    Sightseeing and city days

    For a day out, a small daypack or a convertible sling is plenty: water, a layer, a phone, a wallet and maybe a small camera. A sling that can be worn across the body and swung to the front in crowds is one of the most practical anti-theft carries.

    One-bag travel

    If the backpack is your only luggage, you need a carry-on travel pack with a clamshell opening, a laptop compartment and lockable zippers. Our guide to the Peak Design Travel Backpack 45L covers how to choose and pack a carry-on travel backpack, and the same principles apply to anti-theft designs.

    Outdoors and remote work

    For campsites, RV trips and remote work with expensive hardware, a rugged, water-resistant bag with a structured interior protects equipment from knocks as well as from theft. For real trail use, though, a hiking pack with a hip belt carries weight far better; see our guide to hiking backpacks.

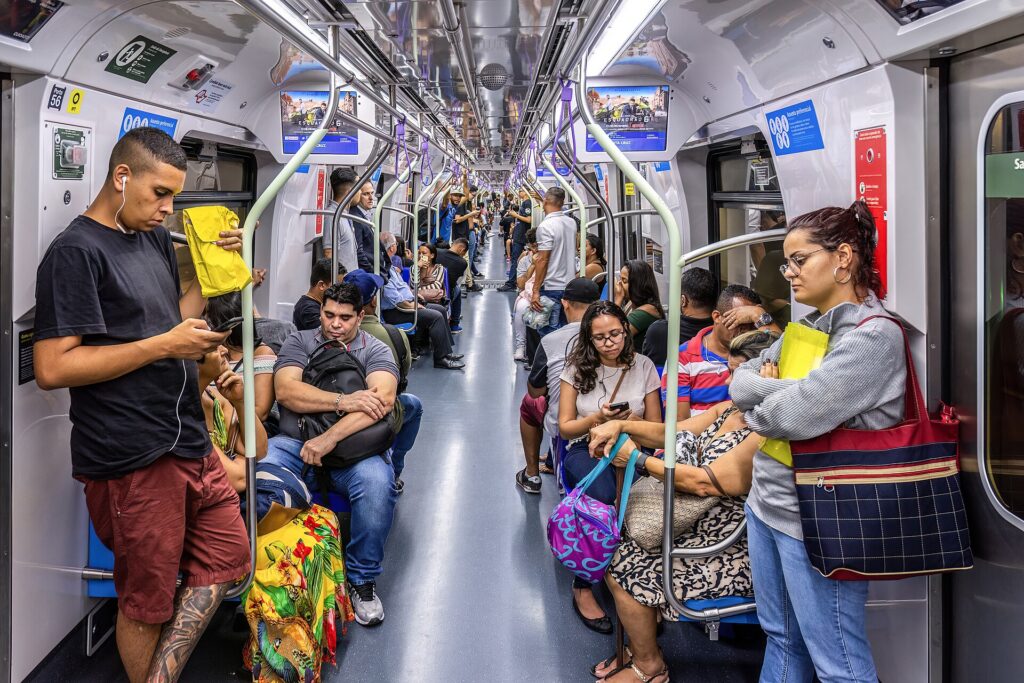
    Passengers standing close together in a crowded metro carriage
    In a packed carriage, swing your backpack to the front and keep a hand on it (Photo: Wilfredor via Wikimedia Commons, CC0)

    Options from our original list

    The bags below were featured in the original version of this guide. They cover different needs rather than a single ranking, and designs, sizes and features change between versions, so check the current details from the manufacturer or seller before you buy.

    BANGE anti-theft laptop backpack (17.3-inch)

    BANGE’s anti-theft backpack is aimed at business travelers and commuters who carry a large laptop. It is designed to fit a 17.3-inch notebook, uses water-resistant materials and includes a USB charging port that connects to a power bank you carry inside. It suits people who need room for a big laptop plus files and accessories, and who want the main compartment harder to open while the bag is on their back.

    Bags designed for a Starlink Mini kit

    The original list included a travel bag built around a Starlink Mini satellite dish and its accessories, with water-resistant material and anti-theft features. It is a niche choice, but a sensible one if you travel in an RV, camp or work remotely with that hardware: a bag shaped for the kit protects it far better than a general-purpose backpack. Check that the bag fits your exact kit before buying.

    Travelon Anti-Theft Voyages Daypack

    Travelon is one of the best-known names in anti-theft travel bags, and its range is built around features like lockable zippers, slash-resistant body panels and straps, and RFID-blocking pockets. The Voyages Daypack from the original list is a casual, lightweight daypack for sightseeing, museums and markets. Check the current product details for the exact feature set of the version you are buying.

    Travelon Anti-Theft Classic Convertible Sling Backpack

    This compact convertible bag can be worn as a backpack or a sling, which makes it easy to move to the front of your body in a crowd. It suits commuters who carry only essentials and travelers who want a secure second bag for day trips alongside their main luggage. Expect room for a phone, wallet, small tablet and a few daily items.

    NOMATIC Navigator Travel Backpack

    NOMATIC‘s Navigator is a premium carry-on travel backpack of around 32 liters with room to expand, a dedicated laptop compartment and protected access points. It suits frequent flyers and digital nomads who want one main bag that stays secure through airport lines, public transit and city walks. As with any expandable bag, check that it still fits your airline’s carry-on limit once expanded.

    Other brands to know

    Pacsafe is another long-established travel security brand, known for bags and accessories built around locking zippers, cut-resistant materials and anchor cables. It is worth a look alongside the options above if you want a wide choice of sizes and styles.

    Comfort and fit still come first

    A secure bag you hate wearing ends up at home. Check that the shoulder straps are padded and adjustable, that the back panel is not so stiff that it digs in, and that the bag sits high and close to your back rather than hanging low. A sternum strap helps a heavier laptop bag stay put. Remember that cut-resistant panels and steel-cable straps add weight, so compare empty weights if you will carry the bag all day. If possible, load the bag with a laptop and a water bottle in the store and walk around with it for a few minutes before deciding.

    What to carry in a city daypack

    A well-packed daypack means you rarely need to open it in a crowd. A sensible kit for a day of sightseeing:

    • Water, a light layer or rain jacket, and a snack.
    • Phone, a compact power bank and one cable; a 3-in-1 Apple charger back at the hotel keeps everything topped up overnight.
    • One card, some local cash and a transit card in an easy but body-side pocket.
    • A photocopy or photo of your passport, with the original in the safe unless you need it.
    • A few plasters, pain relief and hand sanitizer from a small travel first aid kit.

    Everything you need often should be reachable without opening the main compartment, and everything valuable should be in the pockets that are hardest to reach while you wear the bag.

    Habits that matter more than the bag

    • Wear it in front in crowds. On packed trains, escalators, markets and big events, swing the backpack to your chest or move a sling to the front.
    • Nothing valuable in outside pockets. Phones in back pockets and wallets in outside bag pockets are the easiest targets there are.
    • Never hang your bag on a chair. Keep it on your lap or loop a strap around your leg or the chair leg.
    • Keep your phone in your hand, not on the table. Café tables near doors and terraces are a favorite spot for quick phone grabs.
    • Split your valuables. One card and some cash in your wallet, a backup card and cash somewhere else, and your passport in the hotel safe or a hidden pocket. A money belt worn under clothing is a good home for backups.
    • Be wary of distractions. If someone creates a commotion close to you, put a hand on your bag first and help second.
    • Look like you know where you are going. Check maps before you step onto a busy street, or step into a doorway to do it.
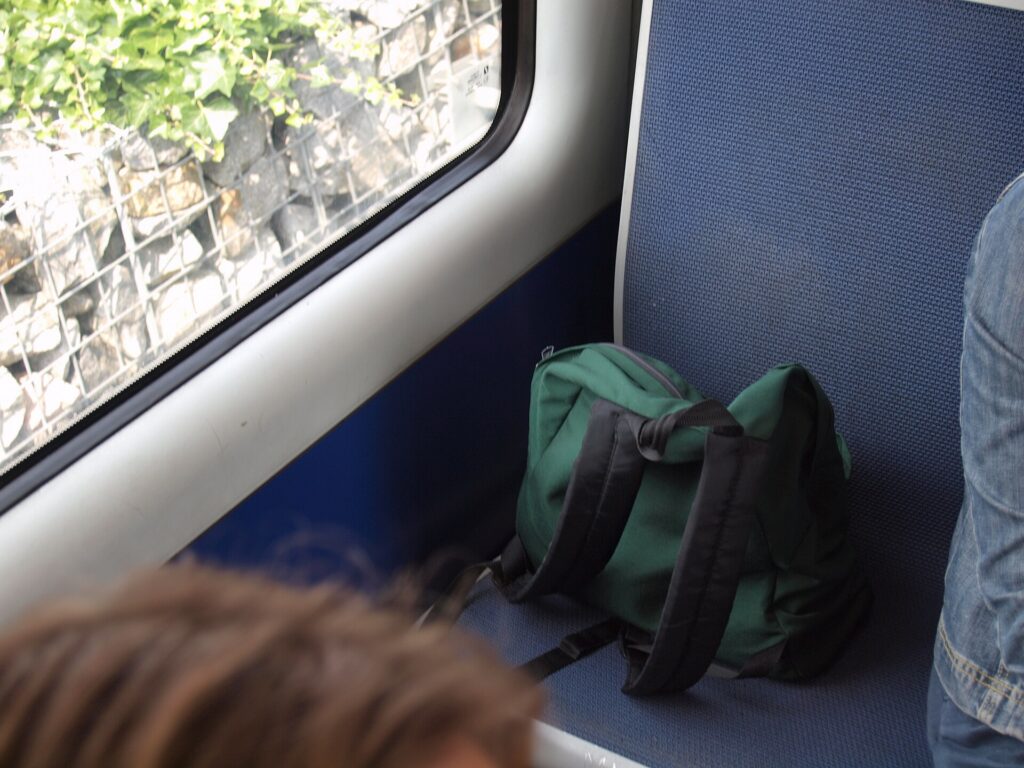
    A backpack sitting on a seat on a metro train
    A bag out of your hands is a bag anyone can pick up; keep it on your lap or strapped to you (Photo: JIP via Wikimedia Commons, CC BY-SA 3.0)

    Protecting documents, cards and small valuables

    Your passport is the one item that can end a trip if it goes missing. Keep it in a hidden pocket or a passport holder inside your bag, not in an outside pocket, and carry a photo of the data page on your phone and in your email. For cards and cash, a slim organizer such as the ones in our guide to travel wallets for women keeps everything in one place you can grip. Jewelry is best left at home, or kept in a small case like those in our guide to travel jewelry cases and locked in the room safe when you go out.

    On transit, in cafés, hotels and cars

    Trains and buses

    On long-distance trains, keep your daypack with you rather than on a distant luggage rack, and lock larger bags to the rack with a cable if you plan to sleep. On metros, stand with your bag in front and away from the doors, where snatch-and-exit thefts happen as doors close.

    Cafés and restaurants

    Choose a seat against a wall, keep the bag between your feet with a strap around your leg, and keep your phone off the table. If you work from cafés, an anchor strap is worth its weight.

    Hotels

    Use the room safe for your passport, spare cash and small electronics. Do not leave a laptop out on the desk when housekeeping is due. In hostels, use a locker and bring your own padlock.

    Rental cars

    Never leave bags visible in a parked car, even for a few minutes. Put luggage in the trunk before you arrive at your destination, not in the parking lot where people can see you do it. If you are renting a car on your trip, our car rental search lets you compare vehicles with an enclosed trunk rather than an open cargo area.

    A dense crowd of tourists in Times Square, New York
    Big tourist crowds are where distraction thefts work best; stay aware and keep valuables out of outside pockets (Photo: Rosapicci via Wikimedia Commons, CC BY-SA 4.0)

    Anti-theft bags at the airport

    Anti-theft backpacks go through security like any other bag. Locking zippers are fine at the checkpoint, but officers may need to open the bag, so keep it easy to unlock. Laptops and liquids may need to come out depending on the airport and screening lane. The TSA’s What Can I Bring? tool covers specific items in the United States, and CATSA’s what can I bring page does the same for Canada. Airports are also a place where bags go missing: never leave yours unattended, keep it in contact with your body at the gate, and count your bags when you leave the checkpoint.

    If something is stolen

    • Freeze cards first. Most banking apps let you lock a card instantly. Do that before anything else.
    • Report it to the police. Get a report number; your insurer and airline may need it.
    • Replace a lost or stolen passport. Canadians abroad can find help through the Government of Canada’s emergency assistance page. US citizens should follow the State Department’s lost or stolen passport guidance. Contact your embassy or consulate as early as possible if you have a flight coming up.
    • Change passwords if a phone or laptop was taken, and use your device’s find-and-erase feature.
    • Contact your travel insurer promptly; policies often have time limits and need a police report.

    Before you go, read your government’s advice for your destination, which often describes common scams and theft hot spots. Canada’s travel advice and advisories are a good starting point.

    Common mistakes

    • Believing the bag does the work. A locked zipper will not help if the bag is hanging on a chair behind you.
    • Buying a bag that screams “valuables”. Plain, understated bags attract less attention than obviously expensive ones.
    • Making it too hard to use. If every pocket needs unlocking, you will stop locking them. Lock the main compartment and keep one easy pocket for a transit card.
    • Carrying everything every day. Leave the passport and backup card in the safe on normal sightseeing days unless local rules require you to carry ID.
    • No backups. Keep a photo of your passport, a backup card and emergency contacts somewhere separate.

    Frequently asked questions

    Do anti-theft backpacks really work?

    They make the most common thefts, like quick pickpocketing and unzipping in crowds, harder and slower, which often means a thief picks an easier target. They do not stop determined theft, so combine the bag with good habits.

    What is the most important anti-theft feature?

    Main zippers that face your back or lock, plus a hidden pocket for your passport and cards. Those address the thefts travelers face most often.

    Is RFID blocking necessary?

    It is a harmless extra. Remote skimming is much less common than physical theft, so do not choose a bag mainly for RFID blocking.

    Are anti-theft backpacks allowed as carry-on?

    Yes, if they fit the airline’s carry-on or personal-item limits. Smaller daypacks and slings usually count as personal items; larger travel packs count as the carry-on.

    Is a sling safer than a backpack?

    A sling worn across the body and moved to the front in crowds is easier to keep an eye on. A backpack carries more and is more comfortable for heavier loads. Many travelers use both.

    Where should I keep my passport while sightseeing?

    In the hotel safe if you do not need it, or in a hidden pocket against your back or under your clothes if you do. Never in an outside pocket.

    Can I lock my backpack when I go through security?

    Yes, but officers may need to open it. Keep locks easy to remove, and use a lock that security can open if you are checking the bag on a flight in or to the United States.

    Once your bag is sorted, focus on the trip itself. Compare fares on our flight search, choose a hotel with a room safe on our hotel search, and if you are exploring a big, busy city, our guides to things to do in Rome and things to do in London will help you plan days where a secure daypack earns its place. For the rest of your kit, start with our main guide to travel luggage.

  • Affordable Kids Suitcases for Boys Every Parent Will Love

    Affordable Kids Suitcases for Boys Every Parent Will Love

    A suitcase of their own changes how a child experiences a trip. Rolling it through the terminal, choosing what goes in it and being responsible for it at the hotel makes a boy feel like a real traveler instead of cargo, and it takes a little weight off the adults at the same time. The catch is that most children’s luggage is sold on looks: a favorite color, a truck, a rocket, a cartoon. Looks matter to a six-year-old, but the things that decide whether a kids’ suitcase actually works are size, weight, wheels, handle height and how it fits the airline’s rules. This guide explains what to look for at each age, how carry-on allowances work for children, hardside versus softside, spinner versus two-wheel, ride-on cases and backpacks, a few affordable sets worth considering, and how to get your son packing and pulling his own bag without a meltdown at the gate.

    The short answer

    For most boys between about four and ten, the right choice is a light carry-on size case, roughly 16 to 18 inches tall, with smooth wheels and a telescoping handle that adjusts low enough for his height, in a design he picked himself. Toddlers do better with a small backpack or a ride-on case that a parent can tow. Pre-teens can usually handle a standard adult carry-on. Keep the empty weight low, since your child can only pull what he can lift, and check your airline’s carry-on and personal-item rules before you buy, because a child with his own seat usually gets the same allowance as an adult. Affordable sets from brands like Rosamo, GYMAX and Travelers Club bundle a small spinner with matching bags, which is good value if you want a backpack and case together.

    Why a child’s own suitcase is worth it

    • Responsibility. A child who packs and pulls his own bag learns to keep track of his things, and he is more likely to notice when something is missing.
    • Excitement. A suitcase he chose turns the trip into something he owns. Many parents find that the bag comes out of the closet days before departure and gets packed and unpacked several times.
    • Fewer hands full. Families already juggle car seats, strollers, documents and snacks. One less bag for an adult to carry matters.
    • Organization. Each child’s clothes in their own case means less digging through a shared bag at the hotel, and a clear answer to “where are my pajamas?”

    It is also one of the small decisions that make a family trip smoother, which is the point of our broader guide on why a family vacation matters for work-life balance.

    Sizing by age

    Children grow fast, and the suitcase that is perfect at five will look tiny at nine. The table below is a practical starting point. Heights are the overall height of the case including wheels, which is how most retailers list them.

    AgeBest optionTypical sizeWhy
    2 to 3Small backpack or ride-on caseBackpack or about 18 in ride-onToddlers cannot steer a case for long; a parent tows the ride-on when they tire
    4 to 6Small spinner or two-wheel caseAbout 14 to 16 inLight enough to pull, low handle, fits under a seat on many aircraft
    7 to 10Kids’ carry-onAbout 16 to 18 inHolds a week of kids’ clothes; still manageable through a terminal
    11 and upStandard adult carry-onWithin the airline’s carry-on limitWill not be outgrown; handle height suits taller kids

    Two things matter more than the headline size. First, handle height: many small cases have a telescoping handle that is too long even at its lowest setting, which forces a small child to pull at an awkward angle. If you can, have your son try the handle before you buy. Second, empty weight: a heavy case filled with clothes becomes a bag the parent carries. Look for the lightest case in the size you need.

    How airline rules apply to children

    Airline baggage rules are the same for children as for adults in most cases, which surprises many parents. The principles:

    • A child with a paid seat usually gets the full cabin allowance of their fare: typically one carry-on for the overhead bin and one personal item under the seat. Basic economy fares on some airlines restrict the full-size carry-on, so check the fare rules.
    • Lap infants (usually under two, sitting on a parent’s lap) generally do not get their own carry-on, though many airlines allow a diaper bag and let you check or gate-check a stroller and car seat. Policies vary.
    • Size limits apply to the child’s bag too. A kids’ case that is within the airline’s carry-on dimensions can go in the overhead bin; a very small one may fit under the seat in front as the personal item, which keeps it within reach for snacks and toys.
    • Measure with the wheels and handle. Airline limits include wheels and handles, and a case that is fine on paper can be too deep once the pockets are full.

    Rules change and differ between airlines, so check the official pages before you fly: Air Canada, WestJet, Delta and American Airlines all publish their current limits. Air Canada also has a page on travelling with children that covers infant allowances. Our guide to Delta carry-on sizes goes into one airline in detail.

    Hardside or softside?

    Both work for children. The choice comes down to how the bag will be used.

    Hardside

    Hardside cases, made from ABS or polycarbonate plastics, protect contents from crushing, wipe clean easily and usually carry the bold printed designs that kids love. Most kids’ spinner sets are hardside. The downsides are that the shell scuffs, a cheap shell can crack if it is dropped hard or overpacked, and there is no give when you are trying to squeeze one more sweater in. Hardside cases also typically open like a clamshell into two halves, which needs floor space in a small hotel room.

    Softside

    Fabric cases are lighter for their size in many cases, have outside pockets for a book or a jacket, and flex to fit a tight overhead bin. They hide scuffs and are less likely to crack. They are harder to clean after a spilled juice box, and the designs tend to be less flashy, which matters to some children more than others.

    For a young child who will drag the case along the ground, bump it down stairs and sit on it at the gate, a sturdy hardside shell or a well-made softside case both last. Avoid the thinnest, cheapest shells if your son is rough on his things.

    Spinner wheels or two wheels?

    Most kids’ suitcases now come with four spinner wheels, and in a smooth airport terminal that is easiest for a child: the case glides beside him and he can push or pull it in any direction. Spinners are less happy on cobblestones, cracked sidewalks, carpet and gravel, where small wheels catch and the case tips. Two-wheel, or inline, cases are pulled behind at an angle; they roll better on rough surfaces and are less likely to roll away on a sloping floor or a moving train, but they take a little more coordination.

    For trips that are mostly airport, hotel and car, spinners are fine. For cities with old streets or a lot of walking between transit and the hotel, a two-wheel case, or a backpack, is often less frustrating. Whichever you choose, check that the wheels turn freely and quietly, and that the handle locks firmly at each height without wobbling.

    A traveler pulling a small rolling suitcase through an airport terminal
    Smooth terminal floors are where spinner wheels shine; cobblestones and gravel are another story (Photo: Sherm for Disabled And Here via Wikimedia Commons, CC BY 4.0)

    Ride-on suitcases

    Ride-on cases, which a small child can sit on while a parent tows them by a strap, are a popular answer to the tired-toddler problem. Trunki is the best-known brand. They are fun, they give a three-year-old a place to sit at the gate, and they solve the problem of little legs that give out halfway down a long concourse. The trade-offs: capacity is small, the shape does not pack efficiently, and they are awkward for an adult to carry once the child outgrows riding. Use common sense on where to ride: never on escalators or moving walkways, and not in crowded security lines. They suit children roughly from two to five; beyond that, a normal small case is more practical.

    Backpacks as an alternative (or addition)

    Many families find that a good kids’ backpack is the most useful single bag for a young child. It keeps hands free for holding a parent’s hand, it goes up stairs and onto trains easily, and it can be the personal item under the seat with snacks, a book and headphones. For short trips, a backpack alone may be enough. For longer trips, a small case for clothes plus a backpack for the flight is the ideal combination, which is why so many kids’ luggage sets include one.

    Keep a child’s backpack light: a few kilograms at most for a young child, and adjust the straps so it sits high and close to the back.

    Affordable sets worth considering

    Kids’ luggage sets offer good value if you want coordinated pieces. The sets below are affordable options that suit boys who want a fun design without paying adult-luggage prices. Specifications, colors and designs change often, so check the current listing for dimensions and weight before you buy.

    Rosamo 16-inch Kid’s Luggage Set (6 pieces)

    Rosamo sells a 16-inch hardside spinner case bundled with several smaller matching pieces, such as a backpack and accessory bags, in a range of kid-friendly designs. It suits families who want everything in one purchase: the case for clothes, a backpack for the flight and extras for toiletries or toys. Check that the 16-inch case suits your son’s height and that the backpack is sized for his back.

    GYMAX Kids Carry-On Luggage Set (12-inch and 16-inch)

    This set pairs a 12-inch and a 16-inch rolling case. That makes it flexible: a younger sibling can take the small one while an older child takes the larger, or the same child can use the 12-inch for weekends and the 16-inch for longer trips. It is a practical buy for families with two young children close in age.

    Travelers Club 5-Piece Kids’ Luggage Set (First Responders theme)

    Travelers Club makes kids’ sets with themed graphics, including a first responders design with fire trucks, police cars and ambulances that appeals to many young boys. The multi-piece set gives a child a matching collection, and a theme he loves is a strong motivation to pack and pull his own bag.

    A plain case he will not outgrow

    For boys around ten and up, consider skipping kids’ designs altogether and buying a lightweight adult carry-on in a color he likes. It costs a little more, but it will last into the teenage years. Our guide to top travel luggage covers what to look for in an adult case.

    Design, themes and letting him choose

    A suitcase that a child loves is a suitcase he will actually pull. Let him choose the design from a shortlist you have already checked for size and weight. Dinosaurs, space, vehicles, sports and superheroes are perennially popular, but plenty of boys prefer a plain bold color, and interests change fast; a strong color or a simple pattern may last longer than a character he will be embarrassed by in two years. Bright or distinctive cases have a practical upside too: they are easy to spot on a baggage carousel and harder for another family to grab by mistake.

    Teaching kids to pack their own bag

    Packing is a skill, and a trip is a good time to teach it. For children around five and up:

    • Give a picture or written list. Number of shirts, shorts or pants, underwear and socks, pajamas, a sweater, a swimsuit, toothbrush. Younger children do well with pictures.
    • Lay it out first. Have your son put everything on the bed, then check it together before it goes in the case.
    • Roll clothes. Rolled clothes take less space and are easier for small hands to fit in.
    • One comfort item, chosen by him. A stuffed animal or small blanket goes in the backpack, not the checked bag.
    • Limit the toys. Two or three small toys and a couple of books are plenty. Our list of the best traveling books for kids has ideas that pack flat.
    • Leave room for souvenirs. A case packed to bursting on the way out has no room for the trip home.
    • The parent does the final check. Chargers, medications and anything that cannot be replaced should be packed or checked by an adult.

    Getting through security with a child’s suitcase

    A child’s carry-on goes through the X-ray just like an adult’s, and the same liquid limits apply to anything inside it. Toy guns, realistic replica weapons and some toys with sharp parts can be refused, and water bottles need to be empty at the checkpoint. Snacks are generally fine. Formula, breast milk and baby food are treated differently from other liquids; our travel bottle warmer guide explains those rules for families with babies.

    In the United States, the TSA’s traveling with children page explains screening for children, strollers and car seats, and the TSA “What Can I Bring?” list covers specific items. In Canada, Transport Canada publishes what not to bring on a plane. Pack the child’s bag so that anything the officers may want to check, like a tablet or a snack pouch, is easy to reach, and allow extra time at the airport when traveling as a family; our guide to airport arrival times has the details.

    Illustration of a family with rolling suitcases waiting at an airport gate
    A case for each child who can manage one, and a backpack each for the flight (Photo: Familydestinationsguide.com Images via Wikimedia Commons, CC BY 2.0)

    Siblings, longer trips and checked bags

    With two or three children, the question is whether everyone gets a case or whether the family shares. A workable pattern for many families: every child carries a backpack with their own flight essentials, children old enough to manage it pull a small case, and one larger checked bag holds the bulky items, such as jackets, extra shoes and beach gear, for everyone. That keeps each child’s load light while avoiding a line of five overhead-bin cases that all need lifting at boarding.

    For trips of more than a week, or trips that need winter clothes, a small child’s case will not hold everything, and that is fine. Pack the child’s case with the clothes he will need for the first couple of days plus his favorite things, and put the rest in the shared checked bag. If the checked bag is delayed, he still has what matters to him. On road trips, soft bags squash into a car trunk more easily than several hardside cases; our family car rental guide covers choosing a vehicle with enough room.

    An empty baggage claim carousel in an airport arrivals hall
    A bright, distinctive case is easier to spot on the carousel and harder for another family to take by mistake (Photo: Jo-Jo Eumerus via Wikimedia Commons, CC BY-SA 4.0)

    Labels, tracking and not losing it

    • Label inside and out. A luggage tag with a parent’s phone number outside, and a card with the same details inside, in case the tag is torn off. Do not put the child’s name on the outside.
    • Add a small tracker if you like. A Bluetooth tracker tucked in a pocket can help locate a case left at a gate or delayed by the airline.
    • Photograph it. A quick photo of the case, and of what is inside, makes a lost-baggage claim much easier.
    • Do a count. At every transition, gate, taxi, hotel lobby, count the bags. Give each child the job of counting his own.

    Making it last

    Children are hard on luggage. A few habits help a case survive several trips:

    • Push the handle all the way down before lifting the case by the side or top handle.
    • Do not let children stand on the case or sit on a spinner, which is not built for it. Ride-on cases are the exception.
    • Wipe hardside shells after the trip, and empty and air softside cases before storing them.
    • Check the wheels and zippers before each trip, not the night before departure.
    • Store the case somewhere dry; a damp garage is hard on zippers and fabric.

    Common mistakes

    • Buying too big. A case sized “to grow into” is too heavy and awkward for the child now, so an adult ends up carrying it.
    • Ignoring handle height. A handle that is too tall is the most common reason kids give up pulling their bag.
    • Assuming any kids’ case fits under the seat. Under-seat space varies by aircraft and seat. Measure against the airline’s personal-item limit if that is the plan.
    • Checking the child’s only bag. Keep a change of clothes and the comfort item in the cabin in case checked bags are delayed.
    • Buying on design alone. A great print on a flimsy shell with sticky wheels will not last one trip.

    Frequently asked questions

    What size suitcase does a child need?

    For about four to six, a case around 14 to 16 inches; for about seven to ten, 16 to 18 inches; from around eleven, a standard adult carry-on within the airline’s limit. Handle height and weight matter as much as size.

    Do kids get a free carry-on on flights?

    A child with their own paid seat usually gets the same cabin allowance as an adult on that fare. Lap infants usually do not get a separate carry-on, though many airlines allow a diaper bag. Check your airline’s rules.

    Are kids’ suitcases allowed as carry-on?

    Yes, as long as they are within the airline’s carry-on or personal-item dimensions, including wheels and handles. Many kids’ cases are well inside the limits, but measure before you fly.

    Is a hardside or softside suitcase better for kids?

    Both work. Hardside protects contents and wipes clean; softside is lighter, flexible and has outside pockets. Choose on weight, wheels and handle before material.

    What age can a child pull their own suitcase?

    Many children can manage a small, light case from about four, with help on stairs and escalators. Younger children do better with a backpack or a ride-on case a parent can tow.

    Are ride-on suitcases worth it?

    For children roughly two to five on trips with long walks through airports, many parents find them very useful. They hold less and are outgrown quickly, so older children are better served by a normal case.

    Should my child’s suitcase be a set with a backpack?

    If you do not already have a kids’ backpack, a set is good value: the case holds clothes and the backpack holds the flight essentials under the seat.

    With the bags sorted, the rest is the trip itself. Compare family fares across flexible dates on our flight search, find a room with space for everyone on our hotel search, and if you are driving from the airport, add a car with room for the luggage on our car rental search. Our guide to booking hotels for family vacations covers timing and room types, and a first family trip to Orlando or San Diego is a great first outing for a new suitcase.

  • Top Travel Bottle Warmer Options for Flights and Road Trips

    Top Travel Bottle Warmer Options for Flights and Road Trips

    Feeding a baby at home is a routine. Feeding a baby at 30,000 feet, in the back seat on a highway, or in a hotel room with no kitchen is a puzzle, and the piece that most often goes missing is warm milk. A travel bottle warmer solves that puzzle for many families: a portable, usually rechargeable device that brings breast milk, formula or water to a comfortable temperature wherever you are. But not every baby needs warm milk, not every warmer suits every trip, and there are real rules about carrying milk, formula and batteries on a plane. This guide explains whether you need a travel warmer at all, the different types and how to choose, what to know about flying and driving with one, safe preparation and cleaning on the road, and a packing checklist that makes feeding on the go feel routine again.

    The short answer

    If your baby will take room-temperature or cool milk, you may not need a warmer at all; the CDC notes that breast milk does not need to be warmed. If your baby insists on warm feeds, a rechargeable portable warmer is the most flexible choice for flights and road trips, a car-powered warmer suits long drives, and an insulated flask of hot water is the simple, no-battery backup. Look for temperature control, enough capacity for your bottles, a leak-proof lid, easy cleaning and a battery you can carry in the cabin. Never use a microwave to warm milk or formula, and always test the temperature before feeding.

    A baby drinking milk from a bottle held by a parent
    Some babies take milk cool or at room temperature; test at home before you buy a warmer (Photo: Vyacheslav Argenberg via Wikimedia Commons, CC BY 4.0)

    Do you actually need a travel bottle warmer?

    Start with your baby. Some babies drink milk cold from the fridge or at room temperature without complaint, and for those families a warmer is optional. Others refuse anything but body-warm milk, and a hungry, crying baby on a plane is exactly the situation a warmer is designed for. The best way to find out is to experiment at home a few weeks before the trip: offer a room-temperature bottle and see what happens. If your baby accepts it, travel just got simpler.

    Think too about the trip itself. A short flight between feeds needs less equipment than a long-haul flight. A road trip with frequent stops at places with hot water may need nothing more than a flask. A week in a hotel room with a kettle is different from a week in a rental with a full kitchen. Match the gear to the trip, and remember that everything you bring has to be carried, charged and cleaned.

    Types of travel bottle warmers

    TypeHow it worksBest forWatch out for
    Rechargeable portable warmerBattery-powered cup or bottle that heats water or milk to a set temperatureFlights, day trips, anywhere without powerBattery life, charging before travel, lithium battery rules
    Car-powered warmerPlugs into a car’s USB port or 12-volt outlet; some wrap around the bottleLong road tripsSlow on weak ports; useless away from the car
    Insulated flask with water bathHot water from a flask poured into a cup or container; the sealed bottle stands in itBackup for any trip; no power neededWater cools over hours; spill risk
    Plug-in electric warmerA compact version of a home warmer that runs on wall powerHotel stays and rentalsVoltage and plug type abroad; needs an outlet

    Rechargeable portable warmers

    These are the most popular travel choice and what most people mean by a “travel bottle warmer.” Most look like an insulated bottle or cup with a heating element and battery in the base and a simple control on the side. Some heat water that you then mix with premeasured formula powder; others are designed to warm milk directly or to hold a bottle in a warm water bath. Many offer several temperature settings and a keep-warm function. They are ideal on planes and in places without an outlet, but they depend on the battery, so charging becomes part of your routine.

    Car-powered warmers

    For long drives, a warmer that runs from the car’s power removes the battery worry. Some are wrap-around sleeves that heat a bottle directly, others are cups that sit in a cup holder. They tend to be slower than battery units on a weak USB port, and they only work in the car, so they are best paired with another option for the hotel.

    The flask method

    The simplest travel warmer is a good insulated flask of hot water. At feeding time, pour hot water into a cup or a small container, stand the sealed bottle or milk bag in it for a few minutes, and test the temperature. This is similar to the CDC’s own advice for warming breast milk, which is to place the sealed container in warm water or hold it under warm running water. A flask needs no charging and has nothing to break, which makes it a good backup even if you bring an electric warmer.

    Plug-in warmers for the hotel

    If you are staying put for a week, a compact plug-in warmer, or even your home warmer if it is small, may be simpler than a battery unit. Check the voltage and plug type if you are traveling abroad, since many home appliances do not work on a different voltage without a converter.

    What to look for

    • Power source and battery. For flights, a built-in rechargeable battery is the main need. Check how many warms a full charge gives you and how the unit charges; a common charging cable you already carry for your phone means one less cable to pack.
    • Heating time. Faster is better when a baby is hungry, but manufacturers’ claims vary with the starting temperature and amount. Test it at home so you know how long it really takes.
    • Temperature control. Adjustable settings, including one around body temperature, let you warm milk gently rather than making it hot. A display that shows the temperature is helpful.
    • Capacity and bottle fit. Make sure the warmer holds enough for a full feed and, if it holds a bottle, that your brand of bottle fits. Wide-neck and narrow-neck bottles fit differently.
    • Leak-proof design. A warmer that leaks in the diaper bag is worse than no warmer. Look for a secure, sealed lid.
    • Easy cleaning. Wide openings and few crevices matter when you are washing it in a hotel bathroom sink.
    • Size and weight. It needs to fit in the diaper bag and, ideally, a car cup holder.
    • Safety features. Automatic shutoff and overheat protection are worth having.

    Popular portable options

    Portable bottle warmers are sold by many brands, and models change often. A few names that parents frequently come across are below. Check the current product listing for capacity, settings, charging and battery details before you buy, and choose on the features above rather than the brand.

    Papablic Portable Bottle Warmer

    Papablic makes portable, rechargeable warmers designed for travel and home, with multiple temperature settings and a design intended to fit in a car cup holder. The brand also sells a Pro version marketed as heating faster with more temperature settings. They suit parents who want one warmer for the car, the hotel and the flight.

    BOLOLO Portable Bottle Warmer

    BOLOLO sells a compact rechargeable warmer for breast milk, formula and water, aimed at parents who want something small and light for short flights and day trips.

    Large-capacity rechargeable cups

    Several brands sell larger insulated warmers that hold enough water for more than one feed, useful for long travel days or twins. The trade-off is size and weight in the bag.

    Passengers seated in the economy cabin of an airliner
    Keep the warmer and bottle in the bag under the seat, ready for takeoff and landing (Photo: Minette Lontsie via Wikimedia Commons, CC BY-SA 4.0)

    Flying with a bottle warmer, milk and formula

    Security screening

    Baby feeding supplies are treated differently from other liquids at airport security. In the United States, the TSA allows formula, breast milk, toddler drinks and baby food in quantities greater than 3.4 ounces (100 milliliters) in carry-on bags, and they do not have to fit in the quart-sized bag. Tell the officer at the start of screening that you have them, and take them out to be screened separately; they may be tested. Ice packs and gel packs used to keep milk cold are allowed too. The TSA’s traveling with children page covers strollers, car seats and screening. In Canada, CATSA’s guidance on baby food and milk sets out the rules. Other countries have similar exemptions but the details vary, so check before you fly, especially on the return trip.

    An empty bottle warmer goes through the X-ray like any other electronic device. If it is full of water at the checkpoint, you may be asked to empty it, so fill it airside, after security.

    Batteries

    Most portable warmers have a built-in lithium battery. In general, devices with lithium batteries are best kept in carry-on bags, and spare lithium batteries and power banks must be in carry-on, not checked bags, according to the FAA’s PackSafe guidance. Airlines can have their own rules, so check with yours, and switch the warmer off or lock it so it cannot turn on in the bag.

    Using a warmer on board

    Airlines vary on whether they allow heating devices to be used in the cabin, and flight attendants may also be able to provide hot water to stand a bottle in. Ask your airline before you fly, and ask the crew when you board. Air Canada, for example, publishes a page on travelling with children that covers infant travel. Plan as if you cannot rely on either: a warmer charged and ready and a flask of hot water from an airport café make a good combination.

    Timing feeds

    Many parents like to offer a bottle during takeoff and landing, because sucking and swallowing can help with ear pressure. That means having milk ready as boarding finishes and again when the descent begins, often about half an hour before landing. Keep the warmer and bottle in the bag under the seat in front, not the overhead bin, since you cannot stand up during takeoff and landing. Leave plenty of time at the airport so you are not rushing; our guide to airport arrival times helps.

    An airport security checkpoint with queue barriers and screening lanes
    Declare breast milk, formula and baby food at the start of screening; they are screened separately (Photo: MaedaAkihiko via Wikimedia Commons, CC0)

    Road trips

    • Stop to feed. Never take a baby out of the car seat while the car is moving. Plan stops every couple of hours; it is better for everyone anyway.
    • Keep milk cold, then warm it. Carry expressed milk in an insulated cooler with ice packs and warm only what you need for each feed.
    • Do not store formula in a hot car. The CDC advises storing unopened formula in a cool, dry, indoor place rather than in vehicles; on a road trip, keep it in the cabin with you, out of direct sun.
    • Use car power for warming. A car-powered warmer, or charging your battery warmer as you drive, means it is ready at the next stop.
    • Plan for traffic. A delay can push a feed into the middle of a highway with nowhere to stop. Having a warm bottle ready before you set off on the next leg helps.

    If you are renting a car for the trip, reserve an infant seat or bring your own, and check that the vehicle has a working USB port or 12-volt outlet. Our guide to family car rentals covers seats and vehicle choice.

    Preparing feeds safely on the road

    Breast milk

    Follow the CDC’s breast milk storage and preparation guidance. Key points: breast milk can be served cold, at room temperature or warm; to warm it, keep the container sealed and place it in warm (not hot) water; once warmed, use it within two hours; and never thaw or heat breast milk in a microwave, which can create hot spots. Thawed milk should not be refrozen.

    Formula

    The CDC’s infant formula preparation guidance covers the essentials: wash your hands, use clean bottles, measure water before adding powder according to the container’s instructions, use prepared formula within two hours of preparation and within an hour of starting a feed, and discard leftovers. It also notes extra precautions for babies younger than two months, premature babies and those with weakened immune systems. Premeasured powder in a divided dispenser, plus warm water from the warmer or flask, is the easiest approach on the go. Ready-to-feed formula needs no mixing and is convenient for travel days.

    Water

    Where tap water is not safe to drink, use bottled or boiled water for mixing formula and cleaning bottles, and follow local health advice and your pediatrician’s guidance.

    Always test the temperature

    Before feeding, shake or swirl the bottle and test a few drops on the inside of your wrist. It should feel warm, not hot. Portable warmers can vary, and a setting that is perfect at home may behave differently when the device is cold or the battery is low.

    A child's car seat installed in the back of a camper van
    On road trips, stop to feed: never take a baby out of the car seat while the vehicle is moving (Photo: CruiseAmerica via Wikimedia Commons, CC BY-SA 4.0)

    Cleaning on the road

    Cleaning is the part of travel feeding that people forget to plan. Pack a small bottle brush, a travel-size bottle of dish soap and a clean towel or drying rack. Rinse bottles and the warmer as soon as possible after each feed, since dried milk is harder to clean, then wash properly at the hotel. Many hotels will provide a mini-fridge on request, which is useful for storing milk, and a kettle for boiling water; clean the kettle before use if you are using it for baby feeds. Our guide on the best time to book hotels for family vacations covers the room features that make travel with a baby easier, like a fridge, a kitchenette or a separate sleeping area.

    Traveling abroad with a warmer

    International trips add a few wrinkles. Wall voltage and plug shapes differ between countries, and a plug-in warmer designed for North American outlets may need a converter, not just an adapter, to work safely elsewhere; check the label on the charger or device, which usually lists the input voltage range. Battery warmers that charge from a standard phone charger are the easiest option, since most modern phone chargers accept a wide voltage range. Formula brands differ between countries too, so bring enough of your baby’s usual formula for the whole trip rather than hoping to find it on arrival, and keep it in your carry-on in case a checked bag is delayed. On long-haul flights across time zones, feed on your baby’s schedule rather than the clock, and adjust gradually once you arrive. Finally, check the security rules for your return flight as well as the outbound one, since the exemptions for milk and formula are similar in many countries but not identical.

    A feeding packing checklist

    • Bottle warmer, fully charged, and its charging cable
    • Insulated flask for hot water as a backup
    • Enough bottles and nipples for the travel day, plus spares
    • Formula (premeasured in a dispenser) or ready-to-feed cartons
    • Expressed breast milk in an insulated cooler with ice packs
    • Bottle brush, small dish soap and a towel
    • Bibs, burp cloths and a change of clothes for baby and a parent
    • A basic travel first aid kit; our travel first aid kit guide covers what to include
    • Plug adapter or voltage converter for international trips

    Pack all of it in the bag under the seat or within reach in the car. Once your baby becomes a toddler, the bag gets a little lighter, and the challenge shifts to entertainment; our guides to travel books for kids and kids’ suitcases cover the next stage.

    Common mistakes

    • Not testing the warmer at home. Learn how long it takes and which setting your baby likes before the trip.
    • Forgetting to charge it. A dead warmer at the gate is worse than none. Charge it the night before and top it up during layovers.
    • Packing it in checked luggage. Keep it, and any lithium battery, in the cabin with you.
    • Overheating milk. Warm, not hot. Test every time.
    • Using the microwave. Hot spots can burn a baby’s mouth. The CDC advises against it for both breast milk and formula.
    • Keeping leftovers. Once a baby has fed from a bottle of formula, discard what is left after the feed.
    • Relying on the airline. Hot water on board is not guaranteed. Bring your own solution.

    Frequently asked questions

    Can I bring a bottle warmer on a plane?

    Generally yes, in your carry-on. Devices with lithium batteries belong in the cabin, and spare batteries must be carried on. Whether you may use a heating device during the flight depends on the airline, so ask before you fly.

    Can I bring breast milk and formula through security?

    Yes. In the United States, breast milk, formula and baby food in quantities over 3.4 ounces are allowed in carry-on bags; declare them at the start of screening. Canada has similar rules. Check the rules for every country on your itinerary.

    Does breast milk need to be warmed?

    No. The CDC notes that breast milk can be served cold, at room temperature or warm. Warming is a matter of what your baby prefers.

    How do I warm a bottle without a warmer?

    Stand the sealed bottle or milk bag in a cup or container of warm water for a few minutes, using hot water from a flask, a café or the crew, then test the temperature on your wrist. Never use a microwave.

    How long does warmed milk last?

    Per CDC guidance, use warmed breast milk within two hours. Use prepared formula within two hours of preparation and within one hour after the feed begins, then discard leftovers.

    Will a travel bottle warmer work in the car?

    Battery warmers work anywhere, and car-powered models run from the USB port or 12-volt outlet. Always stop the car to feed rather than taking the baby out of the car seat while driving.

    Should I buy a warmer that heats water or one that heats milk?

    Water-heating models suit formula, where you mix powder with warm water. Models that hold a bottle in a warm water bath or warm milk directly suit breast milk. Some do both; choose based on how you feed.

    Once feeding is sorted, the trip is much easier to plan. Compare fares on flexible dates on our flight search, where a nonstop is often worth a little extra with a baby, find a room with a fridge and space for a crib on our hotel search, and if you are driving, price a car with room for the stroller on our car rental search. For the bigger picture, read our guide on why a family vacation is worth making time for.

  • Best Hiking Backpacks for Comfort, Durability, and Storage

    Best Hiking Backpacks for Comfort, Durability, and Storage

    A hiking backpack is the one piece of outdoor gear you feel on every step. The right pack moves weight onto your hips, keeps water and snacks within reach, and stays comfortable after hours on a trail. The wrong one pulls at your shoulders, rubs your back raw and turns a great day into a slog. The good news is that choosing well is not complicated once you know what matters: the right capacity for your trips, a proper fit to your torso, a suspension that suits the load, and a handful of features that make a real difference. This guide explains how to size and fit a hiking pack, frame types and features, day packs versus overnight and multi-day packs, the packs from our original list and who each suits, how to pack a pack so it carries well, and how to fly with one when your hike starts at the other end of a flight.

    The short answer

    For day hikes, a 20 to 30 liter daypack with a padded hip belt, a hydration sleeve or bottle pockets, and room for a warm layer and rain jacket covers most needs. For overnight and weekend backpacking, look at 40 to 65 liters with an internal frame, an adjustable torso length and a padded hip belt that carries most of the weight. Size by trip length and how bulky your gear is, not by what looks impressive. Above all, fit the pack to your torso length, not your height, and load it with weight before you decide. A well-fitted mid-priced pack will carry better than an expensive one that is the wrong size.

    A backpacker carrying a large internal frame pack on a trail in Grand Teton National Park
    An internal frame and a snug hip belt move the load off your shoulders on multi-day trips (Photo: National Park Service via Wikimedia Commons, Public domain)

    Choose capacity by trip, not by ambition

    Backpack capacity is measured in liters. More space tempts you to carry more, and more weight is the enemy on a trail. Use the table as a starting point, then adjust for how compact your gear is and the season.

    Trip typeTypical capacityWhat it holdsFrame and belt
    Short day hike15 to 25 LWater, snacks, layer, rain shell, first aid, phoneFrameless; simple webbing or light padded belt
    Long or alpine day hike25 to 35 LAdds extra layers, more food and water, map, headlampLight frame sheet; padded hip belt
    Overnight or light weekend35 to 50 LCompact tent or shelter, sleeping bag and pad, stove, food for one or two daysInternal frame; padded hip belt
    Weekend, 2 to 3 nights50 to 65 LFull camping kit, food for several days, more clothingInternal frame; adjustable torso; supportive belt
    Week or longer, winter trips65 L and upBulky winter gear, extended food, shared group gearRobust internal frame built for heavy loads

    If you are new to hiking, start with the pack for the trips you will take most often. Many people do mostly day hikes with the occasional overnight, and a 30 to 40 liter pack can stretch to cover both if your gear is compact.

    A marked hiking trail crossing a colorful volcanic mountainside
    For day hikes, a light 20 to 30 liter pack with water, layers and the essentials is all you need (Photo: Jakub Hałun via Wikimedia Commons, CC BY 4.0)

    Fit: the part that matters most

    Most discomfort comes from a pack that does not fit, not from a pack that is poorly made. Fit depends on your torso length and hip size, not your height; two people of the same height can need different sizes.

    Measure your torso

    Have someone measure along your spine from the prominent bone at the base of your neck (tilt your head forward to find it) down to the level of the top of your hip bones. That distance is your torso length. Manufacturers publish which torso range each size fits, and many overnight packs have an adjustable back system to fine-tune it.

    Adjust in the right order

    • Load the pack with a realistic weight, loosen every strap and put it on.
    • Hip belt first. Center the padded belt over the top of your hip bones and tighten it firmly. The belt should carry most of the load on an overnight pack.
    • Shoulder straps next. Snug them so they wrap your shoulders without taking the weight off your hips. The straps should attach to the pack a little below the top of your shoulders.
    • Load lifters. If your pack has small straps from the top of the shoulder straps to the pack body, pull them to bring the load closer to your back.
    • Sternum strap last. Clip it across your chest, a few centimeters below your collarbones, just tight enough to hold the shoulder straps in place.

    Walk around, climb some stairs and lean forward. The pack should move with you, not sway or pull backward. Many brands offer women’s-specific fits with shorter torso ranges, differently shaped shoulder straps and hip belts, and these are worth trying regardless of how the pack is marketed.

    Frame types

    • Frameless packs are light and simple, ideal for day hikes and for ultralight backpackers who carry very little weight. They rely on how you pack them for structure.
    • Internal frame packs have a frame sheet, stays or a perimeter frame inside the pack. This is the standard for overnight and multi-day hiking because it transfers weight to the hip belt and keeps the load close to your body for balance on uneven ground.
    • External frame packs hang the bag on a visible frame. They are less common now but still carry heavy, awkward loads well and ventilate your back. They are less stable on rough terrain.

    Features that make a real difference

    • Padded hip belt with pockets. The belt carries the weight, and small belt pockets keep snacks, a phone and sunscreen in reach without stopping.
    • Water access. Stretch side pockets you can reach while walking, or a hydration sleeve and port for a water bladder, keep you drinking often.
    • Ventilated back panel. A suspended mesh back keeps air flowing and reduces a sweaty back in hot weather, at the cost of pushing the load slightly away from you.
    • Rain cover. Pack fabrics are water-resistant, not waterproof. An integrated or included rain cover, plus a liner or dry bags inside, keeps a sleeping bag and clothes dry.
    • Access. Top-loading is simplest and lightest. A front panel zip or a separate bottom compartment for a sleeping bag makes it easier to reach items without unpacking.
    • Compression straps. These cinch a partly full pack so the load does not shift, and let you strap on a foam pad or tent poles.
    • Tool loops. Loops for trekking poles and an ice axe matter on mountain routes.
    • Durable fabric and zippers. Abrasion-resistant fabric at the base and sides, and sturdy zippers, make a pack last many seasons.

    Weight: pack and base weight

    Every gram of the empty pack is a gram you carry all day. Heavier packs usually have more padding, stronger frames and more features, which is worth it for heavy loads and often not worth it for light ones. Backpackers talk about “base weight”: everything you carry except food, water and fuel. Reducing base weight, by choosing a lighter shelter, sleeping bag and cooking kit, often lets you choose a smaller, lighter pack, which makes the whole trip more pleasant. Pack light first, then choose the pack that fits what you carry.

    Packs from our original list

    The packs below were featured in the original version of this guide. They cover a range of trips and budgets rather than a ranking, and models, sizes and features change, so check the current specifications and torso-fit range from the manufacturer or seller before you buy.

    MOUNTAINTOP hiking backpack (25L and 40L)

    MOUNTAINTOP’s hiking backpack, listed in 25 and 40 liter versions, is an affordable option for day hikes and light overnights. It focuses on lightweight comfort with padded straps, a breathable back panel and multiple pockets. The 25 liter size suits day hikers who carry layers, food and water; the 40 liter size can stretch to a light overnight if your camping gear is compact. It is a sensible first pack for newer hikers.

    TETON 65L Explorer internal frame backpack

    TETON Sports is known for budget-friendly camping and backpacking gear. The 65L Explorer is a large internal frame pack with an adjustable torso, a padded hip belt, multiple compartments and gear loops, and an included rain cover. It suits backpackers who need room for a tent, sleeping bag and several days of food, and who want an adjustable fit at a lower price than premium brands. At 65 liters, resist filling every corner; pack only what you need.

    TETON 55L Scout internal frame backpack

    The 55L Scout is a slightly smaller sibling of the Explorer, with the same approach: internal frame, padded hip belt and shoulder straps, compression straps, gear loops and a rain cover. For many weekend backpackers, 55 liters is a better middle ground than 65, especially with reasonably compact gear. It is also a practical choice for teenagers and for scout or school trips where budget matters.

    Amazon Basics internal frame hiking backpack

    The Amazon Basics internal frame pack is a budget option with adjustable straps, an included rainfly, compression straps and a separate sleeping bag compartment. It suits people trying backpacking for the first time who do not want to invest heavily before they know they enjoy it. As with any budget pack, check the fit carefully: an adjustable torso and a hip belt that sits properly on your hips matter more than extra pockets.

    32 liter hiking backpack with internal frame and rain cover

    The original list also included an unbranded 32 liter pack with a light internal frame, an adjustable chest strap, breathable padding and a rain cover. A pack of this size and style bridges the gap between a daypack and an overnight pack: ideal for long day hikes with extra layers and food, or a minimalist hut-to-hut or overnight trip. Generic packs vary a lot in quality, so look closely at stitching, buckles and zippers.

    How to pack a hiking backpack

    A well-packed bag carries lighter than a badly packed one of the same weight.

    • Bottom: bulky, light items you will not need until camp, such as your sleeping bag and sleep clothes.
    • Middle, close to your back: the heaviest items, such as food, water reservoir, stove and cook kit. Keeping weight close to your spine and around shoulder-blade height keeps you balanced.
    • Outer middle and top: layers, rain jacket, first aid kit, water filter and toilet kit, where you can reach them quickly.
    • Lid and hip belt pockets: map, snacks, sunscreen, headlamp, phone and insect repellent.
    • Outside: as little as possible. Items dangling from the outside snag on branches and throw off your balance.

    Whatever the trip, carry the essentials for safety: navigation, a headlamp, sun protection, first aid, a knife or repair kit, a way to start a fire, shelter, extra food, extra water and extra clothes. The US National Park Service explains each of the Ten Essentials, and our guide to travel first aid kits covers what a compact kit should include. In Canadian national parks, Parks Canada’s visitor safety page covers wildlife, weather and trip planning.

    A backpacker with a loaded pack crossing a mountain stream
    A pack that sits close to your back keeps you balanced on stream crossings and rough ground (Photo: Mattsjc via Wikimedia Commons, CC BY 4.0)

    Footwear, clothing and the rest of your kit

    A great pack cannot fix bad shoes. For well-maintained trails, trail runners or light hiking shoes work for many people; for rough terrain and heavy loads, boots with more support may suit you better. Our guide to comfortable walking shoes for traveling covers fit and break-in. A pair of light sandals or eco-friendly flip-flops makes a welcome camp shoe. Dress in layers of quick-drying fabrics rather than cotton, and pack a waterproof shell even on a sunny morning. For trips that combine town and trail, our guide to travel pants for men covers versatile, quick-drying options.

    Flying with a hiking backpack

    Many hikes start with a flight to the mountains. A few things to plan for:

    • Size. Most packs above about 40 to 45 liters are too big for carry-on limits and will need to be checked. Smaller packs may carry on if they fit the airline’s dimensions; check the airline’s official page.
    • Protect the straps. Loose hip belts and straps catch on baggage belts. Tighten everything, tuck straps away, and consider packing the pack inside a large duffel or a dedicated travel cover.
    • Stoves and fuel. Camping fuel canisters are not allowed on passenger flights. Stoves may be allowed if they are completely clean and empty, but rules vary, so check before you pack and plan to buy fuel at your destination.
    • Bear spray, knives and poles. Bear spray is generally not permitted on planes. Knives belong in checked bags, and trekking poles often have to be checked too. The TSA’s What Can I Bring? tool covers specific items for US flights, and CATSA’s what can I bring page covers Canadian airports.
    • Batteries in the cabin. Spare lithium batteries for headlamps, GPS units and power banks generally must travel in your carry-on. The FAA’s PackSafe guidance explains the rules.
    • Keep a carry-on day kit. Put your boots or trail shoes, a layer and any essential medication in the cabin with you, so a delayed checked pack does not stop you hitting the trail.

    If you are traveling to the trailhead with other luggage, our main guide to travel luggage explains how to combine a checked bag with a carry-on, and our guide to the Peak Design Travel Backpack 45L covers the brand’s Outdoor Backpack 45L for trips that mix trails and towns.

    Where to take a new pack

    Some of the best hiking in North America is a short flight and a drive away. Calgary is the gateway to Banff and the Canadian Rockies; see our guide to things to do in Calgary and compare flights to Calgary. Denver puts Colorado’s Front Range within reach; compare flights to Denver. Vancouver pairs city and mountains in one trip; read our guide to things to do in Vancouver. For more ideas closer to home, our guide to America’s most unique state parks has trails for every level. Most trailheads are not served by transit, so a car is usually essential; our Calgary car rentals page is a good place to start for the Rockies. For overnight trips in US national parks, read the National Park Service’s guidance on backcountry camping, since many areas require permits.

    Two tents pitched in a sheltered volcanic crater at a backcountry campsite
    Overnight trips need room for a shelter, sleeping bag and food; many US parks require a backcountry permit (Photo: NPS Photo via Wikimedia Commons, Public domain)

    Day hike, overnight or multi-day: getting it right

    Day hikes

    Keep it light and simple. A comfortable daypack with a hip belt, two bottle pockets or a hydration sleeve, and room for the essentials. Choose a pack you would happily wear all day on a city trip too, since many travelers use one bag for both.

    Overnight

    This is where an internal frame earns its place. A 35 to 50 liter pack with a proper hip belt, a sleeping bag compartment and compression straps handles one night comfortably if your shelter and sleeping bag are compact.

    Multi-day

    Fit, frame and hip belt matter most. Test the pack with the full weight you plan to carry, including food and water, and make sure the torso length is right. A few hours with the pack loaded around your neighborhood before the trip will reveal hot spots.

    Trying a pack before you buy

    If you can, try packs on in a store that lets you load them with weighted bags, and wear each one for at least ten minutes while walking and climbing stairs. Bring the gear you already own, especially a sleeping bag and water bottles, to see how it fits inside. If you buy online, check the return policy first, load the pack at home with your real gear, and wear it around the house before taking the tags off. For children and teenagers, choose a pack with a generous torso adjustment range so it can grow with them, and keep their loads light.

    Caring for your pack

    Empty the pack completely after every trip, shake out dirt and crumbs, and let it dry fully before storing it to avoid mildew. Clean it with a sponge, lukewarm water and mild soap; avoid washing machines and harsh detergents, which damage coatings and foam. Rinse a hydration bladder and let it dry open. Store the pack loosely, out of direct sunlight, in a dry place. Check buckles, stitching and zippers before each season; small repairs are easy early and hard in the backcountry.

    Common mistakes

    • Choosing by height, not torso. Measure your torso and check the size chart.
    • Buying too big. A 70 liter pack for a weekend trip invites overpacking.
    • Carrying the weight on your shoulders. Tighten the hip belt on your hip bones first.
    • Heavy items at the bottom or outside. Keep heavy gear close to your back and centered.
    • Trusting fabric to stay dry. Use a rain cover and a liner or dry bags.
    • First use on the big trip. Try the pack loaded on a shorter hike first.
    • Checking a pack with loose straps. Straps catch on baggage systems; tuck them or use a cover.

    Frequently asked questions

    What size hiking backpack do I need?

    Roughly 15 to 30 liters for day hikes, 35 to 50 for overnights and 50 to 65 for weekend trips of two or three nights. Longer or winter trips may need more. Compact gear lets you go smaller.

    How do I know if a hiking pack fits?

    The hip belt should sit on top of your hip bones and carry most of the weight, the shoulder straps should wrap your shoulders without gaps, and the pack should not sway when you walk. Choose the size by torso length.

    Is an internal frame backpack worth it for day hikes?

    For most day hikes, a frameless or lightly framed pack is enough. A frame helps on long days with heavy water, winter layers or camera gear.

    Are budget hiking backpacks any good?

    Many are fine for occasional use, especially for beginners. Check the fit, hip belt and build quality carefully, and upgrade once you know what you need.

    Can I bring a hiking backpack on a plane?

    Smaller packs may fit carry-on limits. Larger packs usually need to be checked, with straps tucked away or the pack placed in a cover. Fuel, bear spray and some tools are restricted.

    Do I need a women’s-specific hiking pack?

    Not necessarily, but women’s-specific fits often have shorter torso ranges and shaped straps and hip belts that suit many bodies better. Try both types.

    Should I use a hydration bladder or bottles?

    Bladders make it easy to sip often; bottles are easier to refill, check and clean. Many hikers use one of each.

    Once the pack is ready, pick the trail. Compare fares on our flight search for a mountain getaway, find a base near the trails on our hotel search, and book a car for the drive to the trailhead on our car rental search. For the Rockies, our guide to the best time to fly to Calgary will help you time your trip for the hiking season.

  • New York to Toronto Cheap Flights: How to Find the Best Deals

    New York to Toronto Cheap Flights: How to Find the Best Deals

    New York to Toronto is one of the busiest cross-border air routes in North America. It links the largest city in the United States with the largest city in Canada, it is short enough to fly in about an hour and a half, and it is served by several airlines from three New York airports to two Toronto airports. That combination is good news for anyone looking for a cheap flight: lots of competition and lots of choice. It also means there are more ways to get it wrong, from picking the airport pair that looks cheapest but costs you an hour in traffic, to booking a fare that charges for the bag you assumed was included, to arriving at the airport without the right document for the border. This guide explains how to pick the right airports, when to fly and book, how airlines and fares compare on this route, what to know about the border in each direction, how to get downtown at both ends, and when the train or the car is worth considering. It is part of our flight booking series, which starts with our guide to the best time to book cheap flights and hotels.

    The short answer

    Compare all six airport pairs: JFK, LaGuardia and Newark in New York, and Toronto Pearson and Billy Bishop Toronto City Airport in Toronto. Billy Bishop is on an island next to downtown Toronto and can save a long transfer. Fly midweek or on Saturday if you can, because the route is heavy with business travelers on weekdays and weekend visitors on Fridays and Sundays. Book roughly one to three months ahead, earlier for holidays and big event weekends. Price the total, including bags and seats and the cost of getting to and from each airport. And bring the right document: U.S. citizens need a valid passport to fly to Canada, and most other visitors need an eTA or a visa. Compare fares across a whole month on our Toronto flights page or from the other direction on New York flights.

    Billy Bishop Toronto City Airport on the Toronto Islands, seen from the CN Tower
    Billy Bishop sits next to downtown Toronto and can save a long transfer (Photo: Arild Vågen via Wikimedia Commons, CC BY-SA 4.0)

    Know your airports on both sides

    The choice of airports shapes the fare, the airlines available, and how long the trip takes door to door. On a short flight, the ground transfer can take longer than the flight itself, so choose with your final destination in mind.

    New York

    AirportLocationBest for
    LaGuardia (LGA)Queens, closest major airport to Midtown ManhattanManhattan, Queens and the Bronx; quick trips
    JFKSoutheast QueensBrooklyn, Queens and anyone connecting from long-haul flights; AirTrain to the subway and Long Island Rail Road
    Newark (EWR)New Jersey, west of ManhattanNew Jersey, the west side of Manhattan and travelers using the AirTrain to rail connections

    Check each airport’s official site for current transit options: LaGuardia, JFK and Newark. Our JFK airport guide covers terminals and transfers, and our guide to getting around New York explains why most visitors skip the car.

    Toronto

    AirportLocationBest for
    Toronto Pearson (YYZ)Mississauga, northwest of downtownThe widest choice of airlines and flights; travelers heading to the west and north of the city or connecting onward
    Billy Bishop Toronto City (YTZ)Toronto Island, next to downtownDowntown hotels, the Financial District and the waterfront

    Toronto Pearson is Canada’s busiest airport, with two passenger terminals, Terminal 1 and Terminal 3. Check which one your airline uses on the Toronto Pearson website or our Toronto Pearson airport guide. The UP Express train connects Pearson with Union Station downtown; the operator describes the trip as 28 minutes, with trains every 15 minutes.

    Billy Bishop is a small airport on the Toronto Islands, reached by a pedestrian tunnel or a very short ferry ride from the foot of Bathurst Street, with a shuttle to Union Station. For a trip to downtown Toronto it can save a lot of time. Porter Airlines has long flown between Billy Bishop and Newark, and other airlines have added service at the island airport in recent years; check the current schedule when you search. The airport’s official site lists destinations and ground transportation, and notes that U.S. preclearance is now open there.

    Which airlines fly New York to Toronto?

    The route is served by Canadian airlines including Air Canada and Porter, and by major U.S. airlines from their New York hubs. Porter, for example, flies Billy Bishop to Newark and has added Pearson to LaGuardia service. Schedules and airport pairs change, so search all combinations rather than assuming. On a route this competitive, the cheapest airline varies by day and time, and the airlines often match each other’s fares on popular flights.

    What to compareWhy it matters on this route
    Airport pairA cheaper fare into Pearson may cost more overall if you are staying downtown and Billy Bishop was an option
    Fare typeBasic fares may exclude seat selection, changes and, on some airlines, a full-size carry-on
    Checked bag policyTransborder fares often charge for the first checked bag on the cheapest fare types
    Aircraft sizeRegional aircraft have smaller overhead bins; a large carry-on may be checked at the door
    ScheduleAn early nonstop protects a same-day meeting better than a cheaper midday flight
    LoyaltyStatus and credit card benefits can include free bags and better seats, changing which fare is really cheapest

    Check the current baggage and fare rules on each airline’s own site before you pay. Our carry-on size guide explains how to measure your bag and how limits compare between U.S. and Canadian airlines, and our flight details guide decodes fare brands and codeshares.

    When to fly and when to book

    Days and times

    This is a classic business route. Weekday morning and early evening flights are popular with people traveling for work, and Friday afternoon and Sunday evening flights fill with weekend visitors. Midweek flights, Saturday flights and midday departures are often cheaper. Very early morning and late evening flights can be good value, but check how you will get to and from the airport at those hours.

    Seasons

    PeriodWhat to expect
    January to MarchCold in both cities; often the cheapest time outside holiday weekends
    April to JunePleasant weather arrives; long weekends and June events increase demand
    July and AugustSummer peak for leisure travel and festivals
    September and OctoberExcellent weather; the Toronto International Film Festival in September and busy conference weeks lift hotel rates
    November and DecemberQuieter until the holidays; Thanksgiving weekends in each country and the Christmas period are busy

    Remember that the two countries celebrate Thanksgiving on different dates, Canada in October and the United States in November, and each country’s long weekends affect demand in its own direction. For more detail on each city’s seasons, see our guides to the best time to fly to Toronto and the best time to fly to New York.

    Booking window

    For ordinary dates, booking about one to three months ahead is a sensible window. For holiday weekends and major event dates, book earlier. Set a price alert, watch the route for a few weeks to learn what a normal fare looks like, and book when a fare lands at or below that level. For flights to or from the United States booked at least seven days out, most airlines let you cancel within 24 hours of booking without penalty, which is a useful safety net.

    Terminal B at LaGuardia Airport in New York
    LaGuardia is the closest major airport to Midtown Manhattan (Photo: David from Simply Aviation via Wikimedia Commons, CC BY 4.0)

    Crossing the border in each direction

    Flying New York to Toronto

    When you fly into Canada, you clear Canadian border formalities on arrival in Toronto. The documents you need depend on your citizenship:

    • U.S. citizens do not need an electronic travel authorization (eTA). The Government of Canada says they must carry proper identification such as a valid U.S. passport.
    • U.S. lawful permanent residents are also exempt from the eTA, but must travel with a valid passport from their country of nationality and a valid green card or equivalent proof of status.
    • Other visa-exempt travelers generally need an eTA before boarding a flight to Canada, and some nationalities need a visitor visa.

    Check your requirements on the Government of Canada’s eTA page before you book, and read the Canada Border Services Agency’s travel documents guidance. Declare any food, alcohol, cash and goods according to CBSA rules.

    Flying Toronto to New York

    On the way back, you usually clear U.S. border formalities before you leave Toronto. Toronto Pearson has U.S. preclearance facilities, and Billy Bishop now offers preclearance too, so you land in New York as a domestic passenger with no immigration line. That is convenient, but it means you need to arrive at the Toronto airport earlier than for a domestic flight, because check-in, security and preclearance all happen before departure. Our guide on how early to arrive for an international flight explains how to plan it.

    Getting downtown at each end

    AirportMain options into the city
    Toronto PearsonUP Express to Union Station; TTC buses; taxis and ride-hailing; rental cars
    Billy BishopWalk through the pedestrian tunnel or take the short ferry, then streetcar, shuttle, taxi or walk into downtown
    LaGuardiaBuses to the subway and rail connections; taxis and ride-hailing
    JFKAirTrain to the subway or Long Island Rail Road; taxis and ride-hailing
    NewarkAirTrain to NJ Transit and Amtrak trains toward New York Penn Station; taxis and ride-hailing

    In Toronto, the TTC runs the subway, streetcars and buses; the TTC website has routes and fares. Our guide to renting a car or using transit in Toronto explains when a car is worth it, and you can compare prices on Toronto car rentals if you plan day trips to Niagara Falls or cottage country.

    Fly, drive or take the train?

    For most travelers, flying is the fastest way between the two cities, but it is worth knowing the alternatives.

    • Flying: about an hour and a half in the air, plus airport time. Best for most trips, especially short ones.
    • Train: Amtrak’s Maple Leaf, operated with VIA Rail, runs between New York Penn Station and Toronto Union Station, with border inspection along the way. It takes most of a day, but it is scenic, runs city center to city center and suits travelers who prefer not to fly.
    • Driving: a long day’s drive through New York State, with a border crossing near Niagara Falls or Buffalo. It makes sense if you want a car in Toronto or plan to stop along the way.
    • Bus: usually the cheapest fare but the longest trip.

    For a weekend or a business trip, a flight almost always wins. For a slow trip with stops in upstate New York or Niagara, the car or train can be part of the fun.

    A step-by-step booking routine for this route

    • Decide where you are staying in both cities, so you know which airports are really convenient.
    • Search a flexible range of dates and all airport pairs; our flights from New York and flights from Toronto pages show fares across the month.
    • Shortlist a few options and add bags, seats and ground transfer costs to each.
    • Check your documents for the border before paying.
    • Book, then use the 24-hour cancellation window to double-check names and details.
    • Book a refundable hotel for the same dates, then recheck the price before the free cancellation deadline.
    • Check the events calendar. Our Toronto events and New York events pages show what is on.
    Inside a UP Express train, which links Toronto Pearson with Union Station
    UP Express links Pearson with Union Station downtown (Photo: David Wilson from Oak Park, Illinois, USA via Wikimedia Commons, CC BY 2.0)

    If you fly this route often

    New York to Toronto is a commuter route for many people: consultants, bankers, lawyers, people with family in both cities and couples splitting time between them. If you fly it several times a year, a few habits pay off.

    • Consider NEXUS. NEXUS is a joint Canada and U.S. trusted traveler program for low-risk, pre-approved travelers. According to the Canada Border Services Agency’s NEXUS page, members can use self-serve kiosks and automated gates at major Canadian airports, expedited security lines where available, and TSA PreCheck lanes at participating U.S. airports. It involves an application, a fee and an interview, and it lasts five years.
    • Pick an airline and stick with it where it makes sense. On a short route, the fare difference between airlines is often small, and the perks of status, such as free bags, better seats and priority boarding, can matter more than a small saving.
    • Learn the airport pair that works for you. Many regulars settle on one combination, such as Billy Bishop and Newark for downtown Toronto and west Manhattan, or Pearson and LaGuardia for a wider schedule.
    • Watch fares for your usual days. Set a standing price alert for your typical departure days so you notice when the route gets cheaper.
    • Keep a flexible fare in mind. If your plans change often, a fare that allows changes can cost less over a year than repeatedly forfeiting cheap nonrefundable tickets.

    Making a same-day business trip work

    A day trip between the two cities is very doable. Book the first or second flight of the morning, which is less likely to be delayed by knock-on problems, and a return in the early evening with a later backup option on the same airline. Travel with a carry-on only, keep your passport and boarding pass on your phone and in your pocket, and leave extra time in Toronto for U.S. preclearance on the way home. If your meetings are downtown, Billy Bishop can save an hour or more of ground travel compared with Pearson, which is a big share of a short day.

    Where to stay

    In Toronto, staying downtown puts you close to the CN Tower, the waterfront, the Financial District and the theaters; the Entertainment District is a popular base and is close to both Union Station and Billy Bishop. Compare prices on our Entertainment District hotels page or all Toronto hotels. For ideas on what to do, read our guide to things to do in Toronto.

    In New York, Midtown Manhattan is the classic base for first-time visitors, with easy access to Broadway and the major sights, but Brooklyn, Queens and Lower Manhattan can offer better value. Compare on our Times Square hotels page or all New York hotels, and see our guides to things to do in New York and visiting New York on a budget.

    Making the most of a weekend in Toronto

    Many New Yorkers fly to Toronto for a long weekend, and the city rewards it. Downtown is compact, transit is straightforward and most visitors can see the waterfront, the CN Tower, a museum and a couple of neighborhoods in two or three days. Flying up on Thursday evening or Saturday morning and back on Monday often costs less than the classic Friday-to-Sunday pattern, and downtown hotels that fill with business travelers midweek often cut rates on Friday and Saturday nights. Check a Blue Jays, Maple Leafs or Raptors home schedule if you want to catch a game, and remember that prices are in Canadian dollars once you arrive, which can make the trip feel better value for visitors paying in U.S. dollars, depending on the exchange rate at the time.

    Points, miles and packages

    Short cross-border flights can be good value for loyalty points, especially when cash fares are high on busy weekday flights. Compare the points price with the cash fare, and remember that taxes and fees still apply. If you fly the route often, airline status or a co-branded credit card can add free checked bags and better seats, which changes which fare is really cheapest. Flight and hotel packages are sometimes available; compare the package price with booking separately and read the change rules. For more on getting better seats, see our guide to business class upgrade hacks.

    A Porter Airlines Dash 8-400 landing at Billy Bishop Toronto City Airport
    Compare every airline and airport pair on this busy route (Photo: Fabian Roudra Baroi via Wikimedia Commons, CC BY-SA 4.0)

    Common mistakes to avoid

    • Searching only one airport pair. The cheapest and most convenient options may be at different airports.
    • Forgetting the transfer. A cheaper fare to a farther airport can cost more in time and taxis.
    • Arriving without the right document. U.S. citizens need a passport to fly to Canada; many other travelers need an eTA.
    • Underestimating preclearance. On the way back from Toronto, U.S. border formalities happen before departure; allow time.
    • Assuming a bag is included. Check the fare rules on transborder basic fares.
    • Booking a large carry-on on a small aircraft. It may be checked at the door; keep valuables in your personal item.
    • Ignoring holiday calendars on both sides. Canadian and U.S. long weekends fall on different dates.

    Frequently asked questions

    How long is the flight from New York to Toronto?

    About an hour and a half in the air, depending on the airports and routing. Allow extra time for the airport and ground transfers at both ends.

    Which airport in Toronto is best?

    Billy Bishop is best if you are staying downtown and a flight suits you. Toronto Pearson offers the most flights and airlines, and the UP Express connects it with Union Station.

    Which New York airport is cheapest for Toronto?

    It varies by date and airline. Search JFK, LaGuardia and Newark together, and include the cost and time of getting to each one.

    Do U.S. citizens need a passport to fly to Canada?

    The Government of Canada says U.S. citizens must carry proper identification such as a valid U.S. passport. They do not need an eTA. Check the official page before you travel.

    Do I clear customs in Toronto on the way back to New York?

    Usually yes. Toronto Pearson has U.S. preclearance, and Billy Bishop now offers it too, so you clear U.S. border formalities before departure and arrive in New York as a domestic passenger.

    What is the cheapest day to fly between New York and Toronto?

    Midweek and Saturday flights are often cheaper than Friday and Sunday flights. Use a fare calendar to check your dates.

    How far in advance should I book?

    About one to three months ahead for ordinary dates, and earlier for holidays and big events. Set a price alert and book when the fare is at or below the normal level.

    Is it cheaper to book a round trip or two one-way tickets?

    On this route, one-way fares are often priced reasonably, so two one-ways, even on different airlines or between different airports, can give you better times at a similar total. Compare both ways, and remember that each separate ticket has its own bag and change rules.

    Is the train a good alternative?

    It is a scenic city-center-to-city-center option, but it takes most of a day. For short trips, flying is much faster.

    Ready to book? Compare fares across a whole month on our Toronto flights page, check both Toronto airports and all three New York airports, then find a room for the same dates on our Toronto hotels page. For more on timing, read our guide to the best time to book cheap flights and hotels.

  • Last Minute Hotel Booking Guide for Travelers and Weekend Getaways

    Last Minute Hotel Booking Guide for Travelers and Weekend Getaways

    Booking a hotel at the last minute has a reputation for being either a panic purchase or a secret bargain. In reality it is both, depending on where and when you are going. On a quiet Sunday night in a city full of hotels, waiting until the day of arrival can get you a better room for less than people who booked months ago. On the night of a sold-out concert, a holiday weekend or a big convention, the same approach leaves you paying top price for whatever is left, or driving to the next town. The skill is knowing which situation you are in and having a fast, reliable process for either. This guide explains why last-minute rates move the way they do, when waiting pays, when it backfires, a step-by-step routine for booking a room in the next few days or the next few hours, and what to do if you are stranded by a cancelled flight. For the full picture of how to book any hotel well, see our pillar guide to hotel booking tips.

    The short answer

    Last-minute booking works best when there are many hotels, demand is low (weekends in business districts, weeknights in leisure areas, off-season), and you are flexible about the exact area and room type. It works worst around events, holidays, conventions and peak season, and in small destinations with only a few properties. Before you rely on it, spend two minutes checking what is happening in town on your dates. When you book, filter for your must-haves, use the map, compare the total price including taxes and fees, read a few recent reviews, and tell the hotel if you will arrive late. If you are booking tonight, a phone call to the front desk after you have compared online prices can sometimes help. You can compare what is still available for tonight or this weekend on our hotel search.

    An illuminated hotel sign on a building facade in Montreal at night
    On a quiet night, a hotel with empty rooms has every reason to lower its price (Photo: BrokenSegue via Wikimedia Commons, CC BY-SA 4.0)

    Why last-minute hotel prices behave the way they do

    A hotel room is perishable. If it is empty tonight, the revenue from tonight is gone forever. That is the core reason last-minute deals exist: as the date approaches, a hotel with unsold rooms has an incentive to lower its price or release rooms through discount channels rather than leave them empty. At the same time, hotels price dynamically based on how many rooms they have left and what their competitors charge. When a hotel is nearly full, the few remaining rooms tend to be priced high, because someone who needs a bed tonight will often pay it.

    So the price you see close to the date depends mainly on one question: how full is the city on that night? If there is plenty of spare capacity, prices tend to soften, and you have leverage. If there is not, prices climb, and you have none. Everything else in this guide is about working out which of those you face and acting accordingly.

    This is different from how many travelers think about flights, where fares often rise as departure approaches. Hotels can move in either direction, which is why a blanket rule (“always book early” or “always wait”) is wrong for hotels.

    When last-minute booking works in your favor

    • Business districts on weekends. Downtown hotels that fill with corporate travelers from Monday to Thursday often have spare rooms on Friday and Saturday nights and price them to attract leisure guests.
    • Leisure areas on weeknights. Beach towns, resort areas and weekend-getaway destinations are often quiet from Sunday to Thursday outside peak season.
    • Low and shoulder seasons. Outside the busy months, cities and resorts have more rooms than guests, and last-minute rates reflect it.
    • Big cities with lots of hotels. The more properties competing for the same guests, the more likely someone is discounting tonight.
    • Sunday nights. In many cities, Sunday is one of the quietest nights of the week: the weekend visitors have gone and the business travelers have not yet arrived.
    • When you are flexible. If you will take any well-reviewed room in a broad area, you can pick whichever hotel happens to be discounting.

    When waiting backfires

    • Events. A stadium concert, a playoff game, a marathon, a festival or a major conference can fill a city. Last-minute rooms, if any exist, are expensive and often far out.
    • Holidays and long weekends. Demand is high everywhere at once, and families book well ahead.
    • Peak season in popular destinations. Summer in national-park towns, ski weeks in the mountains, and winter in warm-weather resorts.
    • Small towns, islands and park gateways. A handful of properties can sell out completely; there is nowhere else to go.
    • Specific needs. If you need an accessible room, two beds, a family suite, a pet-friendly room or parking for a large vehicle, the choice is narrower and disappears first.
    • Weather disruptions. When storms cancel flights, airport hotels can fill within an hour as stranded passengers all search at once.

    If your trip falls into any of these, book early on a refundable rate. You can still take advantage of a price drop by rebooking before your cancellation deadline, and you are protected if prices rise.

    Hotels lining the Las Vegas Strip
    In event-driven cities like Las Vegas, one big weekend can erase every last-minute deal (Photo: Dietmar Rabich via Wikimedia Commons, CC BY-SA 4.0)

    How to check demand in two minutes

    Before you decide to wait, look for signs that the city is busy on your dates.

    • Check the event calendar. The city’s official tourism site usually lists major events and conventions; sites such as Visit Las Vegas and Destination Toronto are good examples. Our event pages for cities like Las Vegas and Toronto show concerts, games and shows on sale.
    • Run a quick search for your dates. If many well-rated hotels show availability at normal prices, you have room to wait. If results are thin, prices look unusually high, or many properties show as sold out, book now.
    • Compare with the following week. Search the same nights a week later. If the difference is large, something is happening on your dates.
    • Look at the calendar view. A flexible-date view shows which nights are expensive at a glance.

    Step by step: booking a room in the next few days

    1. Decide your must-haves quickly

    You do not have time to browse everything, so decide the few things that matter: the area, your maximum total budget, number of beds, parking if you are driving, and a minimum review score. Everything else is negotiable. Being flexible on room type (a king instead of two queens, a city view instead of a courtyard view) and on the exact neighborhood is your biggest advantage.

    2. Search and filter

    Enter the exact dates and the right number of guests, then filter for your must-haves and turn on “free cancellation” if your plans are still moving. Sort by a mix of price and rating rather than price alone; the cheapest last-minute rooms are sometimes cheap for good reason.

    3. Use the map

    Look at where the available rooms are in relation to where you need to be. Last-minute value often sits a few stops along a transit line from the center, or in a neighboring district that is less famous but just as practical. For Las Vegas, for example, compare the Strip with Downtown and Fremont Street on our Las Vegas hotel page.

    4. Compare the total, not the headline

    Last-minute prices can look attractive until taxes, resort fees and parking are added. Open the rate details and note the total. In the United States, a Federal Trade Commission rule requires hotels and booking sites to include mandatory fees in the total they show you, but optional costs like parking are still yours to add.

    5. Skim recent reviews

    You do not need to read fifty. Sort by most recent and read five or six, looking for patterns about cleanliness, noise, safety and whether the property matches its photos. A pattern of complaints is a reason to skip a hotel, however good the rate.

    6. Check the hotel’s own site

    If you have found a hotel you like, check its website with a free loyalty login. Member rates sometimes beat public prices, and booking directly makes last-minute requests (late arrival, early check-in) easier to handle.

    7. Book and confirm

    Book, save the confirmation, and if you booked through a third party close to arrival, it can be worth calling the hotel to check it has your reservation. Hotels usually receive third-party bookings quickly, but a same-day booking made late at night is exactly when a gap can cause trouble.

    Booking tonight: the same-day routine

    Same-day booking is where last-minute stays are won or lost, and it rewards a slightly different approach.

    • Search on your phone as early in the day as you can. Availability generally shrinks as the evening goes on, especially in busy areas.
    • Check same-day offers. Some booking sites and hotel apps highlight tonight’s deals when hotels want to fill rooms. Treat them like any other offer: check the total, the location and the reviews.
    • Consider calling the front desk. After you have compared prices online, a polite call to an independent or smaller hotel can occasionally get you a better rate or a small extra such as breakfast or parking, particularly on a quiet night. At large chains, the published rate is often all the desk can offer, but asking costs nothing.
    • Walk-in rates are rarely the best. Walking up to the desk without a reservation usually gets you the standard rate, and on busy nights nothing at all. Book on your phone from the lobby if you must, after comparing.
    • Tell the hotel your arrival time. If you will arrive late, say so in the booking notes or by phone. A guaranteed reservation should be held, but on a sold-out night a hotel is more likely to keep your room if it knows you are coming.
    • Have your card and ID ready. Hotels usually require a photo ID and a credit card for a hold at check-in; some do not accept debit cards for the hold, or hold more on them. Check if you are relying on debit.
    The front desk of a hotel lobby
    Walk-in rates are rarely the best; compare on your phone first, then book or ask (Photo: Unknown Photorapher via Wikimedia Commons, Public domain)

    What to do when everything nearby is sold out

    • Widen the radius along transit lines. A hotel near a train or subway station further out can be quicker to reach than one closer by road.
    • Try airport hotels. Outside flight-disruption nights, airport properties often have spare rooms, include parking, and run shuttles. Our airport guides, such as Toronto Pearson and Harry Reid in Las Vegas, explain how airports connect to the city.
    • Look at the next town. In park gateways and small destinations, the next community along the highway often has rooms when the famous one is full.
    • Change the room type. A suite, a room with one bed instead of two, or a more expensive category can still be available when standard rooms are gone. Compare the total with your other options.
    • Consider other accommodation. Hostels with private rooms, apartment-style hotels and inns sometimes have last-minute space. Check cancellation terms and check-in arrangements, which can be less flexible late at night.
    • Check again later. Cancellations happen, especially the day before and the morning of, as travelers with flexible bookings change plans. A property shown as sold out in the morning may have a room by afternoon.

    Stranded by a flight delay or cancellation

    One of the most stressful last-minute bookings is the one you did not plan: a delayed or cancelled flight that leaves you overnight in a city you only meant to pass through. Before you book and pay for a room yourself, find out what the airline owes you.

    In Canada, the Air Passenger Protection Regulations set out airlines’ obligations for delays and cancellations. When the disruption is within the airline’s control, and you are kept waiting overnight, airlines are required to provide hotel accommodation and transport to it; the rules differ depending on the cause, so check the details for your situation. In the United States there is no general federal requirement for airlines to provide hotels, but the Department of Transportation’s airline customer service dashboard shows what each major U.S. airline has committed to provide when a delay or cancellation is within its control, which often includes a hotel.

    In practice:

    • Ask the airline first, at the counter, in the app or by phone, whether it will provide a hotel voucher or reimburse you.
    • If you book yourself, book quickly. On a night of mass cancellations, airport hotels fill fast. A refundable rate protects you if the airline then offers a room.
    • Keep every receipt for the room, meals and transport, and note the reason the airline gave for the disruption.
    • Look beyond the airport. If the airport hotels are full, properties along a train line into the city may have rooms and be cheaper.

    Last-minute scenarios at a glance

    SituationChance of a good last-minute rateWhat to do
    Big city, business district, weekendGoodWait if you like; compare several downtown hotels a few days out
    Beach or resort town, midweek, off-seasonGoodSame-day offers can be strong; check what is open out of season
    Big city, ordinary weeknightFairSearch a few days ahead; use the map to find value a few stops out
    Any city during a major eventPoorBook as early as possible on a refundable rate
    Holiday or long weekendPoorBook early; if late, widen the area and try airport hotels
    National-park gateway in summerVery poorBook months ahead; if late, look at the next town along the highway
    Stranded by a cancelled flightDepends on the nightAsk the airline first; book a refundable airport-area room fast if needed
    A hotel beside an airport terminal
    Airport hotels are a good fallback on normal nights and fill fast when storms cancel flights (Photo: Chris j wood via Wikimedia Commons, CC BY-SA 4.0)

    Staying safe when you book in a hurry

    Speed makes it easier to overlook things that matter. A few quick checks keep a spontaneous booking from becoming a bad night.

    • Book through known sites or the hotel’s official website. Be wary of unfamiliar sites and of phone numbers from search ads, which can lead to resellers rather than the hotel. The FTC’s travel advice covers common booking scams.
    • Read reviews about the area, not just the room. Guests often mention whether a neighborhood feels safe at night and how easy it is to reach.
    • Check the check-in arrangements if you will arrive late, especially at small properties without a 24-hour front desk. Some use key boxes or door codes, which you need in advance.
    • Pay by credit card where you can, and keep your confirmation handy.
    • Share your location with someone if you are traveling alone and arriving late somewhere new.

    Last-minute tips for specific trips

    Weekend getaways

    Look at cities where the hotel market is driven by business travel; weekends there can be excellent value. Leave on Friday afternoon, check a few days ahead for the best choice, and look for rates that include parking if you are driving. Pair the stay with a rental car on our car rental search if the destination is a drive away.

    Families

    Family rooms, suites and connecting rooms are the first to go, so last-minute family trips need more flexibility or a fallback such as an apartment-style hotel. For planned family travel, our guide to the best time to book hotels for family vacations explains how far ahead to book around school holidays.

    Business trips booked at short notice

    Check your company’s travel policy and negotiated rates first; many corporate rates stay available close to the date. Prioritize location near your meeting and a reliable late check-in. Our business travel hotels guide covers what matters most on a work trip.

    Canada in summer

    Major Canadian cities have busy summers and big-event weekends, and park towns fill well ahead. Last-minute value is easier to find in the shoulder seasons. Our guide to hotel booking in Canada covers seasons and neighborhoods, and you can check availability in Toronto, Montreal or Vancouver.

    Common last-minute mistakes

    • Waiting without checking the event calendar. One concert can erase every deal in town.
    • Booking the cheapest room without looking at the map. A long commute costs time and money.
    • Ignoring fees. Resort fees and parking can turn a bargain into an ordinary rate.
    • Skipping the reviews. A pattern of complaints is a warning, whatever the price.
    • Not telling the hotel you will arrive late. On a full night, it helps to make sure your room is held.
    • Paying for a room the airline should have provided. Ask first, keep receipts.

    Frequently asked questions

    Are last-minute hotel bookings cheaper?

    Sometimes. When a city has plenty of empty rooms, hotels often lower rates close to the date. When it is busy, prices usually rise. Check demand for your dates before deciding to wait.

    What is the best time of day to book a hotel for tonight?

    As early in the day as you can. Availability tends to shrink through the evening, particularly in busy areas, even if an occasional late discount appears.

    Is it cheaper to walk in without a reservation?

    Rarely. Walk-in guests usually get the standard rate, and on busy nights there may be nothing available. Compare prices on your phone first, then book or ask the desk to match what you see.

    Can I book a hotel for the same day and check in immediately?

    Usually, yes, from the hotel’s standard check-in time. Early check-in depends on whether a room is ready; ask when you book or call ahead.

    What happens if I arrive very late?

    A guaranteed reservation should be held for your arrival, but tell the hotel your expected time. Small properties without a 24-hour desk may need to send you entry instructions in advance.

    Does the airline have to pay for my hotel if my flight is cancelled?

    It depends on where you are flying and why the flight was cancelled. In Canada, the Air Passenger Protection Regulations require hotel accommodation in certain situations within the airline’s control. In the United States, check the Department of Transportation dashboard for your airline’s commitments.

    Which days are best for last-minute deals?

    In business-oriented cities, Friday, Saturday and especially Sunday nights. In leisure destinations, weeknights outside peak season.

    Last-minute booking rewards preparation more than luck: know whether the city is busy, stay flexible on area and room type, compare the total price, and book quickly once you find a good option. See what is still available for your dates on our hotel search, check last-minute flights if you still need to get there, and read our guide to finding the best hotel deals online for more ways to save.

  • How to Save Money for a Trip While Still Enjoying Everyday Life

    How to Save Money for a Trip While Still Enjoying Everyday Life

    Most people who want to travel more are not short of ideas. They are short of a plan for paying for it that does not involve giving up everything they enjoy for a year. The good news is that saving for a trip works best when it is boring and steady rather than heroic: a clear number, a separate account, an automatic transfer, a few swaps in how you spend, and a trip designed to cost less in the first place. This guide walks through the whole process in order, from pricing the trip honestly to keeping the budget intact once you land, with a worksheet you can copy, a sample timeline and the mistakes that quietly drain travel funds. It is part of our destinations and planning series; if you have not chosen where to go yet, start with our guide to budget travel destinations, because the destination you pick is the biggest saving of all.

    The short answer

    Price the whole trip, not just the flight, and add a buffer. Divide that total by the number of months until you leave to get a monthly target. Open a separate savings account for the trip and set up an automatic transfer on payday, so the money moves before you can spend it. Make the trip itself cheaper by choosing the season, the destination and the number of stops carefully. Trim spending by swapping, not stopping: cheaper versions of the things you enjoy rather than cutting them out. Put windfalls and side income straight into the fund. And book the big pieces at the right time, watching fares on our flight search while you save so you know when the price is right.

    A glass-jar piggy bank holding coins saved for a trip
    A separate, clearly labeled travel fund is the single most effective saving habit (Photo: stevepb via Wikimedia Commons, CC0)

    Step 1: Put an honest number on the trip

    A vague goal like “go to Europe next year” is easy to postpone. A number is not. Before you save anything, price the trip as if you were booking it today, category by category. Search real flights for your likely dates on our flight search and real rooms on our hotel search, rather than guessing, since guesses are almost always too low.

    CostWhat to includeCommonly forgotten
    FlightsRound trip or open-jaw fare for every travelerChecked and carry-on bag fees, seat selection, getting to and from your home airport
    AccommodationTotal for every night, after taxesResort or destination fees, city tourist taxes, parking, deposits
    Food and drinkA realistic daily figure per personCoffee, snacks, water, tips where customary
    Local transportTransit passes, trains between cities, taxisAirport transfers at each end, fuel and tolls if you rent a car
    ActivitiesMuseums, tours, events, day tripsAdvance-booking fees, guide tips, equipment rental
    Documents and healthPassport renewal, visas or travel authorizationsVaccinations, prescriptions, travel insurance
    Before you goLuggage, adapters, clothing you genuinely needPet or house sitting, time off without pay
    BufferAround 10 to 15 percent of the totalCurrency swings and price rises between now and the trip

    If you are renting a car, add insurance, young-driver fees and one-way charges; our rental car booking tips list the extras that catch people out. For hotels, compare the total price, not the nightly rate, as our hotel booking tips explain.

    Step 2: Turn the total into a monthly target

    Once you have a total, divide it by the number of months until you need the money. That is your monthly target. Divide the monthly figure by four and a bit to get a weekly one, which some people find easier to picture.

    As a purely illustrative example, suppose the trip comes to $2,400 including the buffer, and you are leaving in eight months. That is $300 a month, or roughly $70 a week. If that feels impossible, you have three levers: save for longer, make the trip cheaper (Step 3), or find extra income (Step 8). What does not work is picking a target you cannot sustain and hoping. A smaller amount that you transfer every single month beats a heroic figure that collapses in month two.

    Remember that some costs come early

    You will not pay for everything on departure day. Flights are usually paid in full when you book, often months ahead. Many hotels charge only at check-in on refundable rates, but prepaid and nonrefundable rates are charged up front. Deposits for tours, rail passes and events come due at booking. Map out roughly when each large payment will fall, so you know the fund needs to reach, say, the price of the flights by the time fares look good, rather than the full total.

    Step 3: Make the trip cheaper before you save a cent

    Trimming your coffee budget helps. Choosing a cheaper version of the trip helps far more. Before you commit to a savings target, look hard at the decisions that set it.

    Choose the destination for daily costs, not just the fare

    A trip is the flight plus every day on the ground. A week in a city where rooms and meals are inexpensive can cost far less than a week somewhere with a cheaper flight but Western capital prices. Our budget travel destinations guide profiles ten places that give you a lot for your money, and our guide to New York on a budget shows how even an expensive city can be done cheaply.

    Travel in the shoulder season

    The weeks either side of a destination’s peak season usually bring lower fares and room rates with weather that is still good. For Europe, that often means late spring or early fall; our guide to the best places to visit in Europe in fall covers the autumn options, and our guide to the best time to book cheap flights and hotels explains booking windows.

    Fewer stops, longer stays

    Every extra city adds a train or flight, a first night of higher spending and time lost in transit. If you are planning a multi-country trip, our guide to traveling Europe on a multi-city itinerary shows how to route it efficiently, including open-jaw flights that avoid backtracking.

    Consider closer, cheaper alternatives

    A road trip or a short flight can deliver a great break for a fraction of a long-haul trip. Our list of America’s most unique state parks and our roundup of relaxing vacations for doing absolutely nothing both include options that are easy on the budget.

    Step 4: Give the trip its own account

    Money that sits in your everyday account gets spent. Money in a separate account with the trip’s name on it tends to stay put. This is the single most effective step in the whole process.

    • Open a separate savings account or a labeled savings “goal” inside your existing bank. Name it after the trip: “Lisbon, May” works better than “Savings 2”.
    • Choose an account that pays interest and does not charge monthly fees. Over a year of saving, interest will not pay for the trip, but it helps and it costs you nothing.
    • Keep it insured and accessible. For money you will need within a year or two, a deposit account covered by deposit insurance is the right home, not investments that can fall in value just before you book. In Canada, eligible deposits at member institutions are protected by the Canada Deposit Insurance Corporation; in the United States, by the FDIC at insured banks. Check that your institution is a member and what is covered.
    • Consider the tax wrapper, if you have room. Canadians can hold savings inside a Tax-Free Savings Account, where interest is not taxed; read the contribution and withdrawal rules before you use one for a short-term goal.

    Automate the transfer

    Set up an automatic transfer from your main account to the travel account on the day your pay arrives. If you are paid every two weeks, split the monthly target across both paydays. Automating removes the monthly decision, and the decision is where saving usually fails.

    Step 5: Find out where your money actually goes

    You do not need to become a spreadsheet obsessive. You do need a month of honest information. Most banking apps categorize spending automatically; if yours does not, a simple note on your phone works. Track these for one month:

    • Food: groceries, takeout, restaurants, coffee and snacks, listed separately.
    • Transport: fuel, parking, transit, taxis and ride-hailing.
    • Subscriptions: streaming, apps, gyms, memberships, software.
    • Small extras: impulse buys, convenience-store runs, delivery fees.

    The point is not to feel guilty. It is to find two or three categories where the money is not buying much happiness. Almost everyone finds at least one subscription they forgot about and one habit that costs more than they thought. The Financial Consumer Agency of Canada and the US Consumer Financial Protection Bureau both publish free budgeting tools and worksheets if you want more structure.

    Step 6: Swap, don’t stop

    The fastest way to abandon a savings plan is to cut out everything you enjoy. The better approach is to keep the experiences and choose cheaper versions of them. You still have a life; you just spend on it more deliberately.

    • Eating out three times a week? Make it once, and turn one of the others into a dinner you cook with friends.
    • Daily café coffee? Keep the weekend one as a treat and make it at home on weekdays.
    • Several streaming services? Keep one at a time and rotate every few months.
    • Nights out? Look for free events, happy hours and local festivals, or host at home.
    • Takeout lunches at work? Bring lunch three days out of five.
    • Shopping as entertainment? Replace it with something free: a hike, the library, a museum’s free evening.

    Every time you make a swap, move the difference into the travel account the same day. Many banking apps let you transfer small amounts in seconds. Seeing the balance grow because of a specific choice is what makes the habit stick.

    Step 7: Build small habits that add up

    Individual habits save little on any given day. Across months, they are the difference between reaching the target and falling short.

    • Plan meals for the week and shop with a list; food waste is money in the bin.
    • Carry a water bottle and snacks so you are not buying them on the go.
    • Walk or cycle short trips instead of driving or taking a cab.
    • Wait 48 hours before any non-essential purchase over a set amount. Most impulses fade.
    • Round up. Some banks round every card purchase up and move the change into savings automatically. Point that feature at the travel account.
    • Review bills once. A single afternoon spent calling your phone, internet and insurance providers to ask for a better rate can free up money every month for the rest of the year.

    Step 8: Add income, not just cuts

    Cutting spending has a floor. Earning a little more does not. You do not need a second full-time job; a few small streams directed straight into the travel account can shorten your timeline noticeably.

    • Sell what you do not use. Old electronics, sports gear, furniture, clothes and books can add up to a meaningful sum, and decluttering before a trip feels good.
    • Freelance or tutor in a skill you already have, such as design, writing, coding, music or languages.
    • Take occasional paid work like event staffing, pet sitting or seasonal shifts.
    • Redirect windfalls. Tax refunds, work bonuses, cash gifts and rebates go straight into the fund, or at least half of them do.

    Keep records of any side income, since it may be taxable where you live. And keep the rule simple: side money goes to the trip, the main salary covers life.

    Clothes and travel essentials being packed into an open suitcase
    Packing light is a saving in itself: it keeps you clear of bag fees on low fares (Photo: Angelina Litvin linalitvina via Wikimedia Commons, CC0)

    Step 9: Use rewards carefully, and never pay interest

    Credit card points, airline miles and hotel loyalty programs can cover a flight or a few nights, but only if you use them in a way that costs you nothing extra.

    • Pay the full balance every month. Card interest will wipe out the value of any rewards many times over. If you cannot pay in full, the rewards are not worth having.
    • Put everyday spending you would make anyway on one rewards card, rather than spreading it across several.
    • Join the free loyalty program of the airline or hotel group you use most. Member rates and small perks are free money.
    • Do not buy things to earn points. A purchase you did not need is not a saving.
    • Look for a card without foreign transaction fees if you will spend abroad; the fee applies to every purchase in another currency.

    Never put the trip itself on a card you cannot pay off. Travel on credit means paying interest on a vacation long after you are home.

    Step 10: Book the big pieces at the right moment

    Saving and booking run side by side. While the fund grows, watch prices so you know what a good fare looks like for your route.

    Flights first

    Fares are usually the most volatile part of the trip, so they are the first thing to lock in once the price is right and the fund can cover it. Search a whole month of dates to see where prices dip, check nearby airports, and read the fare rules before you pay. Our international flight booking tips cover connections, bags and layovers, and our guide to planning a trip with TicketScanner shows how to use flexible dates and fare calendars on this site.

    Rooms on flexible terms

    Once flights are booked, reserve accommodation on a refundable rate if the price difference is small. You hold the room without tying up the whole cost, and you can rebook if prices drop before your cancellation deadline.

    Everything else last

    Tours, rail tickets and event seats can often wait until closer to the date, unless they are known to sell out. Rail fares in parts of Europe do rise closer to departure, so book those once your route is firm.

    Step 11: Celebrate milestones and protect your sanity

    Saving for months with no reward is how people give up. Build in small wins.

    • At a quarter of the target: a modest treat, like a meal out.
    • At half: book one part of the trip, such as the flight, so it becomes real.
    • At three quarters: buy one useful item you will take, like a good daypack or a money belt.
    • At the target: finalize the plan and enjoy the anticipation, which for many people is half the fun.

    Keep a small, fixed “fun budget” each month that you spend without guilt. Do not compare your saving speed with anyone else’s. And remember that a trip is part of a good life, not a reason to put life on hold.

    Euro banknotes and coins spread on a table
    Pay in the local currency and use bank ATMs, not airport exchange desks (Photo: Avij (talk · contribs) via Wikimedia Commons, Public domain)

    Step 12: Keep the budget intact once you land

    All that saving is wasted if the money leaks away in the first three days. A few habits keep spending on track.

    • Set a daily budget from your plan and check it each evening; it is easier to adjust on day two than on day ten.
    • Pay in the local currency. When a card terminal offers to charge you in your home currency, decline; the conversion rate is usually worse.
    • Use bank ATMs rather than airport exchange desks for local cash.
    • Eat your big meal at lunch, when set menus are cheaper, and shop in markets.
    • Use transit passes and walk; taxis are where daily budgets break.
    • Buy travel insurance before you go. An emergency abroad can cost more than the whole trip. The Government of Canada explains what to look for in its guide to travel insurance.

    A sample savings timeline

    Time before the tripWhat to do
    9 to 12 monthsChoose the destination and season, price the trip, open the travel account, start the automatic transfer
    6 to 9 monthsTrack a month of spending, make your swaps, sell unused items, start watching fares
    3 to 6 monthsBook flights when the price is right, reserve refundable rooms, check passport validity and entry rules
    1 to 3 monthsBook rail, tours and events that sell out; buy insurance; set the daily budget
    Final weeksRecheck room prices and rebook if lower, get local currency or a no-fee card, pack light to avoid bag fees

    For a long-haul trip such as Japan, start at the top of that range. For a short city break, you can compress it into a few months.
    A departures board listing flights at Miami International Airport
    Book the flight first once the fare is right and the fund can cover it (Photo: Bobby Hidy via Wikimedia Commons, CC BY-SA 2.0)

    Mistakes that drain a travel fund

    • Pricing only the flight. Accommodation, food and transport usually cost more in total.
    • No buffer. Prices rise, exchange rates move, and something always comes up.
    • Keeping the fund in your everyday account. It will be spent.
    • Dipping in for non-travel expenses. Keep a separate emergency fund, so the trip money is not your safety net.

    • Booking nonrefundable too early. Save the cheapest prepaid rates for plans that are fixed.
    • Ignoring bag fees. A low fare plus two checked bags each way can cost more than a higher fare that includes them.

    • Financing the trip. Buy-now-pay-later and card balances turn a vacation into a debt.

    Frequently asked questions

    How much should I save for a trip?

    Price your specific trip: flights, every night of accommodation after taxes, a daily figure for food and local transport, activities, insurance and documents. Then add a buffer of around 10 to 15 percent. That total, not a generic estimate, is your target.

    How far in advance should I start saving?

    For a long-haul trip, six to twelve months gives you time to save steadily and book flights at a good moment. For a short domestic break, two or three months can be enough.

    Where should I keep my travel savings?

    In a separate, fee-free savings account that pays interest and is covered by deposit insurance. Money you need within a year or two should not be in investments that can drop in value right before you book.

    Is it better to cut spending or earn more?

    Both, but spending cuts have a limit. Small, consistent swaps plus a little extra income, directed straight into the travel account, is usually the fastest route.

    Should I use a credit card to pay for travel?

    A card can offer purchase protection and rewards, which is useful, but only if you pay the balance in full. Never carry a travel balance at interest.

    What is the biggest single way to save on a trip?

    Choosing when and where you go. Traveling in the shoulder season to a destination with low daily costs saves more than any amount of coupon-clipping.

    Can I save for a trip on a low income?

    Yes, with a smaller target and a longer timeline. Choose a closer or cheaper destination, travel off-peak, and automate even a small weekly transfer. Consistency matters more than the size of each deposit.

    Ready to turn the plan into a trip? Price your flights on our flight search to set a realistic target, compare rooms on our hotel search, and if you are still choosing where to go, browse our budget travel destinations for places where your savings will stretch furthest.