Author: admin

  • Hotel Booking Tips to Find the Best Deals Online

    Hotel Booking Tips to Find the Best Deals Online

    Online, the same hotel room can be listed at several different prices on the same afternoon. The differences come from the site you look at, the rate conditions attached, whether you are signed in to a loyalty program, whether the room is bundled with a flight, and which taxes and fees are included in the number you see. None of that is a trick you need insider knowledge to beat. It is a set of rules you can learn in an hour. This guide explains how online hotel pricing works, how to compare offers properly, where the genuine discounts are (member rates, memberships, bundles, flexible dates and neighborhoods), which popular “hacks” are overstated, and how to book safely so the deal you found is the deal you get. For the full booking process from choosing a neighborhood to checkout, start with our pillar guide to hotel booking tips.

    The short answer

    Use a comparison search to see the market for your dates, shortlist two or three properties, and compare them on the total price for the whole stay, including taxes and fees, with the same room type and cancellation terms. Then open each hotel’s own website, sign in to its free loyalty program, and see whether the member rate or the terms are better. Check whether you qualify for a membership rate such as an auto club discount. If you are also flying, price a flight-and-hotel bundle against booking separately. Book a refundable rate if there is any doubt, and check again before your cancellation deadline in case the price drops. You can run the first step on our hotel comparison search.

    Hands typing on a laptop keyboard while comparing options online
    Use comparison tools to find the hotel, then compare the total price and terms for that exact room (Photo: Simon Hattinga Verschure webmarbles via Wikimedia Commons, CC0)

    How online hotel prices work

    Hotels price rooms dynamically. The rate for a given night moves with demand: how many rooms are already sold, what competing hotels are charging, whether there is an event in town, and how close the date is. That is why the same room can cost very different amounts on a Tuesday in February and a Saturday in July, and why the price you saw yesterday may have changed today.

    The same room is also sold through several channels at once. The hotel sells it on its own website and through its phone reservations team. Online travel agencies sell it, sometimes under their own terms. Comparison sites and metasearch engines do not usually sell rooms themselves; they collect prices from many sellers and show them side by side, then send you to the seller to book. Most of the time, the prices across channels are similar, because hotels generally try to keep their public rates consistent. The differences tend to show up in the details: member-only prices, package rates, different cancellation terms, or whether breakfast is included.

    Understanding this changes how you shop. Instead of hunting for one site that is always cheapest, which does not exist, you use comparison tools to find the right hotel at the right price range, and then look for the best combination of price and conditions for that specific room.

    Step by step: comparing offers properly

    1. Search with your real details

    Enter your exact dates, the correct number of adults and children, and the number of rooms. Prices change with occupancy, and a price for two adults may not cover a third guest or an older child. If your dates are flexible, check a flexible-date or calendar view first to see which nights are cheaper before you commit.

    2. Filter hard before you browse

    Set your must-haves as filters: price range, neighborhood or distance, guest rating, free cancellation, parking, breakfast, pool, accessibility features. Sorting by “lowest price” without filters tends to surface properties that are cheap for a reason, in the wrong place, or with conditions you will not want.

    3. Use the map

    The map view is the most underused tool on any hotel search. It shows at a glance which areas are expensive and which are cheaper but still close to transit or the places you want to be. Often the best value is a few blocks outside the most famous district, or one or two stops along a subway line. In Paris, for example, you can compare hotels in Le Marais with the rest of the city on our Paris hotel page, and weigh them against the sights you plan to see in our guide to things to do in Paris.

    4. Compare totals, not headline rates

    Open the rate details for each finalist and note the total for the stay, including taxes and any mandatory fees. The rules are on your side here: in the United States, a Federal Trade Commission rule requires hotels and booking sites to show the total price, including mandatory fees such as resort fees, up front; in Canada, the Competition Bureau treats advertising a price that leaves out unavoidable fees as drip pricing. Optional costs are still yours to add, so include parking if you are driving and breakfast if you would otherwise buy it.

    5. Compare like with like

    A price is only cheaper if it buys the same thing. Check that you are comparing the same room category and bed configuration, the same cancellation policy, and the same inclusions. A nonrefundable room with no breakfast at a slightly lower price is not a better deal than a flexible rate with breakfast, unless you are certain of your dates and do not eat breakfast.

    6. Check the hotel’s own site

    Once you have a favorite, open the hotel’s official website, sign in or join its loyalty program, and search the same dates. You may find a member rate below the public price, an added perk, or more generous cancellation terms. You may also find it is the same or higher, in which case book wherever the total and terms are best.

    7. Book, then keep watching

    If you booked a refundable rate, check the price again a week or two before arrival. If it has fallen, make a new reservation at the lower price and then cancel the original, while you are still inside the free cancellation window. Some sites offer price alerts that do this watching for you.

    Where the genuine discounts are

    Loyalty program member rates

    This is the most reliable discount in hotels, and it is free. Every major hotel group, such as Marriott Bonvoy and Wyndham Rewards, runs a loyalty program you can join online in a couple of minutes, and members usually see a lower rate when booking directly than the general public does. Members may also get free Wi-Fi at some brands, points toward future free nights, and, with status, perks like late checkout or upgrades. Joining the program for the hotel you are booking is worth it even for a single stay. Note that bookings made through third-party sites often do not earn points or recognize status.

    Membership and affiliation rates

    Many hotels offer discounted rates for members of certain organizations. Auto club members through CAA in Canada or AAA in the United States often qualify for discounts at participating hotels, and seniors, military members, government employees and some students can find specific rates too. The catch is eligibility: hotels may ask to see a membership card or ID at check-in, and if you cannot show it, the rate can be changed. Book these rates only if you genuinely qualify.

    App-only and mobile rates

    Some hotel chains and booking sites offer lower prices or extra points for booking in their app. It is worth checking when you already have the app, but compare the total and the cancellation terms as you would anywhere else. A mobile rate that is nonrefundable is not automatically a deal.

    Newsletters and promotions

    Hotel groups run seasonal promotions for their members, such as bonus points, a free night after a certain number of stays, or discounted weekend rates. Signing up for the emails of the one or two groups you use most keeps you aware of them without much effort. Combining a promotion with points you have already earned can make a stay much cheaper.

    Advance-purchase rates

    If your dates are completely fixed, a prepaid, nonrefundable rate is often noticeably cheaper than the flexible one. It is a genuine saving, but the trade-off is real: if you cannot travel, you usually lose the money. Use it for trips you are certain about, such as a wedding or a conference you have already registered for.
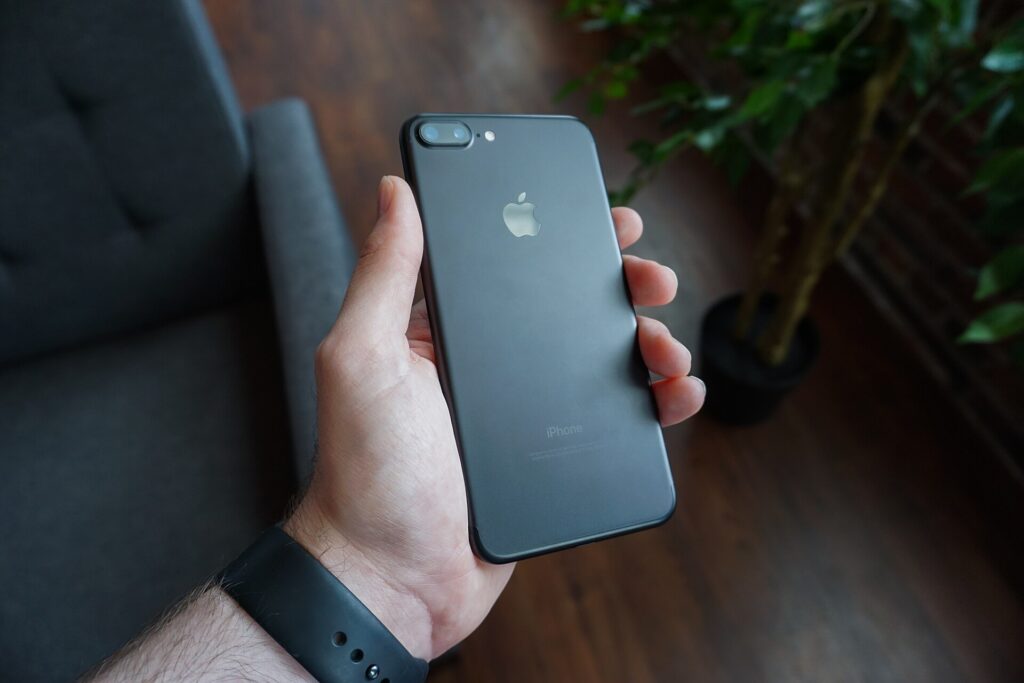
    A hand holding a smartphone
    App-only rates can be worth a look, but compare the total and the cancellation terms like any other offer (Photo: Dennis Cortés cortes via Wikimedia Commons, CC0)

    Bundles: flight plus hotel

    Many booking sites sell flight-and-hotel packages, and bundled prices can be lower than buying the same flight and hotel separately, because hotels and airlines sometimes offer discounted rates that are only available when the price of the individual components is hidden inside a package. Bundles are most often worth checking for resort and beach destinations and for city breaks where you would book a standard room anyway.

    They are not automatically cheaper, though, and they come with trade-offs:

    • Compare against the separate prices. Price the same flight and the same hotel on their own. Sometimes the bundle wins clearly; sometimes it does not.
    • Read the change and cancellation terms. A package is often governed by one set of rules, and changing one part can affect the other. Refund terms can be stricter than those of a flexible hotel rate booked on its own.
    • Check the flight details. Make sure the times, number of stops and baggage allowance are what you would choose if you were booking the flight alone.
    • Know who to call. With a package, changes usually go through the site that sold it, not the hotel or airline directly.

    If you prefer to book separately, pick the flight first when fares are the more volatile part of the trip, then fit a refundable hotel around it. You can compare fares on our flight search, including flights to Paris if that is where you are headed.

    Flexibility: the discount anyone can use

    Flexible dates

    Moving your stay by a day or two can change the price considerably, especially if you move away from a weekend, a holiday or an event. In business-heavy downtowns, weekend nights are often cheaper because the weekday corporate travelers have left; in leisure and resort areas, weeknights usually are. A calendar view shows the pattern for your destination in seconds.

    Flexible seasons

    Peak season (summer, the December holidays, school breaks, ski season in the mountains) is when rates are highest and the best rooms go first. If you must travel then, book early on a refundable rate. Shoulder seasons, the months either side of peak, often combine decent weather with much better prices and availability, and the low season can be very cheap in exchange for less reliable weather or shorter opening hours. Our guide to the best time to book cheap flights and hotels explains the booking windows in more detail, and our budget travel destinations guide suggests places where your money goes further.

    Flexible neighborhoods

    Being open to a neighborhood just outside the most famous area is one of the most effective ways to save. The key is transit: a hotel two subway stops from the center can be just as convenient as one in the middle, while a hotel that needs a taxi every day will eat its own savings. Check the walk to the nearest station and the journey time to the places you will visit most.

    Flexible timing: last-minute deals

    Unlike flights, hotel rooms sometimes get cheaper close to the date, because a hotel with empty rooms tonight would rather sell them at a discount than not at all. That can work well in quiet periods and in places with lots of hotels. It works badly around events, holidays and in small destinations where there are few rooms. Our last-minute hotel booking guide explains when waiting pays and when it backfires.

    Hacks that are overstated

    Travel advice is full of tricks that sound clever. A few deserve a more measured look.

    • “Always clear your cookies or use incognito mode.” It is often claimed that sites raise prices when they see you searching repeatedly. There is little solid evidence that this is common for hotels, and prices move for plenty of other reasons, such as rooms selling out. Browsing privately does no harm and can stop you from seeing results tailored to past searches, but it is not a reliable way to get a lower rate. Comparing carefully and signing in for member rates will save you far more.
    • “Booking direct is always cheapest.” Sometimes it is, especially with a member rate; sometimes a booking site or package is lower. Check both.
    • “Booking sites are always cheapest.” The same logic applies in reverse. The lowest headline price may come with stricter terms.
    • “Call the hotel and they will beat the online price.” Occasionally, especially at independent hotels on quiet nights, a polite request helps. At large chains, reservation agents often have little room to change rates. It is worth a try, but do not count on it.
    • “There is one best day of the week to book.” Prices depend on demand for the nights you are staying, not the day you happen to search. Focus on your stay dates and booking early for peak periods.

    Best-rate guarantees and price matching

    Many hotel groups offer a best-rate guarantee on their own websites: if you book directly and then find a lower publicly available price for the same room and conditions elsewhere, they will match it and sometimes add a further discount or bonus. These programs can be useful, but the terms are specific. They usually require the same hotel, room type, dates, number of guests and cancellation conditions, a claim within a short window after booking, and a price that anyone can book (not a member-only rate or a package price elsewhere). Read the program’s terms on the hotel group’s own site before relying on it.

    The Château Frontenac hotel lit up at dusk in Quebec City
    Big-name hotels often reserve their best member rates for guests who book directly and sign in (Photo: Wilfredor via Wikimedia Commons, CC0)

    Choosing where to book: a comparison

    Where you bookUsually good forWatch for
    Comparison searchSeeing many hotels and sellers side by side; spotting cheaper dates and areasFinal price and terms are set by the seller you click through to
    Online travel agencyWide choice; one account for many trips; package pricesChanges may go through the agency; loyalty points often not earned
    Hotel website, signed inMember rates, points, status benefits, easier special requestsNot always the lowest price; compare like for like
    Hotel appOccasional app-only rates or bonus points; mobile check-in at some brandsSame caution on nonrefundable rates
    Flight-and-hotel packageResort and city breaks where the bundle beats separate pricesCombined terms; changes can affect both parts
    Phone or walk-inSpecial needs, accessible rooms, independent hotels, same-day requestsRarely the lowest published rate at big chains

    Reading reviews and policies before you pay

    A low price is not a deal if the room is noisy, dirty or far from what the photos suggested. Before booking, read a handful of recent reviews, looking for patterns rather than single complaints. If several guests mention thin walls, slow elevators, weak Wi-Fi or unexpected charges, believe them. Check guest photos against the hotel’s own, and read how management responds to criticism.

    Then read the policies, which is where a lot of disappointment starts:

    • Cancellation deadline: “free cancellation” may end days before arrival, not the evening before.
    • Payment timing: “pay now” means the money leaves your account at booking; “pay at the property” means a card guarantee now and payment later.
    • Deposits and holds: most hotels place a temporary hold on your card at check-in for incidentals, which can take several days to be released.
    • Occupancy rules: check the maximum number of guests and whether children stay free and up to what age.
    • Check-in and checkout times: and whether early check-in or late checkout carries a fee.
    • Parking, pets and resort fees: confirm the amounts and whether they are per night or per stay.

    A resort hotel swimming pool surrounded by loungers and palm trees
    Resort amenities are often paid for through a mandatory daily fee; compare totals, not nightly rates (Photo: This Photo was taken by Timothy A. Gonsalves. Feel free to use my photos, but please mention me as the author. I would much appreciate if you send me an email tagooty@yahoo.com or write on my talk page, for my information. Please contact me before commercial use.

    Please do not upload an edited image here without consulting me. I would like to make corrections only at my own source to ensure that the changes improve the image and are preserved.Otherwise you may upload an edited image with a new name. Please use one of the templates derivative or extract. via Wikimedia Commons, CC BY-SA 4.0)

    Booking safely online

    A good deal is worthless if the booking does not exist. A few habits protect you.

    • Book through sites you know or the hotel’s official website. Some scam sites imitate hotel websites closely; check the web address carefully before entering card details.
    • Be careful with phone numbers from search ads. Some lead to third-party resellers or scammers rather than the hotel. Take the number from the hotel’s official site or your confirmation.
    • Pay by credit card where you can. Credit cards generally offer stronger protection if something goes wrong than debit cards or bank transfers. Never pay a hotel booking by wire transfer, gift card or cryptocurrency at someone’s request.
    • Get a confirmation number and, for bookings made through a third party, consider contacting the hotel a few days ahead to confirm it has your reservation.
    • Pay in the local currency when offered a choice abroad; converting at the point of sale often comes with a worse exchange rate than your card applies.

    The Federal Trade Commission’s consumer travel advice covers common travel scams and how to report them.

    Deal-hunting by trip type

    Family vacations

    For families, the best deal is often a room with more space rather than the lowest rate: suites, connecting rooms and apartment-style hotels with a kitchenette, plus included breakfast. School holidays push prices up early, so book as soon as dates are set. Our guide to the best time to book hotels for family vacations covers timing in detail.

    Business trips

    Check your employer’s negotiated rates first; they often include perks like free Wi-Fi or breakfast and flexible cancellation. Location near meetings is usually worth more than a small saving. Our business travel hotels guide covers what matters on a work trip.

    Canada trips

    Canadian city hotels are busiest in summer and around major events, and national-park towns fill early. Taxes vary by province and city and may be shown separately from the room rate, so compare totals. Our guide to hotel booking in Canada goes city by city.

    Tight budgets

    Combine the tactics: shoulder season, weeknights (or weekends in business districts), a well-connected neighborhood just outside the center, a member rate, and breakfast included. Our guide on how to save money for a trip covers the rest of the budget.

    Common mistakes when booking online

    • Comparing nightly rates instead of totals with taxes and fees.
    • Comparing a nonrefundable offer with a flexible one as if they were the same product.
    • Entering fewer guests than are traveling, then paying extra at check-in.
    • Booking a membership rate without being eligible, then losing it at the desk.
    • Forgetting to sign in to the loyalty program before booking directly.
    • Assuming a bundle is cheaper without pricing the parts.
    • Missing the cancellation deadline on a refundable booking that could have been rebooked cheaper.

    Frequently asked questions

    What is the best website to find cheap hotels?

    No single site is always cheapest. Use a comparison search to see many sellers at once, then check the hotel’s own site with a member login. Book where the total price and the conditions are best for you.

    Do hotel prices go up if I search repeatedly?

    There is little solid evidence that this is common for hotels. Prices change mostly because of demand and rooms selling out. Private browsing does no harm, but careful comparison and member rates save more.

    Are flight and hotel bundles really cheaper?

    Sometimes, especially for resort and city-break trips. Price the same flight and hotel separately to check, and read the package’s change and cancellation terms before booking.

    Is it worth joining a hotel loyalty program for one stay?

    Usually yes. Joining is free, and members often get a lower rate when booking directly, plus small perks such as free Wi-Fi at some brands.

    Can I get a refund if the price drops after I book?

    If you booked a refundable rate, you can often book the lower price and cancel the original before your deadline. Some hotel groups also have best-rate guarantees with specific terms.

    Why is the price higher at checkout than in search results?

    Usually taxes, optional extras you selected, or a different room or rate. Mandatory fees should be included in the total where current display rules apply; if the final price is higher than advertised, check the breakdown before paying.

    Is it safe to book hotels through third-party sites?

    Well-known sites are generally safe. Check the web address, pay by credit card, keep your confirmation, and contact the hotel before arrival if you want to be sure your reservation is in its system.

    The best online hotel deal is the right room in the right place at the lowest total price with terms that fit your plans. Start by comparing properties and totals for your dates on our hotel search, add a flight on our flight search, and read the full hotel booking tips guide for everything from choosing a neighborhood to what to check at the front desk.

  • International Flights Booking Tips: How to Save Money and Travel Smart

    International Flights Booking Tips: How to Save Money and Travel Smart

    An international flight is usually the largest single cost of a trip abroad, and it is the booking with the most ways to go wrong. The fare you see first depends on the dates, the airports, the routing and the fare brand. The price you actually pay depends on bags, seats and the currency you are charged in. And a flight that looks perfect on screen can still leave you stranded at a connection, turned away at check-in for a passport that expires too soon, or arriving at dawn with nowhere to sleep. The good news is that a handful of habits fix almost all of it. This guide walks through how to find a good international fare, how to choose a routing and a connection you can trust, what to check before you pay, the entry documents to sort out first, and the mistakes that cost travelers the most money and stress.

    The short answer

    If you only remember a handful of things, make it these. Check your passport and entry requirements before you book, not after. Search flexible dates and nearby airports, because a one-day shift or a different departure city often saves more than anything else. Book long-haul trips roughly two to six months ahead, earlier for summer in Europe and the December holidays. Keep connections on one ticket whenever you can, and allow more time than the minimum. Compare the full price, with bags, seats and change conditions, not the headline fare. And read the fare rules before you pay, so you know what happens if your plans change. You can compare international fares across a whole month on our flight search.

    An Air Canada Boeing 787 Dreamliner departing Toronto Pearson
    Long-haul fares are often at their best two to six months out, earlier for summer and the holidays (Photo: BriYYZ from Toronto, Canada via Wikimedia Commons, CC BY-SA 2.0)

    Step 1: Sort out passports and entry rules first

    It sounds backward to think about documents before fares, but it is the order that saves money. An airline will deny boarding if you do not meet the entry rules of your destination, and a nonrefundable ticket will not be refunded because your passport was the problem.

    Passport validity

    Many countries require your passport to be valid for a period beyond your stay, commonly three or six months, and some require blank pages for stamps. For most of the Schengen area in Europe, the rule is that your passport must have been issued within the previous ten years and remain valid for at least three months after you plan to leave. Several countries in Asia, the Middle East and Latin America ask for six months of validity on arrival. If your passport is close to expiry, renew it before you book. Canadians can check timelines on the Government of Canada passport page, and U.S. citizens on the State Department passport page.

    Visas and electronic travel authorizations

    More and more countries that do not require a visa now require an online authorization before you fly. The United Kingdom’s Electronic Travel Authorisation (ETA) applies to most visa-exempt visitors, including Canadians and Americans. The United States requires an ESTA for travelers under the Visa Waiver Program; Canadian citizens are exempt. Canada requires an eTA for most visa-exempt visitors arriving by air. The European Union is introducing a digital Entry/Exit System and an authorization called ETIAS for visa-exempt visitors; the official EU travel site has the current status. Apply only through official government websites, since lookalike sites charge extra for the same form.

    Transit counts too

    Your connection airport has rules of its own. The United States has no airside international transit, so every passenger connecting through a U.S. airport must be admissible to the U.S., with an ESTA or visa as required, even if you never leave the airport. Canada, the United Kingdom and other countries have transit requirements for certain nationalities. Check the rules for every country you will touch before choosing a routing. Your government’s travel advice, such as Canada’s travel advice and advisories, lists entry requirements and safety information by destination.

    Once you have confirmed you can go, keep your documents organized for the day; a simple passport holder helps keep your passport, boarding pass and printouts together.

    Step 2: Choose your dates with demand in mind

    International fares follow demand closely. Summer in Europe, the December holidays, spring break for beach destinations and major national holidays in your destination all push prices up. The shoulder seasons, April to early June and September to October for much of the Northern Hemisphere, usually offer the best mix of price and weather. Our pillar guide to the best time to book cheap flights and hotels goes through the seasons and booking windows in detail.

    Day of the week

    Midweek departures, often Tuesday and Wednesday, and sometimes Saturday, are frequently cheaper than Friday and Sunday. On long-haul routes with one flight a day, the pattern can be weaker, so use a fare calendar to see the cheapest days for your specific route rather than relying on a rule.

    How far ahead to book

    For long-haul international trips, fares are often at their best somewhere around two to six months before departure. Book toward the earlier end for July and August in Europe, Christmas and New Year, and any trip tied to school holidays, because the cheapest fare levels on those dates sell first and rarely come back. For off-peak trips, you can watch longer and book when a good fare appears. Set a price alert as soon as you start planning; it teaches you what a normal fare looks like for your route, so you recognize a good one when you see it.

    Sales

    Airlines run international fare sales several times a year, with the late-November Black Friday and Cyber Monday period among the most dependable. Sale fares are often valid for winter and spring travel and come with tight conditions. Our guide to Cyber Monday flight deals explains how to judge them.

    Step 3: Widen your airport search

    Flexible airports are one of the most reliable ways to save on international flights. Fares vary between airports because of competition, the airlines that serve them and airport charges.

    • Departure airports: if you live between two cities, price both. In Canada, a larger hub such as Toronto, Montreal or Vancouver usually has more nonstop international flights and more competition than a smaller airport, which can outweigh the cost of getting there. Some Canadians also compare U.S. border airports; include parking, the drive and currency when you do.
    • Arrival airports: many big destinations have several airports. In New York, compare JFK, Newark and LaGuardia. In London, Heathrow, Gatwick, Stansted and Luton all see international flights. In the San Francisco Bay Area, compare SFO with Oakland and San Jose. In Paris, compare Charles de Gaulle and Orly.
    • Nearby cities: flying into a major hub and taking a train can beat flying directly to a smaller city, especially in Europe. For multi-country trips, our guide to traveling Europe on a multi-city route explains how to plan it.

    Always price the transfer. A cheaper fare into an airport an hour and a half from your hotel can cost more once you add a train, a taxi or a night’s parking at home. Our airport guides, such as London Heathrow and Paris Charles de Gaulle, cover the ground transport options.

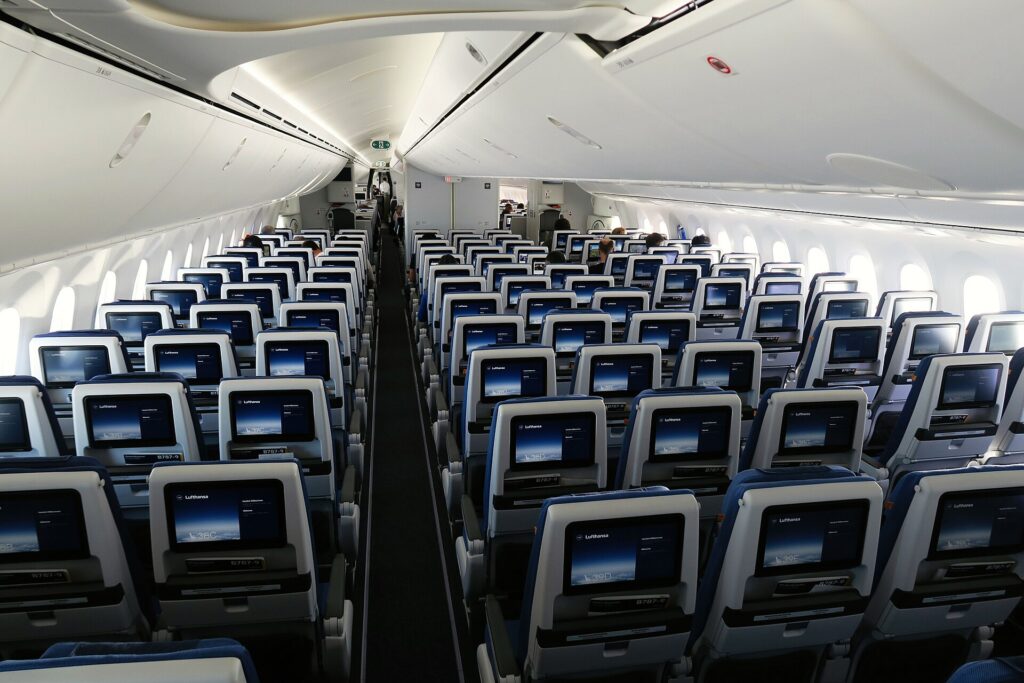
    Rows of economy seats with seatback screens in a Boeing 787 cabin
    On long overnight flights, the routing and the cabin matter as much as the fare (Photo: Cityswift via Wikimedia Commons, CC BY 2.0)

    Step 4: Pick a routing you can live with

    The cheapest international fares often involve a connection, and the connection is where most trips go wrong. Weigh time, reliability and comfort alongside price.

    Nonstop versus one stop

    A nonstop flight costs more on many routes, but it removes the risk of a missed connection and saves hours. On long-haul trips, a single well-timed connection at a major hub is often a reasonable compromise. Two or more connections to save a small amount is rarely worth it.

    Choose the hub, not just the fare

    If you connect, where you connect matters. Large hubs have more flights, so if you miss a connection there are more options to rebook you. Some airports are easier to connect through than others: a connection that requires changing terminals, clearing immigration, rechecking bags and going through security again takes much longer than one within the same terminal. Connecting through the United States always involves immigration and customs, so allow extra time.

    How much connection time to allow

    Airlines and airports set a minimum connection time, and a ticket sold with a connection meets that minimum on paper. In practice, give yourself more when you can: on international itineraries, a buffer of two hours or more is more comfortable than the bare minimum, especially at large airports, in winter, when you are traveling with children, or when you must clear immigration during the connection.

    One ticket, or separate tickets?

    This is the single most important routing decision. When all your flights are on one ticket, the airline is responsible for getting you to your destination if a delay makes you miss a connection, and your checked bags are usually transferred for you. When you book separate tickets, for example a long-haul flight to London and a separate low-cost flight to Italy, each airline treats its flight as the whole journey. If the first is late and you miss the second, you may lose the second ticket and have to buy another. If you do combine separate tickets, leave several hours between them, or better, stay a night at the connecting city, and budget for the risk.

    Open-jaw and multi-city tickets

    You do not have to fly in and out of the same city. An open-jaw itinerary, such as flying into Paris and home from Rome, often costs about the same as a round trip and saves you backtracking. Use the multi-city search option to price it. Our Rome and Paris timing guides help you choose which end to start from.

    Step 5: Compare the full price

    International fares are increasingly sold in fare brands, often called something like basic, standard, flexible and premium. They share the same seat but differ in what is included. The cheapest brand on some airlines, even on long-haul routes, may exclude a checked bag, advance seat selection, changes or refunds.

    What to checkWhy it mattersTip
    Checked baggageSome long-haul basic fares do not include a checked bagCompare the fare with a bag included; adding a bag later can cost more
    Carry-on allowanceSize and weight limits vary by airline, and some have weight limits on cabin bagsCheck each airline on your itinerary; see our carry-on size guide
    Seat selectionFamilies and couples who want to sit together may need to payCheck whether seats can be chosen free at check-in
    Changes and refundsThe cheapest brands are often nonrefundable and unchangeableIf your dates might move, the flexible brand is effectively insurance
    Mixed airlinesDifferent airlines on one ticket may have different bag rulesThe rules of the airline operating the longest or first flight often apply; confirm with the booking
    CurrencyPaying in a foreign currency can add card fees; paying in your home currency on a foreign site can add a poor exchange rateUse a card without foreign transaction fees where you can

    A fare that looks slightly more expensive but includes a checked bag and a seat can easily win once extras are added. Our flight details guide explains how to read fare brands and baggage allowances on your itinerary.

    Premium economy, business and upgrades

    On long overnight flights, a better cabin can be worth more than on any other trip. Premium economy, where offered, gives more space for a moderate premium. Business class on long-haul routes usually means a flat bed. Prices swing widely by route and date, and upgrade offers sometimes appear after booking. Our guides to business class upgrade strategies and the difference between first and business class explain when paying up makes sense.

    Step 6: Compare booking channels

    Use a comparison search to find the best combination of dates, airports and airlines, then check the booking terms before you pay. Booking directly with the airline can make changes and disruption handling simpler, because you deal with one company. Travel agencies and online agencies can offer fares or combinations the airline does not show, but changes may need to go through the agency. Whichever you choose, check that the traveler names exactly match the passports, confirm the fare brand, and save the booking reference and ticket number.

    Step 7: Use loyalty programs and points

    Joining an airline’s frequent flyer program is free, and you can usually credit flights to a partner program in the same alliance. The three big alliances are Star Alliance, oneworld and SkyTeam. If you travel internationally more than once a year, concentrating your flying in one alliance helps you build status and use miles. If you already hold points on a credit card, check their value for your trip before paying cash, especially on expensive peak dates when award seats can be the better deal. Availability of reward seats is limited, so search early.

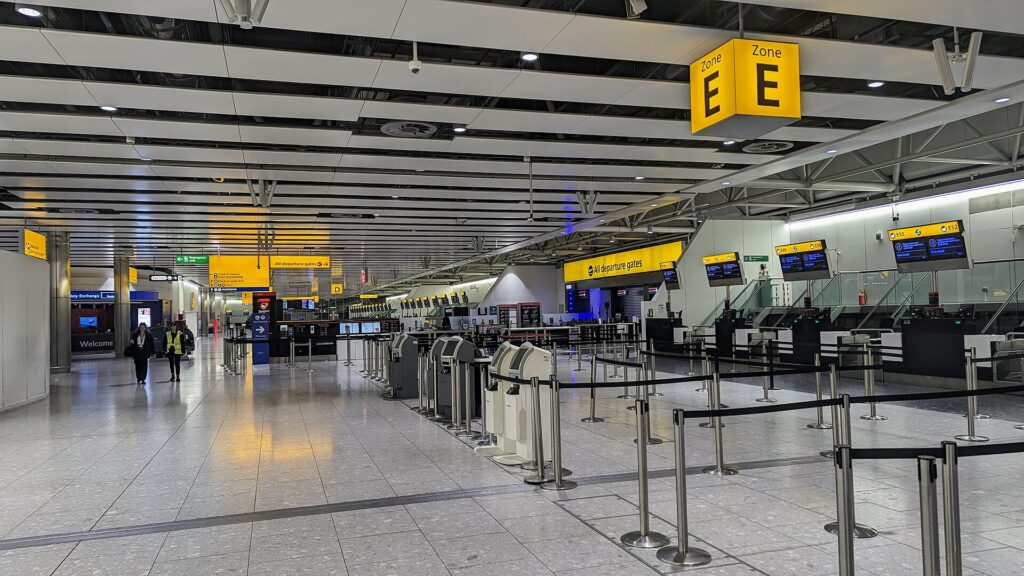
    The check-in hall at London Heathrow Terminal 4
    Airlines check passports and entry documents at check-in, before you ever reach the gate (Photo: Eric0892 via Wikimedia Commons, CC BY 4.0)

    Step 8: Know your rights if things go wrong

    Passenger protection rules depend on where you fly and on which airline. Knowing the basics before you travel helps you ask for the right thing at the airport.

    • Canada: the Air Passenger Protection Regulations set airline obligations for flights to, from and within Canada, including communication, care, rebooking, refunds and, in some cases, compensation for delays and cancellations.
    • European Union: EU air passenger rights cover flights departing from the EU and flights into the EU on EU airlines, including compensation for long delays and cancellations in many circumstances.
    • United States: the Department of Transportation requires refunds when an airline cancels or significantly changes a flight and you choose not to travel, and requires the 24-hour free cancellation or hold option for tickets bought at least seven days before departure.

    Rules change and exceptions apply, so check the official page for your situation.

    Travel insurance

    Government health plans usually cover little or nothing abroad, and a medical emergency overseas can be very expensive. Consider insurance that covers emergency medical care, and read what it says about trip cancellation, interruption and delay. Check whether a credit card you already hold includes any travel coverage, and what its limits are, before buying a separate policy.

    Step 9: Plan the arrival, not just the flight

    Overnight flights to Europe from North America typically land in the morning, and hotel check-in is usually in the afternoon. A few habits make the first day far easier.

    • Think about the arrival time when choosing flights. A slightly later departure that lands mid-morning can make the first day more manageable.
    • Book the hotel from the night you arrive if you want a room waiting for you in the morning, or ask the hotel about early check-in and luggage storage. Our hotel booking tips explain how to ask.
    • Remember the date change. An overnight flight arrives the next calendar day; book hotel nights to match.
    • Plan the transfer from the airport before you land, including how to pay for it.
    • Handle jet lag with light and sleep. Get daylight on arrival, stay up until a reasonable local bedtime and keep the first day light.

    The day of travel

    International departures need more time at the airport than domestic flights, because of document checks at check-in, bag drop cutoffs and, in some cases, exit or pre-clearance controls. Many airlines recommend arriving about three hours before an international flight. Our guide to how early to arrive for an international flight explains check-in deadlines, security and the variables by airport. Check in online as soon as it opens, usually 24 hours before departure on many airlines, and make sure your security-sensitive items follow the rules at your departure airport, such as the CATSA screening guidance in Canada.

    For a long flight, comfortable, layered clothing and good footwear matter; our guide to what not to wear on a flight covers it, and our guides to compression socks for long flights and noise-cancelling headphones help with the long haul.

    Common mistakes that cost the most

    • Booking before checking entry rules. A passport that expires too soon or a missing electronic authorization can mean denied boarding and a lost fare.
    • Names that do not match the passport. Enter names exactly as they appear in the passport. Fixing an error after ticketing can be costly.
    • Tight connections on separate tickets. If the first flight is late, you absorb the loss.
    • Ignoring the transit country. Connecting through the United States requires U.S. entry documents.
    • Comparing headline fares instead of totals. Bags and seats change the ranking.
    • Booking the cheapest brand for uncertain plans. If your dates might change, flexibility is worth paying for.
    • Forgetting the arrival. A dawn arrival with no room and a long transfer can cost a day.
    • Using unofficial visa sites. Apply directly through the government website.

    A quick pre-booking checklist

    • Passport valid for the required period after your trip, with blank pages if needed.
    • Visa or electronic authorization for the destination and any transit country.
    • Dates chosen after checking a fare calendar.
    • Alternative departure and arrival airports priced, with transfers included.
    • Routing checked: connection airport, connection time, one ticket.
    • Fare brand compared with bags, seats and change conditions.
    • Names match passports exactly.
    • Travel insurance decided.
    • Arrival plan: hotel check-in, transfer and first night.
    The international terminal at Vancouver International Airport
    Vancouver is Canada's main gateway to Asia, and a common connection point on transpacific trips (Photo: Wpcpey via Wikimedia Commons, CC BY-SA 4.0)

    Destination examples

    Canada to Europe

    Nonstop options are widest from Toronto, Montreal and Vancouver, with summer the most expensive season and late fall and winter the cheapest. Consider an open-jaw ticket if you are visiting more than one country. Start with our London flights and Paris flights pages.

    North America to Mexico

    Beach resorts peak in winter and around spring break. A big hub such as Mexico City can offer more competition and more flights; our guide to cheap flights to Mexico City covers the options, and our Cancun flights page shows fares to the coast.

    Transborder flights between Canada and the U.S.

    Flights between Canada and the United States behave much like domestic flights in pricing, but you need a passport or an accepted travel document, and at several large Canadian airports you clear U.S. customs and immigration before you board. Our guide to cheap flights between New York and Toronto is a good example of how airport choice changes the fare.

    Asia

    Long-haul trips to Asia from Canada usually route through Vancouver or a Pacific hub. Check passport validity rules carefully, since six months is common in the region. Our Japan travel guide covers planning a first trip.

    Frequently asked questions

    How far in advance should I book an international flight?

    As a guide, about two to six months ahead for long-haul trips, earlier for peak summer and holiday dates. Set a price alert and book when the fare reaches or dips below the normal level for your route.

    Is it cheaper to book international flights directly with the airline?

    Sometimes, sometimes not. Use a comparison search to find the best option, then compare the airline’s own price and conditions. Booking directly can make changes and disruptions simpler to handle.

    Are one-way international tickets more expensive?

    On many routes, one-way fares are now reasonably priced, but on some, a round trip is still cheaper. Compare both, and consider an open-jaw ticket if you are flying home from a different city.

    What is a safe connection time for international flights?

    The minimum connection time on your ticket is legal, not generous. On international trips, two hours or more is more comfortable, especially if you must clear immigration or change terminals.

    What happens if I miss a connection on separate tickets?

    The second airline usually has no obligation to help, and you may have to buy a new ticket. Leave a large buffer or book all flights on one ticket.

    Do I need a visa to connect through another country?

    It depends on the country and your nationality. The United States requires every connecting passenger to be admissible to the U.S. Check each transit country’s rules before booking.

    Should I buy travel insurance for an international trip?

    Medical coverage is strongly worth considering, because government health plans cover little abroad. Read the policy to see what it covers for cancellation, delays and pre-existing conditions.

    Ready to find your fare? Start with a flexible date range and a few nearby airports on our flight search, then line up your stay with our hotel search. For the timing side of the decision, read our guide to the best time to book cheap flights and hotels.

  • Eco-Friendly Travel Flip Flops for Sustainable Travelers

    Eco-Friendly Travel Flip Flops for Sustainable Travelers

    Flip-flops are the most traveled shoe in the world. They go to the beach and the pool, into hostel showers and hotel bathrooms, along boardwalks and onto boat decks, and they fold into the corner of almost any bag. They are also, for the most part, made of foam and plastic, worn hard for a season or two and thrown away. If you care about the footprint of your travel, a better pair of flip-flops is one of the easiest places to start, but it is also a category full of vague “eco” labels. This guide explains what actually makes a travel flip-flop more sustainable, how to read green claims without being fooled, which materials are which, how to choose a pair that is comfortable and safe on wet surfaces, when flip-flops are the right travel shoe and when they are not, and several options from our original list, with the materials details their makers publish. It also covers packing, care and how to make any pair last longer, which is the most sustainable choice of all.

    The short answer

    The most sustainable flip-flop is one well-made pair that you wear for years, not a new cheap pair every summer. When you shop, look for specific, checkable materials claims on the maker’s own site, such as a named natural fiber, a stated recycled percentage or a stated material the product avoids, rather than words like “eco” or “green” on their own. Choose a pair with a grippy sole for wet tiles and decks, a toe post and straps that do not rub, and some arch shape if you will wear them for more than short walks. Pack them flat, rinse off salt and sand, dry them out of strong sun, and keep a supportive walking shoe for long days on foot, because flip-flops are for beaches and showers, not ten-hour city days.

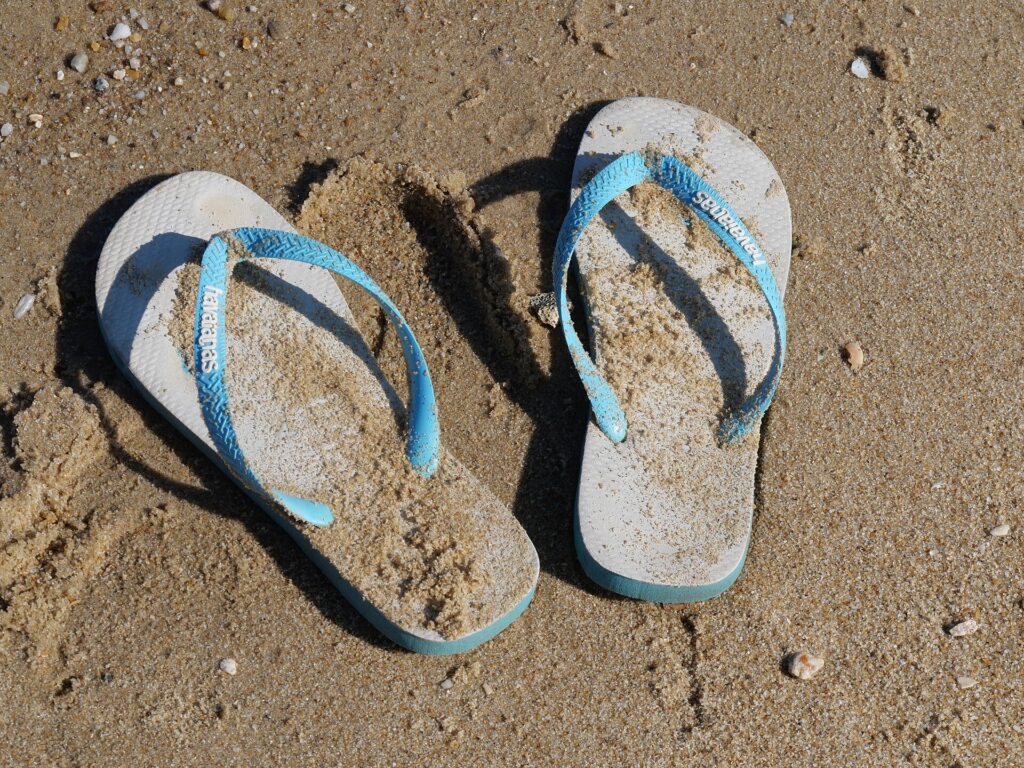
    A pair of rubber flip-flops on a sandy beach
    The greenest pair is the one you keep wearing for years, so buy for durability first (Photo: Peachyeung316 via Wikimedia Commons, CC BY-SA 4.0)

    What makes a flip-flop more sustainable

    There is no single eco-friendly material. The environmental impact of a pair of flip-flops depends on several things together:

    • How long it lasts. A pair that lasts five summers generally beats a pair made from a “greener” material that splits after one. Durability is the part of sustainability you control directly, through what you buy and how you care for it.
    • What it is made of. Plant-based and natural materials, such as natural rubber, cork and hemp, come from renewable sources. Recycled synthetics reuse material that already exists. Conventional foams and plastics are made from fossil fuels. Each has trade-offs in durability, comfort and end-of-life options.
    • What it avoids. Some makers state that their products are made without PVC or without animal-derived materials. Those are specific, checkable claims.
    • How it is made and shipped. Manufacturing energy, glues, dyes and transport all add to the footprint, though these are hard for shoppers to compare.
    • What happens at the end. Most flip-flops end up in landfill. A few brands run repair services, take-back or recycling programs; if that matters to you, check the brand’s site for what is actually offered in your country.

    Keep that list in mind as you read product pages. A shoe that scores well on one point and poorly on another may still be a good choice for you, as long as the claims are real.

    How to read green claims without being fooled

    Environmental marketing is regulated, but vague claims still slip through, and footwear is no exception. A few rules of thumb help:

    • Specific beats general. “Hemp strap and top sole” or “recycled PET webbing lining” tells you something. “Eco-friendly,” “earth-conscious” or “green” on their own tell you almost nothing.
    • Check which part the claim covers. A recycled-content claim may apply to the strap, the lining or the outsole, not the whole shoe. Read the materials section, not just the headline.
    • Look for numbers. “Made with recycled material” could mean a tiny share. A stated percentage is more useful.
    • Look for the source. Trust claims on the maker’s own product page more than seller listings, which often repeat or exaggerate them.
    • Be wary of “biodegradable” and “compostable.” Unless a product clearly states how, where and in what conditions it breaks down, treat such claims with caution. Most shoes do not break down in a home compost bin or in landfill in any useful time.

    Regulators publish guidance on this. In the United States, the Federal Trade Commission’s Green Guides explain how environmental marketing claims should be qualified and substantiated. In Canada, the Competition Bureau’s advice on greenwashing for consumers lists warning signs to look out for. Both are useful reading before any “sustainable” purchase, not just flip-flops.

    Flip-flop materials compared

    This table sums up the materials you will see most often and the trade-offs of each. It describes materials in general, not any specific product.

    MaterialWhere it is usedStrengthsWatch out for
    Natural rubberSoles, footbeds, one-piece flip-flopsRenewable source, grippy, durable and flexibleHeavier than foam; rubber production has its own land-use impacts
    Synthetic rubberOutsolesDurable, good gripMade from fossil fuels
    EVA foamFootbeds and solesVery light, soft, cheap, quick-dryingUsually fossil-based; soft foam compresses and wears faster
    CorkFootbedsHarvested from bark, which regrows; molds to your footCan dry out or crack if soaked and baked in the sun; not ideal for constant water
    Hemp and other natural fibersStraps, top solesPlant-based, strong, breathableCan take longer to dry; may stain
    Recycled polyester (PET)Straps, webbing, liningsReuses existing plastic, strong, quick-dryingStill a plastic; check what share of the shoe it covers
    LeatherStraps, top solesDurable, molds to the foot, repairableNot vegan; dislikes repeated soaking and salt water
    PVCStraps and cheap one-piece flip-flopsCheap and waterproofMany brands now advertise avoiding it; it is hard to recycle
    Cork oak trees with bark harvested from their lower trunks
    Cork comes from bark that regrows on the tree, which is why it shows up in footbeds marketed as natural (Photo: Omar Hoftun via Wikimedia Commons, CC BY-SA 3.0)

    When flip-flops are the right travel shoe

    Flip-flops earn their place in a bag because they are light, cheap to replace, quick to dry and easy to slip on and off. They are the right choice for:

    • Beaches, pools and boat decks, where you want something that can get wet and sandy.
    • Shared showers and bathrooms in hostels, campsites, gyms and some guesthouses, where a barrier between your feet and wet floors is a simple hygiene habit.
    • Hotel rooms and apartments, as a light alternative to slippers.
    • Short strolls in hot weather, such as a walk to dinner in a beach town.

    They are the wrong choice for long walking days, hiking, steep or uneven ground, and anywhere you need to move quickly. They offer little support, the toe post makes your toes grip with every step, and a thin sole gives little protection from hot pavement, sharp shells or broken glass. For sightseeing, pack a proper walking shoe; our guide to comfortable walking shoes for traveling covers how to choose one.

    Flip-flops, slides, sandals or water shoes?

    If you are only packing one warm-weather shoe besides your walking shoes, it is worth thinking about which open shoe does the most for your trip:

    • Flip-flops are the lightest and pack flattest. Best for beach, pool and shower use.
    • Slides have a single strap across the top of the foot and no toe post. Many people find them more comfortable for short periods, and they are easy to slip on in a hotel room, but they tend to be bulkier and less secure when you walk.
    • Strapped sandals with a heel strap stay on your foot, so you can walk further in them, climb on and off boats and wade through shallow water. They are a better choice if your warm-weather trip involves real walking.
    • Water shoes protect your feet on rocky beaches, coral rubble and river crossings. If your destination has stony shores, they are safer than flip-flops in the water.

    Comfort and fit

    The toe post and straps

    The toe post is where most flip-flop discomfort starts. Soft, rounded posts and smooth, wider straps are kinder to skin. If a new pair rubs, wear it around the house for short periods before the trip, just as you would break in any shoe.

    Arch shape and cushioning

    A completely flat, thin flip-flop gives your feet very little support. A contoured footbed with some arch shape and a bit of cushioning is more comfortable if you will spend hours in them, such as a full beach day with walks to lunch. Very soft foam feels lovely in the store but compresses over time.

    Grip on wet surfaces

    Wet tiles around pools, bathroom floors and boat decks are slippery. A textured rubber outsole grips better than smooth foam. Check the sole before you buy, and replace a pair when the tread wears smooth.

    Size and length

    Your heel should sit on the footbed, not hang off the back, and your toes should not reach the front edge. Sizes vary between brands, and many flip-flops come in whole sizes only, so check the maker’s size chart.

    Options from our original list

    The flip-flops and sandals below were featured in the original version of this guide. The original product descriptions could not be verified, so we have rewritten each entry around what the maker’s own site says or, where we could not confirm materials, around who the style suits. We make no environmental claim for a product unless its maker’s page states it. Designs and materials change between versions and colors, so check the current product page for the pair you are buying.

    Reef Women’s Cushion Breeze

    Reef lists the Cushion Breeze as an EVA sandal with a soft cushioned footbed, arch support, wide padded synthetic straps and a rubber sponge outsole. Its product page describes the materials as PVC-free and vegan friendly and states a recycled PET webbing lining. It suits travelers who want plenty of cushioning for beach days and warm-weather strolls. Remember that the recycled claim refers to the lining, not the whole shoe.

    Rainbow Sandals Single Layer Hemp

    Rainbow Sandals makes a Single Layer Hemp flip-flop whose product page lists a natural hemp top sole and hemp strap, a single-layer arch midsole, double stitching with bonded nylon thread and a non-slip rubber bottom sole. The brand is known for flip-flops built to last, and a plant-based fiber top and strap is a good fit for travelers who want natural materials where their skin touches the shoe. Hemp takes a little longer to dry than foam, so it is better for the beach and boardwalk than for daily shower use.

    Sanuk Women’s Yoga Mat

    Sanuk describes its Yoga Mat collection as sandals made from real yoga mat foam, which gives them a soft, squishy footbed. They suit travelers who put comfort first for short walks, beach days and lounging. Sanuk publishes more about materials and its sustainability work on its own site; check the specific product page for what applies to the version you buy.

    Teva Women’s Olowahu

    Teva’s Olowahu is a lightweight women’s flip-flop from a brand best known for outdoor sandals. A light foam flip-flop like this suits the beach and pool and packs easily. Teva publishes materials details on its product pages; check the current listing if recycled content or vegan construction matters to you, since we have not been able to confirm those details for every version.

    Havaianas Top

    Havaianas is the Brazilian brand behind some of the world’s best-known rubber flip-flops, and the Top is its plain, classic design. A simple, durable flip-flop that you wear for several seasons is a reasonable choice on its own terms; the brand does not need to make a green claim for a long-lasting pair to be better than a disposable one. The Top is a good all-rounder for beaches, pools and shared showers.

    Skechers Foamies

    Skechers‘ Foamies are lightweight molded foam footwear, including flip-flop styles. Molded foam is very light and quick-drying and easy to rinse, which makes it practical for pools and showers. We have not confirmed materials claims for Foamies, so treat them as a comfort and convenience choice rather than an eco pick.

    Quick-drying travel slippers

    The original list also included generic lightweight, non-slip, quick-drying travel slippers. Shoes of this kind are handy for hotel rooms, overnight trains and shared bathrooms. Quality varies widely between unbranded products, so look for a textured sole and check that the seller names the materials. If a listing makes environmental claims without detail, apply the checks above.

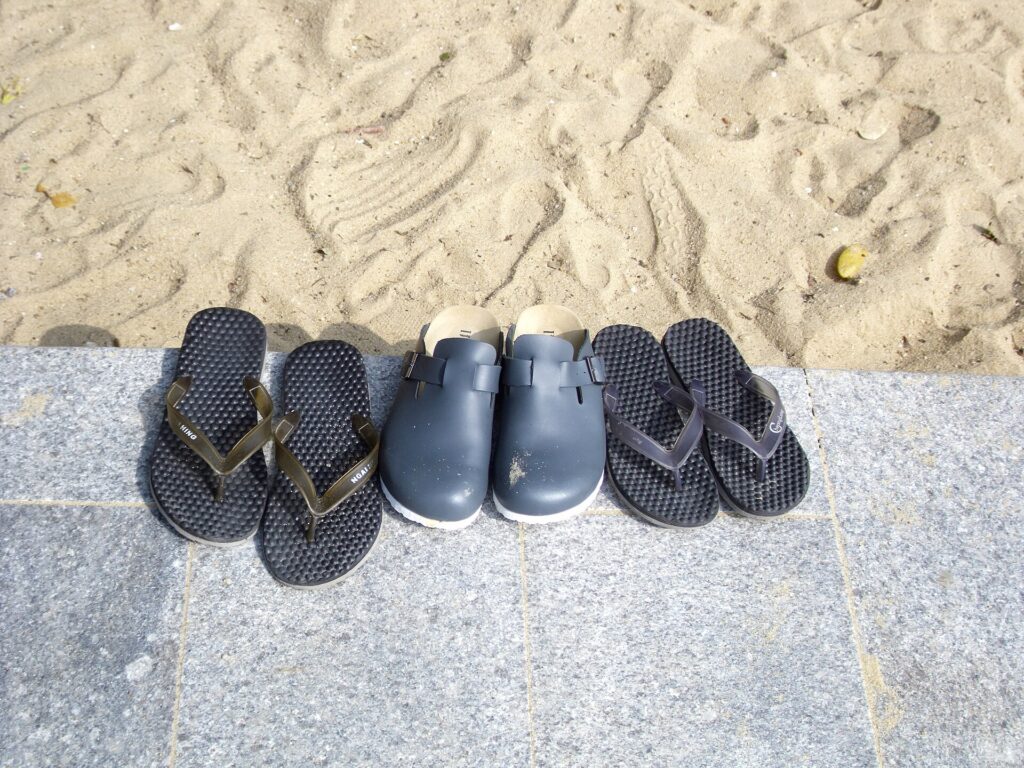
    Black flip-flops and leather sandals side by side on a beach
    Flip-flops for sand and showers, strapped sandals when the day involves real walking (Photo: Peachyeung316 via Wikimedia Commons, CC BY-SA 4.0)

    How to choose: a quick checklist

    • Durability first. Stitched or well-bonded straps and a thick, grippy sole usually outlast thin one-piece designs.
    • Specific materials claims. Look for named materials and percentages on the maker’s page.
    • The right material for how you will use them. Rubber and foam for showers and pools; natural fibers, cork or leather for dry beach days and strolls.
    • Grip. A textured outsole for wet tiles and decks.
    • Comfort. A soft toe post, smooth straps and some arch shape.
    • Weight and packability. Flat, light pairs fit anywhere in a bag.
    • A brand you can reach. A company with clear warranty and care information is easier to deal with if a strap fails.

    Packing flip-flops

    Flip-flops are among the easiest things to pack. Slide them flat along the back panel or side of a suitcase or backpack, sole to sole, inside a thin bag to keep sand and shower water off your clothes. A mesh or breathable bag lets damp pairs dry. If you travel carry-on only, a pair of flip-flops is one of the few second pairs of shoes that barely takes up any room; our main guide to choosing travel luggage covers how to build a light carry-on kit around them. A travel backpack such as the one in our Peak Design Travel Backpack 45L guide often has a separate shoe or wet compartment that suits them well.

    Flip-flops at the airport and on the plane

    Flip-flops are easy at security, and in the United States the Department of Homeland Security announced in 2025 that travelers at domestic checkpoints would generally no longer need to remove their shoes; officers can still ask. Other countries set their own screening rules, so check CATSA or your departure airport’s security agency before you fly. On the plane itself, many travelers prefer closed shoes: cabins get cold, aisles and lavatory floors are not always clean, and closed shoes protect your feet if you have to move quickly. A practical approach is to wear walking shoes on travel days and keep flip-flops in your bag for arrival.

    Care: make them last

    • Rinse after salt water and sand. Salt and grit wear down straps, stitching and glues. A quick rinse in fresh water after the beach helps any pair last longer.
    • Dry in the shade. Leaving flip-flops in strong sun for hours, or on a hot car dashboard, can warp foam, fade colors and dry out cork and leather.
    • Clean gently. Mild soap and water is enough for rubber and foam. Natural fibers and leather need gentler care and a full dry before packing.
    • Keep natural materials out of constant water. Cork, leather and fabric straps last longer if you save a rubber pair for showers.
    • Rotate pairs at home. If you already own an older pair, keep it for garden and pool use and save the better pair for travel.
    • Fix before you replace. Some brands sell replacement straps or offer repairs, and a cobbler can often fix stitched sandals. Check the maker’s warranty and care pages before throwing a pair away.

    Sustainable travel beyond your feet

    Flip-flops are a small part of a trip’s footprint. If you care about traveling more lightly, a few other choices often matter more:

    • Pack less and buy less. A light bag with versatile pieces, such as the options in our guide to travel pants for men, means fewer purchases and less to carry.
    • Buy gear once. A durable backpack or suitcase that lasts a decade has a far smaller footprint than several cheap ones.
    • Choose direct routes where you can. A nonstop flight usually covers a shorter total distance than a connection, and it saves you time and a missed-connection risk as well.
    • Refill rather than buy. A reusable bottle and a small refillable toiletry kit reduce single-use plastic on every trip.
    • Leave beaches as you found them. Take your litter home, stay on marked paths through dunes and follow local rules on protected areas.

    Keep your valuables safe at the beach

    Beaches and pool decks are where many travelers leave phones and wallets unattended while they swim. Take only what you need, use the hotel safe for passports and spare cards, and consider a waterproof pouch or a slim money belt for a card and some cash. On the walk there and back through busy streets, a bag like the ones in our guide to anti-theft backpacks keeps your things harder to reach. A few plasters from a travel first aid kit are handy if a new toe post rubs or you cut your foot on a shell.

    Latex being collected from a tapped rubber tree
    Natural rubber is tapped from trees as latex; check a maker's page to see whether a sole is natural or synthetic (Photo: Vyacheslav Argenberg via Wikimedia Commons, CC BY 4.0)

    Common mistakes

    • Buying a cheap pair every summer. A durable pair worn for years is usually the more sustainable choice.
    • Trusting “eco” on its own. Look for specific materials and numbers on the maker’s own page.
    • Walking a city in flip-flops. Save them for beaches and showers and pack a supportive walking shoe.
    • Using natural-fiber pairs as shower shoes. Keep a rubber or foam pair for constant water.
    • Baking them in the sun. Heat warps foam and dries out cork and leather.
    • Ignoring worn-out tread. Smooth soles on wet tiles are a slip waiting to happen.

    Frequently asked questions

    What are eco-friendly flip-flops made of?

    Common choices include natural rubber, cork, hemp and other natural fibers, and recycled synthetics such as recycled polyester. Many products mix materials, so check which parts of the shoe a claim covers.

    Are rubber flip-flops sustainable?

    Natural rubber comes from a renewable source and is durable, which helps. Synthetic rubber and many foams are fossil-based. A long-lasting rubber pair is generally better than a short-lived one of any material.

    How can I tell if a green claim is real?

    Look for specific, measurable claims on the maker’s own site, such as a named material or a stated recycled percentage, and check which part of the shoe it applies to. Government guidance from the FTC and Canada’s Competition Bureau explains common warning signs.

    Are flip-flops good for walking all day?

    No. They offer little support or protection and make your toes grip with every step. Use them for beaches, pools and short strolls, and wear proper walking shoes for sightseeing.

    Should I wear flip-flops in hostel or campsite showers?

    Many travelers do, as a simple hygiene habit and for grip on wet floors. A rubber or foam pair that dries quickly is best for this.

    Can I wear flip-flops on a plane?

    You can, and they are easy at security, but closed shoes are warmer, cleaner and safer if you need to move quickly. Many travelers wear walking shoes to fly and keep flip-flops in their bag.

    How long should a good pair of flip-flops last?

    It depends on how often you wear them, where and how you care for them. Rinsing off salt and sand, drying them out of strong sun and saving natural-material pairs for dry use all extend their life.

    Are cork footbeds good for the beach?

    Cork is comfortable and molds to your foot, but repeated soaking and strong sun can dry it out. It suits dry beach days and strolls better than swimming and showers.

    With a good pair packed, the beach is waiting. Compare fares to warm-weather favorites on our flight search, and find a hotel near the sand on our hotel search. If you are dreaming of turquoise water, start with flights to Cancun and our guide to things to do in Cancun, or head to Miami with our things to do in Miami guide. For the rest of your kit, see our main guide to travel luggage.

  • Top 10 Laptop Travel Accessories You Can’t Travel Without

    Top 10 Laptop Travel Accessories You Can’t Travel Without

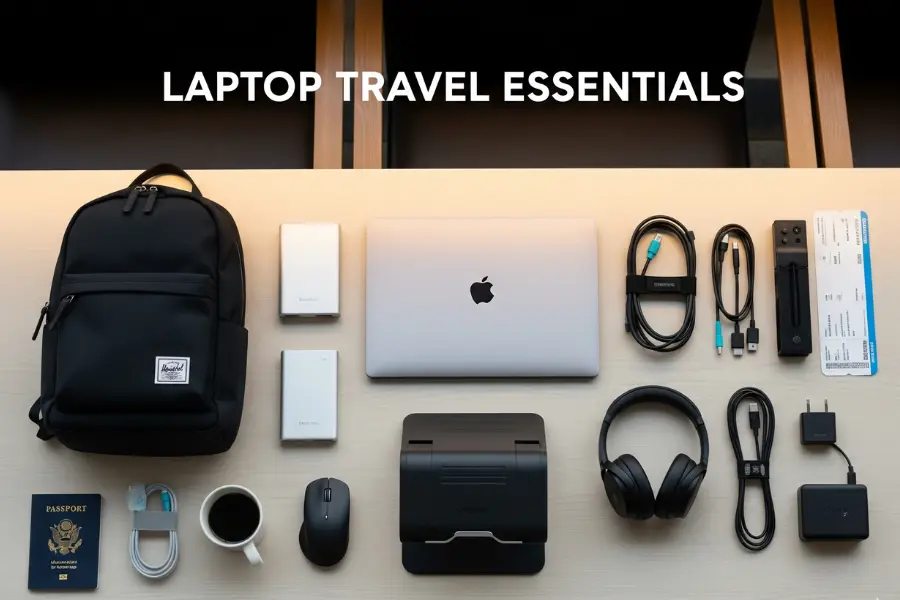
    A laptop is the most expensive and most fragile thing most people travel with, and it depends on a surprising number of small companions to be useful on the road. Without the right plug, it dies in a hotel room abroad. Without a sleeve, it picks up a cracked corner in an overhead bin. Without a stand and a mouse, a week of working from hotel desks leaves you hunched and sore. The good news is that the kit you need is small, and most of it costs far less than a repair. This guide covers the ten laptop travel accessories from our original list, what each one actually does, what to look for when you buy, which ones matter for which kind of trip, and the rules that apply to batteries and chargers when you fly. It is part of our travel gear series, which starts with our main guide to choosing travel luggage.

    The short answer

    If you only buy three things, make them a padded sleeve or a bag with a proper laptop compartment, a plug adapter for the countries you visit and a cable pouch that keeps your charger, cables and adapters in one place. Add a power bank that can charge your laptop over USB-C if you work in airports or on trains, and a folding stand plus a compact mouse if you work from hotel desks for more than a few days. Everything else, from cooling pads to anti-theft backpacks, depends on how and where you travel. Before any flight, remember the one rule that is not optional: power banks and spare lithium batteries travel in the cabin, never in checked bags.

    Start with how you travel

    The right kit for a weekend city break is very different from the right kit for a month of remote work. Three questions narrow it down quickly:

    • How many hours a day will you work? An hour of email needs almost nothing. Full workdays from hotels, cafés and coworking spaces justify a stand, a mouse and possibly a travel keyboard.
    • Where will you plug in? Domestic trips need no adapter. International trips need the right plug for each country, and long travel days with no outlets need a power bank.
    • How will you carry it? A backpack, a rolling bag or a suitcase with a laptop pocket each changes which protection and organization accessories make sense.

    The ten laptop travel accessories

    1. Travel laptop backpack

    A good travel laptop backpack puts the computer in a padded compartment against your back, keeps chargers and cables organized in their own pockets and spreads the weight across both shoulders. For travelers it is often the single most useful accessory because it is both protection and luggage. Look for:

    • A suspended or raised laptop compartment, so the laptop does not hit the ground when you set the bag down.
    • A clamshell or wide opening that lets you reach the laptop at security without unpacking everything.
    • A luggage pass-through strap to slide the bag over a suitcase handle.
    • Dimensions that fit your airline’s personal-item limit if you want it under the seat, or the carry-on limit if it is your main bag.

    If the backpack is also your main luggage, our guide to the Peak Design Travel Backpack 45L explains how to choose and pack a carry-on travel pack.

    2. Slim laptop sleeve

    A sleeve is the cheapest insurance you can buy for a laptop. It adds a layer of padding when the computer goes into a tote, a suitcase or a bag without its own compartment, and it lets you carry the laptop on its own into a meeting or a café. Choose a sleeve sized to your laptop’s actual dimensions rather than just the screen size, with padding on the edges and corners, since that is where drops do the most damage. Water-resistant fabric and a zipper that does not scratch the lid are worth having. A sleeve with a small front pocket for the charger turns it into a minimalist laptop bag for short trips.

    3. Adjustable laptop stand

    Hotel desks, café tables and airport counters put your laptop screen far below eye level, which means hours of looking down. A folding stand raises the screen closer to eye level, and most fold flat or into a small tube for packing. The catch is that once the laptop is raised, its own keyboard is too high to type on comfortably, so a stand works best with a separate keyboard and mouse. Look for a stand that is light, folds small, locks at several heights and feels stable when you type. It can also help air circulate under the laptop on a hot day.

    4. Portable laptop charger (power bank)

    A power bank that can charge a laptop keeps you working through long layovers, train journeys and flights without a working seat outlet. Not every power bank can charge a laptop, so check these points:

    • USB-C Power Delivery output with enough wattage for your laptop. The laptop’s own charger shows its wattage; a power bank with much lower output may charge slowly or only slow the drain while you work.
    • A watt-hour rating printed on the case. Airline and security rules are based on watt-hours, not the milliamp-hour number in the marketing. If only mAh is listed, you can estimate watt-hours as mAh multiplied by the battery voltage, divided by 1,000.
    • Size and weight. Laptop-capable power banks are heavier than phone ones. Carry the smallest one that gets you through a typical travel day.

    The flying rules for power banks are covered in detail below. The short version: cabin only, under the common 100 Wh threshold unless your airline approves a larger one, and protected from short circuits.

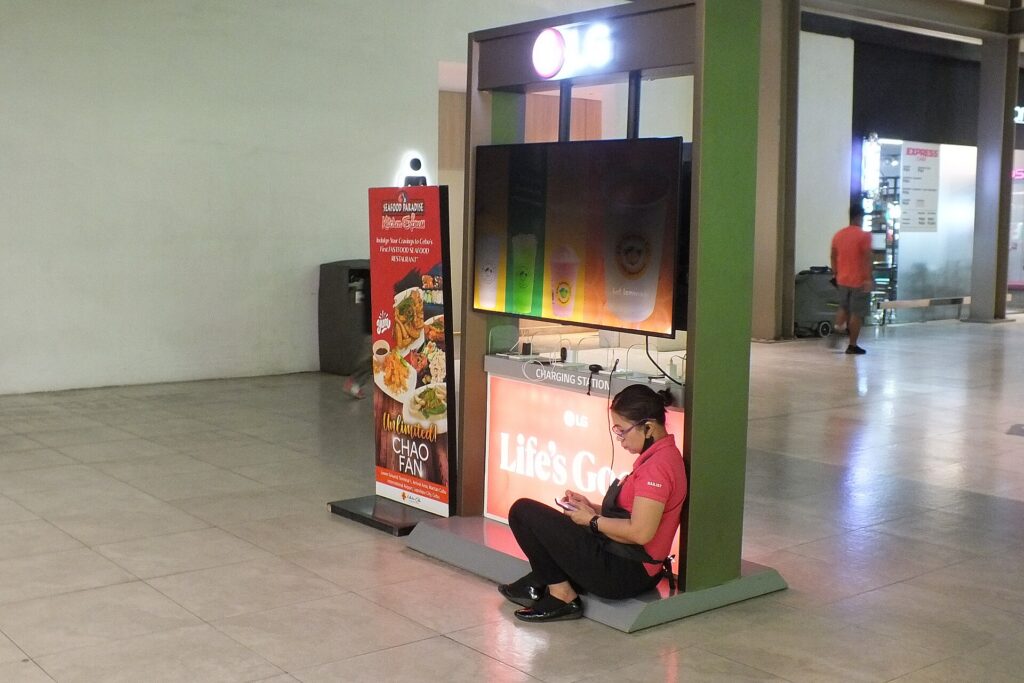
    A traveler charging a phone at a charging kiosk in an airport terminal
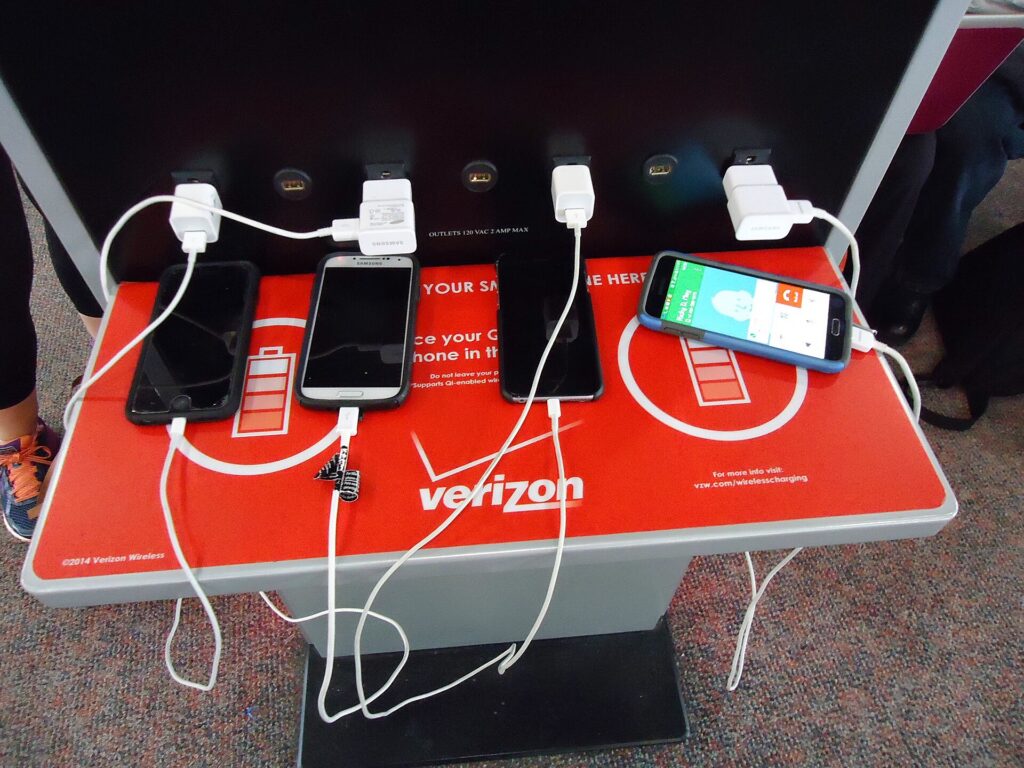
    Airport charging points are often busy or broken; a laptop-capable power bank keeps you independent of them (Photo: Wide Awake! via Wikimedia Commons, CC BY 4.0)

    5. Waterproof laptop bag

    Rain is the most common way travelers damage laptops without dropping them: a dash from a taxi to a hotel, a ferry deck, a sudden storm while sightseeing. A bag with water-resistant fabric, covered or coated zippers and a padded compartment keeps the laptop dry in ordinary weather. Truly waterproof bags with roll-top closures exist, mainly for outdoor and adventure travel, but for most trips water resistance plus a sleeve inside is enough. Whatever the bag claims, do not leave a laptop bag sitting in a puddle or on a wet boat deck.

    6. Anti-theft laptop backpack

    Anti-theft backpacks hide the main zipper against your back or let you lock it, add a hidden pocket for your passport and cards, and in some cases use cut-resistant fabric and straps. They make quick pickpocketing and grab-and-run theft harder, which is useful in busy cities, on crowded transit and in cafés where a bag sits on the floor. They are not theft-proof, and habits matter as much as features. Our full guide to anti-theft backpacks explains which features are worth paying for and which are marketing.

    7. Cable organizer pouch

    A cable pouch is the accessory that saves the most frustration for the least money. It keeps the laptop charger, phone cables, adapters, earbuds and a spare USB stick in one place, so you can pull them all out at a hotel desk and put them all back at checkout. It also makes security easier, since a tangle of loose cables around a laptop is more likely to need a second look. Choose a pouch with elastic loops or small mesh pockets, a zipper that opens wide and a bright interior color so you can see what is inside. Before a trip, pack it and check it against a list: laptop charger, phone cable, watch charger, plug adapter, power bank cable.

    8. Laptop cooling pad

    Cooling pads use one or more fans to push air under the laptop. They make the most sense for gaming laptops and powerful machines that run hot under sustained load, or for working in very warm rooms without air conditioning. For most travelers and most laptops, a cooling pad is optional; keeping the vents clear and working on a hard, flat surface rather than a bed or a sofa does most of the job. If you do pack one, choose a slim, light model that runs from a USB port, and remember it adds bulk. A folding stand that lifts the laptop off the table gives some of the same airflow benefit with less to carry.

    9. Universal travel adapter

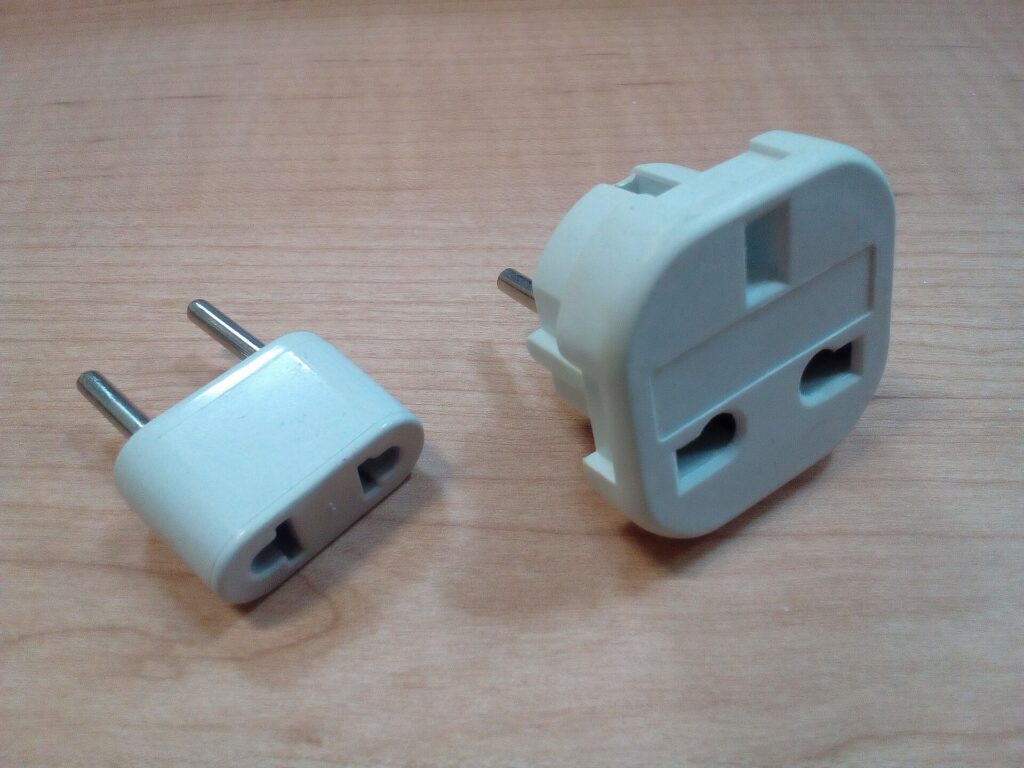
    Plug shapes differ around the world, and an adapter lets your laptop charger fit a foreign outlet. A universal adapter with sliding pins covers many plug types in one block and often adds USB ports for phones and watches. Two things matter more than the number of countries on the box:

    • An adapter is not a voltage converter. It changes the plug shape, not the electricity. Most laptop and phone chargers are designed for a wide input range; Apple, for example, says its USB power adapters are designed for 100 to 240 volts. Check the input rating printed on your own charger before you rely on this. Hair dryers and other heating appliances are a different story.
    • Choose a solid, well-made adapter. A laptop charger is heavy, and a cheap adapter can sag out of the wall or fit loosely. An adapter with a safety shutter and a fuse is worth the small extra cost.

    If you travel with several devices, a single multi-port USB-C charger with interchangeable plug heads can replace several bricks and an adapter at once.

    10. Compact wireless mouse

    A trackpad is fine for an hour, but a small mouse makes long sessions of spreadsheets, design work or editing much more comfortable. Travel mice are smaller than desk mice and often connect by Bluetooth, which saves a USB port and removes the tiny receiver that is so easy to lose. Rechargeable models avoid carrying spare batteries. Look for one that fits your hand without cramping, has an on-off switch so it does not drain in your bag, and works on the surfaces you will actually use, such as glossy hotel desks.

    Comparison: which accessories matter for which trip

    AccessoryWeekend or city breakBusiness tripInternational tripLong-term remote work
    Laptop backpack or bagUsefulEssentialEssentialEssential
    Slim sleeveEssential if no laptop bagUsefulUsefulUseful
    Folding standOptionalUsefulUsefulEssential
    Laptop power bankOptionalUsefulUsefulUseful
    Water-resistant bagUsefulUsefulUsefulUseful
    Anti-theft backpackUseful in busy citiesOptionalUsefulUseful
    Cable pouchUsefulEssentialEssentialEssential
    Cooling padRarely neededRarely neededHot climatesPowerful laptops
    Travel adapterOnly abroadOnly abroadEssentialEssential abroad
    Compact mouseOptionalUsefulUsefulEssential

    Flying with a laptop, chargers and batteries

    Laptops, chargers and power banks all contain or depend on lithium batteries, which are regulated in aviation because a damaged or short-circuited battery can overheat. The details are set by each authority and airline and can change, but the principles are consistent:

    • Keep the laptop with you in the cabin. Devices with installed batteries are allowed in the cabin, and keeping them there also protects them from theft and rough handling.
    • Power banks and spare batteries are cabin only. They are not allowed in checked baggage. If your bag is gate-checked or taken at the aircraft door, take the power bank and any spare batteries out first.
    • Watt-hours decide what is allowed. Most phone and laptop batteries and power banks fall under the common 100 Wh threshold. Larger batteries usually need airline approval, and there is an upper limit beyond which they are not allowed as passenger baggage.
    • Protect the terminals. Keep spares in their packaging, a case or a separate plastic bag, away from keys and coins.
    • Your airline may be stricter. Some airlines have added their own limits on using or charging power banks during flights. Check the airline’s page as well as the government rules.
    • Damaged batteries stay home. A swollen, cracked or recalled battery should not fly.

    Read the official pages before you fly: the FAA’s PackSafe guidance on lithium batteries, the TSA’s power banks entry and its What Can I Bring? tool, and CATSA’s guidelines for batteries for Canadian airports. Transport Canada also has a plain-language explainer on travelling with lithium batteries.

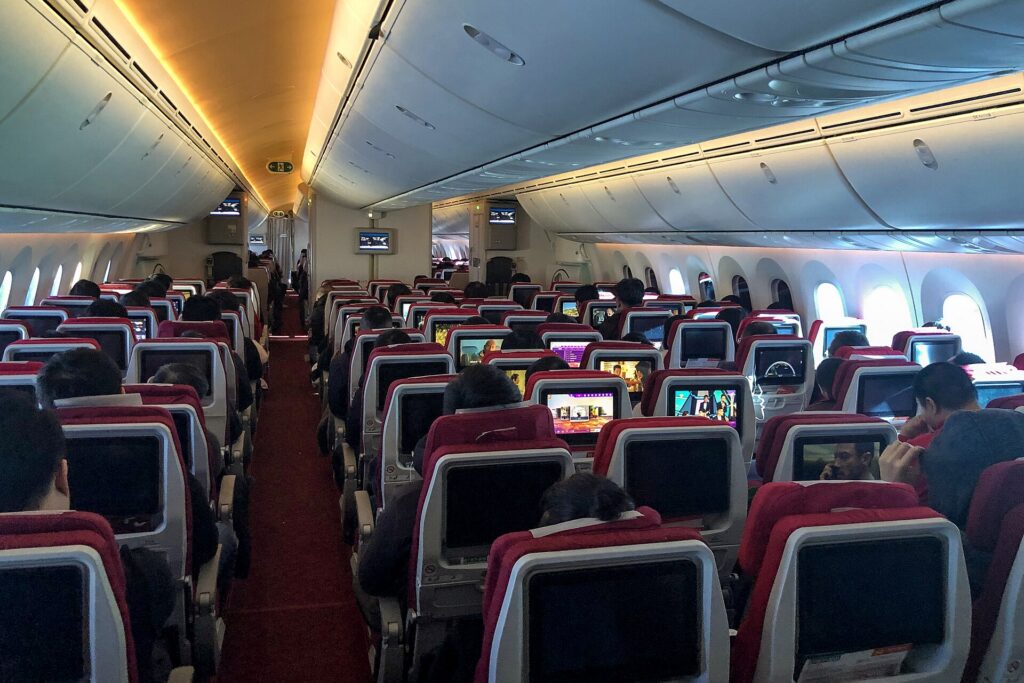
    The economy cabin of a widebody airliner with rows of seats and seatback screens
    Laptops, power banks and spare batteries fly in the cabin with you, never in a checked bag (Photo: N509FZ via Wikimedia Commons, CC BY-SA 4.0)

    Getting through security smoothly

    Laptop screening rules vary by airport, checkpoint and screening program. Some checkpoints still ask you to remove laptops and place them in a separate bin; newer screening lanes and some trusted traveler programs let them stay in the bag. Pack so either works:

    • Laptop in its own compartment near the top or back of the bag, so it slides out in one move.
    • Cables in the pouch, not wrapped around the laptop.
    • Power bank in an outside pocket in case officers want to see it.
    • Take off smart watches and put phones in the bag or bin before you reach the belt, so you are not the person holding up the line.
    • Watch your laptop come out of the scanner. The belt is one of the easiest places to leave a laptop behind or have it picked up by someone else.

    Working on the road: making a hotel room or café into an office

    With a stand, a mouse and a keyboard, almost any table becomes a reasonable workstation. A few habits make it work better:

    • Choose the room for the work. If you need to work from the hotel, look for a room with a real desk and a proper chair, and ask about Wi-Fi quality. Our business travel hotels guide explains what to look for.
    • Carry a short extension or small multi-outlet charger. Hotel outlets are often behind the bed or far from the desk.
    • Bring your own sound. Cafés, airport gates and planes are noisy; our guide to noise-cancelling headphones for flying covers how to choose a pair for calls and focus.
    • Protect the screen from eyes. A privacy screen filter narrows the viewing angle so the person next to you on the plane cannot read your email.
    • Treat public Wi-Fi with caution. Stick to secure sites, use your company’s security tools if you have them and avoid sensitive logins on networks you do not trust.

    Worth adding beyond the top ten

    • A travel keyboard. If you use a stand, or you want to work from a tablet instead of a laptop, a folding or slim Bluetooth keyboard completes the setup. See our guide to travel keyboards.
    • A multi-device charger. If you carry an iPhone, an Apple Watch and AirPods, a 3-in-1 Apple charger cuts three chargers down to one.
    • A rolling laptop bag. If your tech bag is heavy and your trips are mostly airports and offices, a rolling laptop bag takes the weight off your shoulders.
    • A cable lock. Useful in coworking spaces, shared offices and hostels, as long as your laptop has a lock slot or you use an adapter designed for it.
    • A small USB-C hub. Many thin laptops have few ports. A compact hub adds HDMI for hotel TVs and meeting-room screens, plus USB-A for older accessories.

    Before the trip: a laptop checklist

    • Back up your files to the cloud or an external drive before you leave.
    • Update the operating system and apps at home, not on hotel Wi-Fi the night before a presentation.
    • Download what you need offline: documents, maps, entertainment and boarding passes.
    • Turn on device encryption and a strong password, and make sure you can locate or wipe the laptop remotely.
    • Charge everything, including the power bank, the mouse and the keyboard.
    • Pack the cable pouch from a list, and check it again when you leave each hotel.
    • Photograph the serial number of your laptop and keep a copy of the receipt, in case you need to report a loss or make an insurance claim.
    Two plug adapters for different electrical outlet types on a wooden table
    A plug adapter changes the plug shape, not the voltage; check the input rating on your charger (Photo: Fructibus via Wikimedia Commons, CC0)

    Common mistakes

    • Checking the laptop or power bank. Laptops belong in the cabin, and spare batteries are not allowed in checked bags at all.
    • Buying a sleeve by screen size alone. Measure the laptop.
    • Assuming an adapter converts voltage. It does not. Check the input range on the charger itself.
    • Carrying a phone power bank for a laptop. Check the USB-C output wattage before you depend on it.
    • Leaving cables behind. Hotel rooms are full of forgotten chargers. A single pouch and a quick check at checkout prevent it.
    • Working hunched over for a week. A stand and a separate keyboard or mouse are small, light and make a big difference.
    • Relying on seat power. Not every plane has working outlets, and many that do deliver limited power. Arrive fully charged.

    Frequently asked questions

    What are the most important laptop travel accessories?

    A padded sleeve or laptop bag, a plug adapter for international trips and a cable pouch cover most travelers. A laptop-capable power bank, a folding stand and a compact mouse are the next most useful.

    Can I bring a laptop power bank on a plane?

    Yes, in your carry-on. Power banks are not allowed in checked baggage. Most fall under the common 100 Wh threshold; larger ones generally need airline approval. Check the FAA, TSA or CATSA pages linked above and your airline’s policy.

    Do I need a voltage converter for my laptop abroad?

    Usually not. Most laptop chargers accept a wide range of input voltages, so a plug adapter is enough. Check the input rating printed on your charger to be sure.

    Is a laptop cooling pad worth taking on a trip?

    For most laptops and most trips, no. Keeping the vents clear and using a hard, flat surface is enough. Cooling pads make more sense for powerful laptops or very hot rooms.

    Should I use a laptop sleeve inside a laptop backpack?

    It is not necessary if the backpack has a well-padded, suspended laptop compartment, but a sleeve adds protection and lets you carry the laptop on its own at your destination.

    Do I need to take my laptop out at airport security?

    It depends on the checkpoint and your screening program. Pack the laptop so it can come out quickly, and follow the officers’ instructions.

    How can I keep my laptop safe from theft while traveling?

    Keep it in the cabin, never leave it unattended at a café or gate, use a bag with lockable or hidden zippers in busy places and lock it in the room safe or your locked luggage when you go out without it.

    With your kit packed, the only thing left is the trip itself. Compare fares on our flight search, find a hotel with a real desk and reliable Wi-Fi on our hotel search, and if your work trip needs wheels, check our car rental search. Heading to a conference or client meeting in Chicago? Our guide to things to do in Chicago helps you make the most of the evenings, and flights to Chicago are a good place to start. For bags, suitcases and the rest of your gear, return to our main guide to travel luggage.

  • Travel-Friendly Feminine Hygiene Products: What to Pack and How to Fly With Them

    Travel-Friendly Feminine Hygiene Products: What to Pack and How to Fly With Them

    A period does not have to shape your itinerary, but it does change what you pack. On a long-haul flight you may be in your seat for hours with a lavatory line in the aisle. On a road trip the next clean restroom may be an hour away. On a beach holiday you might want to swim every day, and on a hiking trip there may be no bin at all. Abroad, the brand and format you rely on may be hard to find, and the words on the box may be in a language you do not read. Travel-friendly feminine hygiene products solve most of this: compact, discreet, easy to carry through airport security and suited to the kind of trip you are taking. This guide covers how to choose between disposable and reusable options, how airport security rules apply to period products and intimate care liquids, how much to pack, how to handle disposal and cleaning on the road, and a handful of well-known products from our original list that we have checked on the makers’ own sites.

    The short answer

    Pack a small, ready-to-grab pouch in your personal item with enough products for the travel day plus a spare, and put the rest in your main bag. Pads, liners, tampons, menstrual cups and period underwear are solids, so they are not affected by liquid limits; liquid washes, gels and sprays are, and have to follow the TSA’s 3-1-1 rule in the United States and CATSA’s 100 ml rule in Canada. Choose compact disposables for convenience and short trips, and consider reusable options like a cup or period underwear for long trips, remote places and less waste, as long as you are comfortable with cleaning them while traveling. Carry enough of what you prefer for the first few days, since formats and brands vary from country to country. If you use tampons, follow the FDA’s safety advice and the directions on the package.

    A reusable menstrual cup placed next to a small world globe
    One reusable cup can cover a whole trip, as long as you are comfortable cleaning it on the road (Photo: Vulvani via Wikimedia Commons, CC BY-SA 4.0)

    What makes a product travel-friendly

    • Compact and light. Thin pads, compact applicator or applicator-free tampons and a single reusable cup take up much less space than bulky packs.
    • Individually wrapped. Wrapped items stay clean in a handbag or a jacket pocket and are easier to carry discreetly.
    • Reliable for long stretches. Travel days are full of situations where you cannot change right away: boarding, taxiing, seatbelt signs, long drives and tours. Choose what you trust for those stretches, and always follow the product’s own directions on how long it can be worn.
    • Easy to dispose of or clean. Disposables need a bin; reusables need water and somewhere to wash and dry them.
    • Familiar. A trip is not the best time to try something completely new. If you want to switch to a cup or period underwear, try it at home for a cycle or two first.

    Disposable vs reusable for travel

    ProductWhy travelers like itTrade-offs on the roadAirport security
    Pads and linersEasy, familiar, widely soldBulkier to pack; need a binSolid; no liquid limit
    TamponsCompact, discreet, swim-friendlyNeed a bin; formats vary abroadSolid; no liquid limit
    Menstrual cup or discOne item for the whole trip; less wasteNeeds water and privacy to empty and cleanSolid; no liquid limit
    Period underwearNothing to insert or throw away; good backupNeeds washing and drying timeClothing
    Intimate wash, gel or sprayFreshening up on long daysCounts toward liquid limits in carry-onLiquid; follow TSA 3-1-1 or CATSA 100 ml
    WipesUseful where facilities are basicDo not flush; create wasteCheck the TSA and CATSA item tools

    Many travelers end up with a mix: a cup or period underwear as the main option, and a few compact disposables as a backup for travel days, long bus rides and moments when there is no good place to clean a reusable.

    Airport security rules for period products and liquids

    Security rules are the part of this that trips people up, and they change, so check the official pages before you fly.

    United States (TSA)

    The TSA’s liquids, aerosols and gels rule allows travel-sized containers of 3.4 ounces (100 milliliters) or less per item in a single quart-sized bag in your carry-on. That covers liquid intimate washes, cleansing gels, sprays and any liquid cup wash you pack. Pads, liners, tampons, cups and period underwear are not liquids. For any specific item, search the TSA’s What Can I Bring? tool, and remember that the officer at the checkpoint makes the final call.

    Canada (CATSA)

    CATSA’s page on liquids, non-solid food and personal items sets the carry-on limit at containers of 100 ml or 100 g (3.4 oz) or less, all fitting in one clear, resealable plastic bag of no more than 1 L. Larger containers can go in checked baggage if they are not otherwise prohibited. The same logic applies: solid period products are fine; liquid washes and gels go in the bag.

    Everywhere else

    Most countries use a similar 100 ml approach for carry-on liquids, but screening technology and rules differ between airports. If you are connecting through another country, the rules at the transfer checkpoint apply. The simplest plan is to keep liquids small and together, and to carry solid period products loose in a separate pouch so nothing needs to come out of your bag.

    Screening tips

    • Keep period products in a plain pouch separate from your liquids bag, so the liquids bag can come out quickly if your lane requires it.
    • A menstrual cup in its storage pouch is a small, soft item; there is nothing special to declare.
    • If you are carrying medication for menstrual pain, keep it in its original labeled packaging in your carry-on.
    Passengers approaching an airport security checkpoint with screening lanes
    Pads, tampons and cups are solids; only liquid washes and gels need to go in your liquids bag (Photo: MaedaAkihiko via Wikimedia Commons, CC BY-SA 4.0)

    Options from our original list

    These products appeared in the earlier version of this guide. We have kept the ones we could confirm on each maker’s own website and described them by what they are and who they suit, not by claims about health or performance. Product lines change, so check the current range and directions from the maker before you buy.

    Always Radiant Pads with FlexFoam

    Always lists Radiant Pads with FlexFoam in its range, alongside its Infinity pads with FlexFoam and daily liners. Thin, individually wrapped pads like these are the easy choice for travelers who already use pads and want something slim enough to carry in a small bag or jacket pocket. Pair them with a few liners for the lighter days of a trip.

    Rael Organic Cotton Cover Pads

    Rael sells Organic Cotton Cover Pads with Wings in several sizes and pack counts, as well as liners. They suit travelers who prefer an organic cotton cover and want a mainstream, individually wrapped disposable pad. Buy the pack size that matches your trip so you are not carrying a bulky box.

    Cora organic cotton tampons

    Cora’s range includes applicator tampons and applicator-free tampons, pads, liners, discs and a cup. For travel, applicator-free tampons are the most compact option to pack, while compact applicator tampons suit people who prefer an applicator but want something smaller to carry. Several large brands make compact applicator tampons, so you have choices if one is hard to find.

    DIVA Cup

    Diva, the maker of the long-running DivaCup, currently sells the DIVA Cup Model 1 along with cleansing and period essentials bundles. A reusable cup is one item for the whole trip, which is why many long-term travelers and backpackers like cups. Read the maker’s instructions on sizing, wear time and cleaning, and practice at home before relying on it on a trip.

    Saalt menstrual cups

    Saalt makes reusable menstrual cups in several sizes and colors, and publishes cup instructions on its site. Like any cup, it suits travelers who are comfortable emptying and rinsing it in a private bathroom and want less waste. Follow Saalt’s own guidance on use and cleaning.

    Thinx period underwear

    Thinx makes period underwear designed to be worn in place of or as a backup to other products. On a trip, a couple of pairs are a useful backup for overnight flights, long drives and days when you want nothing to insert or throw away. Plan for washing and drying time; quick-dry fabrics and a hotel room with a heater or good airflow help.

    We removed the other products from the original list because we could not confirm their current details on the makers’ own sites. That does not mean they are not good products; it means we are not in a position to describe them accurately.

    Tampon safety and toxic shock syndrome

    If you use tampons, it is worth knowing the FDA’s guidance, because travel days make it easy to lose track of time. The FDA explains in The Facts on Tampons and Tampon Safety that toxic shock syndrome (TSS) is rare and is caused by a toxic substance produced by certain kinds of bacteria. The FDA advises using the lowest absorbency you need, not wearing a tampon for more than eight hours and using tampons only during your period. It lists symptoms that may include a sudden high fever, vomiting, diarrhea, fainting or feeling faint when standing up, dizziness, or a rash that looks like a sunburn, and says that if you have any of these symptoms during or soon after your period, you should stop using tampons and seek medical attention immediately (source: FDA). On a long flight or a long travel day, set a phone reminder so a change does not slip your mind, and consider a pad or period underwear for overnight flights if you expect to sleep for a long stretch.

    How much to pack

    There is no universal number, but a simple method works:

    1. Estimate what you use in a typical cycle, by type (heavier days, lighter days, overnight).
    2. Add a buffer for travel days, delays and changes in routine. Cycles are not always predictable and trips get extended, so pack for the possibility that your period arrives during the trip even if you do not expect it.
    3. Decide whether to buy there. For a long trip to a place with plenty of shops, pack enough for the first few days and buy the rest locally. For remote destinations, cruises, safaris and hiking trips, pack everything you need.
    4. Split it up. Keep a day’s supply plus a spare in your personal item and the rest in your main bag, so a delayed checked bag does not leave you without.

    The carry-on period pouch

    A small zip pouch at the top of your personal item makes travel days much easier. A good kit includes:

    • Enough pads, liners or tampons for the travel day plus a spare, or your cup in its pouch
    • A spare pair of underwear or period underwear
    • A few small, opaque disposal bags for when there is no bin
    • Hand sanitizer and a few individually wrapped wipes
    • Any pain relief you normally use, in its original packaging
    • A small liquid wash, if you use one, inside your liquids bag

    A slim pouch or organizer also keeps things discreet if your bag is opened at security. Our guide to travel wallets for women covers small organizers, and our guide to a travel first aid kit covers the basic health items worth carrying on every trip.

    Managing your period on a flight

    • Choose an aisle seat if you expect to get up often. It is easier to reach the lavatory without climbing over neighbors.
    • Change just before boarding. Boarding, taxiing and the climb can take a long time with the seatbelt sign on.
    • Take your pouch with you to the lavatory rather than digging through your bag in the aisle.
    • Never flush products in an airplane toilet. Wrap them and use the bin in the lavatory.
    • Dress for comfort. Dark, soft, loose layers are more comfortable on a long flight. Our guide on what not to wear on a flight has more.
    • On overnight flights, consider a pad or period underwear as backup while you sleep. Our guide to sleeping on flights covers seat choice and routines for resting well in the air.
    A pair of period underwear laid flat
    Period underwear packs like clothing and makes a useful backup on overnight flights and long drives (Photo: Vulvani via Wikimedia Commons, CC BY-SA 4.0)

    Disposal and cleaning on the road

    Disposal

    In many countries, plumbing is not designed for anything but toilet paper, and in some places even toilet paper goes in a bin. Look for signs in the bathroom, and when in doubt, wrap products and use the bin. Carry a few small opaque bags for places with no bin, such as trailheads, beaches and some bus stations, and dispose of them at the next trash can. In campgrounds and national parks, follow the park’s own rules for packing out waste.

    Cleaning a cup on the go

    Follow the maker’s cleaning instructions. On the road, the practical challenge is privacy and water: a hotel bathroom is easy; a shared toilet stall is harder. Some travelers carry a small bottle of water into the stall to rinse, or simply empty the cup, wipe it and reinsert, then do a full clean back at the hotel. If you are not comfortable with the local tap water, use bottled water to rinse. Bring the cup’s storage pouch and let it dry fully before storing.

    Washing period underwear

    Rinse in cold water, wash according to the label and hang to dry. Hotel sinks, a small bottle of travel detergent within liquid limits and a travel clothesline make this manageable on longer trips. Plan around drying time, especially in humid climates.

    Buying period products abroad

    Pads are sold almost everywhere, but the formats and brands you are used to may not be. Some places have a narrower range of tampons or cups, and packaging may not show sizes the way you expect. A few tips:

    • Pack enough of your preferred product to get through the first few days.
    • Look in pharmacies and large supermarkets rather than small convenience shops for a wider range.
    • Take a photo of the box you use at home, including the absorbency or size, to show a pharmacist.
    • Learn the local word for pads and tampons before you go; a translation app works too.
    • In remote areas, islands and on cruise ships, assume that choice will be limited and prices higher.
    A supermarket shelf stocked with sanitary pads, tampons and toilet paper
    Pads are sold almost everywhere, but your usual brand and format may not be, so bring enough for the first few days (Photo: Minette Lontsie via Wikimedia Commons, CC BY-SA 4.0)

    Choosing by type of trip

    Business trips

    Discretion and convenience matter most. Compact, individually wrapped disposables in a slim pouch fit easily in a laptop bag. Pack a spare in your jacket or handbag for long meetings.

    Beach and pool holidays

    Tampons, cups and discs are the usual choice for swimming. Some brands also make period swimwear. Pack enough for extra changes after swimming.

    Hiking, camping and remote travel

    A cup or disc reduces what you have to carry and pack out, but it needs clean hands and water. Disposables need opaque, sealable bags to carry waste until you reach a bin. Plan with the facilities along your route in mind.

    Road trips

    Restroom stops can be far apart. Keep a pouch within reach in the car, not in the trunk, and stop before you need to. A rental car road trip is also a good reason to pack a small bin bag for the car. Our car rental search helps you plan the trip itself.

    Long-term and backpacking trips

    This is where reusables shine: a cup and a couple of pairs of period underwear can cover months of travel with very little space. Keep a small backup of disposables for travel days.

    Festivals and events

    Portable toilets and long lines make disposables with a wipe and a bag the easiest option. Carry a small pouch rather than a whole pack.

    Sustainable choices

    Reusable cups, discs and period underwear reduce the amount of waste you create on a trip, which is useful in places where trash collection is limited. Organic cotton disposables appeal to travelers who prefer natural materials. Whatever you use, dispose of it properly and never leave anything behind on trails or beaches. If you are building a lower-waste travel kit, our guide to eco-friendly travel flip-flops covers another small swap.

    Common mistakes

    • Packing everything in checked baggage. A delayed bag should not leave you without products.
    • Trying a new product on the trip. Test cups, discs and period underwear at home first.
    • Putting liquid washes in your pouch instead of the liquids bag. It can mean a bag search at security.
    • Assuming you can buy your usual brand abroad. Bring enough for the first days.
    • Losing track of time on travel days. Set reminders, especially if you use tampons.
    • Flushing products. Especially on planes and in countries with older plumbing, always use the bin.

    Frequently asked questions

    Can I take tampons and pads through airport security?

    Yes. They are solids, not liquids, so liquid limits do not apply. Check the TSA’s What Can I Bring? tool or CATSA’s carry-on page for any specific item you are unsure about.

    Can I bring a menstrual cup in my carry-on?

    Yes. A cup is a small solid item. Any liquid cup wash you bring follows the liquid rules.

    Do intimate washes count toward the liquid limit?

    Yes. In the United States they follow the TSA’s 3-1-1 rule, and in Canada CATSA’s 100 ml rule with a 1 L bag. Larger bottles can go in checked baggage.

    Is it safe to wear a tampon on a long flight?

    Follow the FDA’s guidance: use the lowest absorbency you need and do not wear a tampon for more than eight hours (FDA). On long or overnight flights, set a reminder or use a pad or period underwear while you sleep.

    What is the most space-efficient option for a long trip?

    A reusable cup or disc takes the least space, followed by applicator-free tampons. Period underwear is a good backup that packs like clothing.

    Where do I throw away products on a plane?

    Use the bin in the lavatory. Never flush anything but toilet paper in an airplane toilet.

    Will my period products be easy to find abroad?

    Pads usually are. Specific brands, tampon formats and cups can be harder to find, so bring enough of your preferred product for the first few days.

    Should I pack period products even if my period is not due?

    Yes. Timing is not always predictable and trips run long, and a small backup pouch weighs almost nothing.

    With your kit sorted, the rest of the trip is about the booking. Compare fares and flexible dates on our flight search, find a hotel with a private bathroom and good laundry options on our hotel search, and if you are planning a city break, our guide to things to do in Paris is a good start. For the rest of your packing, see our main guide to travel luggage, our guide to travel jewelry cases and our guide to anti-theft backpacks for a secure daypack.
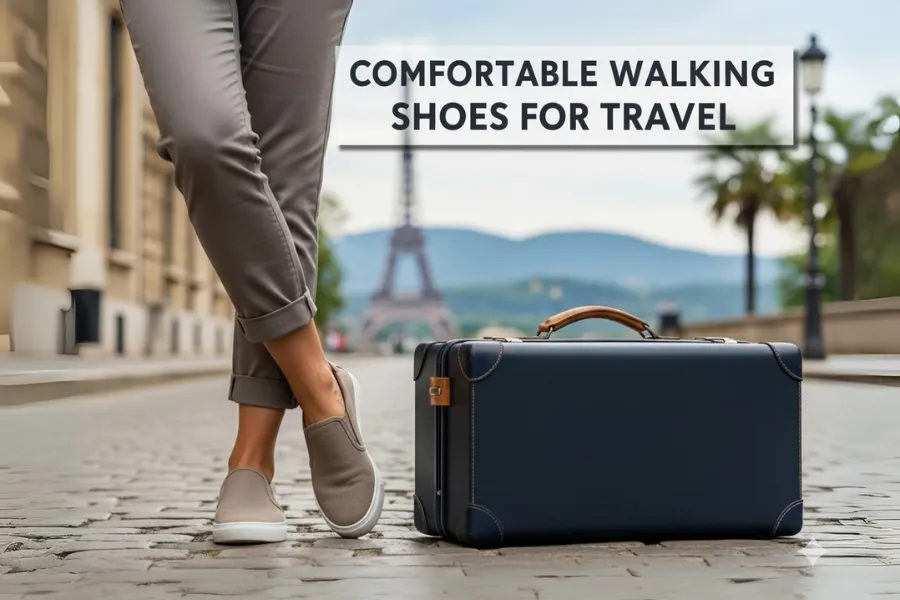
  • The Ultimate Guide to Buying Comfortable Walking Shoes for Traveling

    The Ultimate Guide to Buying Comfortable Walking Shoes for Traveling

    Travel is mostly walking. Even a trip built around beaches or business meetings adds up to long airport concourses, station transfers, museum floors, hilly old towns and evenings on your feet. The right pair of shoes is the difference between a day that ends with dinner and a day that ends with you icing your arches in the hotel room. The wrong pair shows up in the first afternoon as a hot spot on your heel, and by day three it is shaping where you go and how long you stay. This guide explains how to choose comfortable walking shoes for traveling: what actually makes a shoe comfortable over many hours, how to get the fit right, which style suits which kind of trip, how many pairs to pack, how to break them in and care for them on the road, and a set of well-known shoes from our original list that cover different needs and budgets.

    The short answer

    For most trips, pack one pair of cushioned, supportive walking shoes that you have already worn for at least a week, plus one lighter second pair that suits the destination: sandals or flip-flops for heat and beaches, a smarter leather sneaker for restaurants and meetings, or a trail shoe if you plan to hike. Choose your main pair for fit first, then cushioning, support and grip, and only then for looks and weight. Buy late in the day when your feet are at their largest, leave about a thumb’s width of room at the toe, and never start a trip in shoes straight out of the box. If you have ongoing foot pain, a foot condition or diabetes, talk to a doctor or podiatrist before a walking-heavy trip rather than relying on a new pair of shoes to fix it.

    Rows of shoes on display in a shoe store
    Try shoes on late in the day, in the socks you will travel in, and walk around before you decide (Photo: Tomascastelazo via Wikimedia Commons, CC BY-SA 4.0)

    Why travel is harder on your feet than daily life

    Many people who never think about their shoes at home find their feet are the weak link on a trip. There are good reasons for that:

    • You walk much more. Sightseeing days routinely involve several times the walking of a normal workday, often with a backpack.
    • The surfaces are harder and less even. Stone plazas, cobbled lanes, marble museum floors and station platforms give back far less than a carpeted office or a park path.
    • You stand still a lot. Queues, galleries and viewpoints mean long periods of standing, which many people find more tiring than steady walking.
    • Your feet swell. Long flights, heat and hours on your feet all make feet swell, so shoes that fit perfectly at home can pinch on day two.
    • You cannot easily change. At home you can swap shoes at lunchtime. On a day out in a new city, what you put on in the morning is what you wear until night.

    That is why the best travel shoe is rarely the most stylish or the lightest on the shelf. It is the one that stays comfortable from the first hour to the tenth.

    What makes a walking shoe comfortable

    Fit comes first

    No amount of cushioning fixes a shoe that is the wrong shape for your foot. The heel should sit snugly without slipping when you walk, the midfoot should feel held but not squeezed, and the toe box should give your toes room to spread and wiggle. A thumb’s width between your longest toe and the end of the shoe is a common rule of thumb, because feet slide forward on downhill streets and stairs. If your toes touch the front in the store, they will bruise on a long descent.

    Cushioning

    The midsole, the foam layer between the insole and the outsole, absorbs impact on hard ground. More cushioning generally means more comfort on pavement for long hours, though very soft, thick foam can feel unstable on uneven streets. Most travelers do well with a moderate to generous amount of cushioning that still lets them feel the ground.

    Support and stability

    Support is how well the shoe controls the way your foot rolls as you walk. Some people need more of it, especially if their feet roll inward or they have flat arches; others prefer a neutral shoe. A firm heel counter (the cup around the back of your heel) and a midsole that does not twist easily when you wring the shoe like a towel are signs of a stable shoe. If you wear orthotics, take them shopping and make sure they fit inside the shoe with the original insole removed.

    Flexibility in the right place

    A good walking shoe bends at the ball of the foot, where your foot bends, and stays fairly firm through the middle. A shoe that folds in half anywhere offers little support over a long day.

    Grip

    Smooth, worn stone gets slippery, especially when wet. A rubber outsole with some tread pattern grips far better than a flat, hard sole. If you are heading somewhere rainy or hilly, grip moves up the list.

    Breathability and weather

    Mesh and knit uppers keep feet cooler in heat and dry quickly, but let in rain. Leather and waterproof membranes keep feet drier in wet weather but run warmer. Think about the climate you are traveling to, not the one you are leaving.

    Weight and packability

    Lighter shoes are easier to wear all day and easier to pack, but the lightest designs often trade away cushioning and durability. Weight matters most for your second pair, which lives in your bag most of the time.

    Travel shoe styles compared

    There is no single best travel shoe. The right one depends on where you are going and what you will do there.

    StyleBest forStrengthsWatch out for
    Cushioned walking or running-style sneakerCity sightseeing, long walking daysMost comfort over many hours, good cushioning and supportSporty look; mesh versions get wet in rain
    Slip-on knit walking shoeCasual trips, flights, warm climatesLight, easy on and off, packs smallOften less support and grip; less secure on hills
    Leather sneakerCities, restaurants, business tripsSmarter look, wears well, sheds light rainHeavier, needs breaking in, runs warmer
    Trail shoe or light hikerMixed city and trail trips, national parksGrippy outsole, protective toe, handles dirt and gravelHeavier and stiffer on pavement; chunky look
    Walking sandalHot destinations, beach townsAiry, dries fast, works in waterLess protection; blisters where straps rub if not broken in
    Flip-flopsBeach, pool, hostel showersVery light, cheap, quick-dryingNot for long walks; little support or grip

    How to get the fit right

    • Shop late in the day. Feet swell over the day, so trying shoes in the afternoon or evening gives a truer sense of how they will feel after hours of walking.
    • Wear your travel socks. Try shoes with the socks you plan to wear on the trip. A thick hiking sock and a thin dress sock can change the fit by half a size.
    • Measure both feet. Most people have one foot slightly larger than the other. Fit the larger one.
    • Walk, do not just stand. Walk around the store for several minutes, including on any slope or stairs available. Notice any pressure points, rubbing or heel slip.
    • Check width, not just length. If the sides of your foot press against the shoe, look for a wide version rather than going up a size, which only adds length.
    • Trust comfort over a “breaking in” promise. Leather softens with wear, but a shoe that hurts in the store rarely becomes a favorite.
    • Buy online with a return plan. If you order online, order early, wear the shoes indoors first and keep the packaging until you are sure.

    Sizes vary between brands and even between models from the same brand, so do not assume your usual size. Each maker publishes its own size charts and fit notes on its site.

    Match the shoe to the trip

    European city breaks

    Old European centers mean cobblestones, stairs, hills and a lot of standing in museums and churches. A cushioned sneaker with a firm heel and a grippy rubber sole is the best main shoe. If you want to look a little smarter for dinner, a leather sneaker in a neutral color works in most restaurants. Our guide to traveling Europe on a multi-city trip and our things to do in Rome guide give a good idea of how much walking a typical day involves.

    Beach and warm-weather trips

    In heat, breathable mesh sneakers or a supportive walking sandal will serve you better than heavy leather. Add a pair of flip-flops for the beach, pool deck and shared showers; our guide to eco-friendly travel flip-flops covers what to look for. Do not try to walk a whole city in flip-flops; your arches will let you know.

    Cold, wet and winter trips

    For rain and snow, choose leather or a waterproof membrane, a thicker outsole that insulates you from cold ground and a deeper tread. Pair them with wool or synthetic socks that stay warm when damp. If you expect slush or ice, a light winter boot with a lugged sole is safer than any sneaker.

    Hiking and national parks

    If your trip mixes cities with real trails, a trail shoe gives you grip on dirt and gravel while staying comfortable enough for town. For long hikes on rough ground with a loaded pack, a proper hiking shoe or boot gives more protection and stability. Our guide to hiking backpacks covers the other half of a trail setup.

    Business trips

    A clean leather sneaker or a cushioned dress shoe can carry you from the airport to a client meeting and a dinner without packing a second pair. If your role requires formal shoes, add a cushioned insole and pack a pair of comfortable sneakers for walking between meetings.

    A narrow cobblestone street between stone buildings in an Italian hill town
    Cobblestones and hills are where cushioning, a firm heel and a grippy sole earn their place (Photo: Dcrjsr via Wikimedia Commons, CC BY 3.0)

    Shoes from our original list

    The shoes below were featured in the original version of this guide. They are not a ranked test; they cover different styles and budgets. Models are updated, colors and materials change between versions, and several of these listings are women’s styles, so check the maker’s current product page and size chart for the exact version you are buying.

    Skechers Women’s Go Walk Joy

    Skechers‘ Go Walk line is built around lightweight slip-on walking shoes, and the Go Walk Joy is a casual women’s slip-on in that family. A shoe like this suits travelers who want something light and easy to pull on and off, for flights, casual sightseeing in flat cities and warm weather. As with most slip-ons, it offers less adjustability than a laced shoe, so make sure your heel stays put when you walk.

    Adidas Women’s Cloudfoam Pure

    The Cloudfoam Pure is a women’s lifestyle and running-inspired sneaker with a soft, sock-like feel. It suits travelers who want a light, sporty shoe that works with casual outfits for airports and city days. Choose a more structured shoe instead if you need firm arch support.

    New Balance Women’s 608

    New Balance’s 608 is a long-running leather cross-trainer with a classic, chunky look. Shoes of this type tend to feel stable and supportive and hold up well to heavy use, which makes them a practical choice for travelers who put comfort and support ahead of weight. They are bulkier than knit sneakers, so they are best worn on the plane rather than packed.

    Dr. Scholl’s Women’s Madison slip-on sneaker

    The Madison is a casual slip-on sneaker from Dr. Scholl’s Shoes, a style that looks tidy enough for dinner and slips off easily. It suits city trips where you want one shoe that works for daytime walking and evenings out. If you plan very long walking days, compare its support with a laced sneaker before choosing it as your only pair.

    ASICS Women’s Gel-Venture

    ASICS’ Gel-Venture is a trail-running shoe with a grippier outsole than a road shoe. That makes it a good fit for trips that mix city walking with park paths, dirt trails and gravel. On smooth pavement it feels a little firmer and heavier than a city sneaker, which is the trade-off for its grip.

    ECCO Women’s Soft 7 Sneaker

    ECCO’s Soft 7 is a leather sneaker with a clean, minimal look. A premium leather sneaker like this suits travelers who want one pair that looks smart in museums, restaurants and on business trips while still being comfortable for a day of walking. Leather needs a short break-in period and a little care, and it costs more than a mesh sneaker, but it tends to wear well.

    TIOSEBON Women’s slip-on walking shoes

    TIOSEBON sells low-cost knit slip-on walking shoes. Shoes of this kind are light, breathable and pack flat, which makes them a sensible backup pair, a flight shoe or a warm-weather shoe for casual days. They usually offer less support and durability than the more structured shoes above, so treat them as a second pair rather than your main walking shoe on a big sightseeing trip.

    A pair of cushioned running shoes photographed against a plain background
    Running-style sneakers are built for many steps on hard ground, which is what a sightseeing day asks of your feet (Photo: Petar Milošević via Wikimedia Commons, CC BY-SA 4.0)

    How many pairs to pack

    Shoes are the heaviest, bulkiest thing most people pack, so the number of pairs has a big effect on whether you can travel carry-on only. For most trips, two pairs is the sweet spot:

    • Your main walking shoe, worn on travel days so it does not take up space in your bag.
    • A second pair chosen for the destination: flip-flops or sandals for heat, a smarter shoe for dinners and meetings, or a trail shoe for hiking.

    Two pairs also let you rotate, which gives each pair time to dry out and changes the pressure points on your feet. Add a third pair only if an activity truly needs it, such as formal shoes for a wedding, water shoes for rocky beaches or boots for snow. Our main guide to choosing travel luggage covers how to fit everything, shoes included, into a carry-on.

    Break in shoes before you go

    The single most common travel shoe mistake is starting a trip in brand-new shoes. Even a shoe that feels perfect in the store can rub in unexpected places after hours of walking. Wear new shoes around the house and on short walks for at least a week or two before the trip, then do at least one long walk of several hours. If they rub or pinch, you still have time to exchange them. Leather shoes in particular need time to soften and mold to your feet.

    Socks, insoles and blister prevention

    Socks matter as much as shoes

    Cotton socks hold sweat against your skin, which softens it and makes blisters more likely. Merino wool or synthetic blend socks move moisture away from your skin and dry faster, which is why many hikers and frequent walkers prefer them. Make sure socks fit without wrinkles, and pack enough that you can put on a dry pair each day.

    Insoles

    Many shoes come with thin insoles. A supportive aftermarket insole can add arch support and cushioning, and some people find it makes a good shoe excellent. If you have a medical foot condition or wear prescribed orthotics, follow the advice of your doctor or podiatrist rather than guessing.

    Dealing with hot spots and blisters

    A hot spot is the warning before a blister. Stop and deal with it as soon as you feel it: adjust your laces, change into dry socks or cover the spot with a blister plaster or tape. Most small blisters heal on their own if you protect them and keep them clean; the NHS has clear advice on treating and preventing blisters, including when to see a professional. A small travel first aid kit with blister plasters is worth its weight on any walking trip.

    Shoes, flights and airport security

    Your travel shoes do a lot of work before you reach your destination. On a long flight, feet swell, so a shoe with laces or some stretch is more comfortable than a tight one. Some people loosen their laces in flight or bring light slippers or socks for the cabin. If you are prone to swelling, our guide to compression socks for long flights explains how they work and why it is wise to check with a doctor if you have circulation concerns.

    At security, rules on removing shoes differ by country and airport and have changed over time. In the United States, the Department of Homeland Security announced in 2025 that travelers at domestic checkpoints would no longer have to remove their shoes as a general rule, though officers can still ask you to. Other countries set their own rules; in Canada, check CATSA’s guidance before you fly. Either way, shoes that slip on and off quickly make screening easier, and it is sensible to avoid shoes with a lot of metal hardware.

    Weather, terrain and care on the road

    • Dry them properly. If shoes get soaked, remove the insoles, stuff the shoes with newspaper or a towel and let them dry at room temperature. Direct heat from a radiator or hair dryer can damage glues and leather.
    • Rotate. Wearing a different pair every other day lets foam recover and shoes dry fully, which also helps with odor.
    • Clean as you go. Brush off dirt and wipe shoes with a damp cloth and mild soap. Treat leather with a suitable conditioner before a trip if you expect rain.
    • Keep odor in check. Air shoes out overnight, change socks daily and use a breathable shoe bag rather than sealing damp shoes in plastic.
    • Know when to retire them. Cushioning foam breaks down over time even when the upper looks fine. If a favorite pair feels flat or your feet ache sooner than they used to, it may be time for a new pair, ideally a few weeks before your next trip.
    A pair of trail running shoes with a lugged outsole
    If the trip mixes cities with dirt paths and gravel, a trail shoe's grippier sole is worth the extra weight (Photo: Petar Milošević via Wikimedia Commons, CC BY-SA 4.0)

    When foot pain is more than a shoe problem

    Good shoes prevent a lot of discomfort, but they are not a treatment. If you have persistent heel or arch pain, numbness, swelling that does not go down, or a condition such as diabetes that affects your feet, see a doctor or podiatrist before a walking-heavy trip. The NHS page on foot pain is a useful overview of common causes and when to get help. Plan rest into your days as well: a café stop or a tram ride between sights does as much for tired feet as any shoe.

    Build a walking-friendly travel kit

    Comfortable shoes work best as part of a kit designed for long days on foot:

    • A light daypack that sits close to your back. For busy cities, an anti-theft backpack adds locking zippers and hidden pockets.
    • Comfortable trousers that move with you and handle a change of weather; see our guide to travel pants for men.
    • A secure place for cash and cards, such as a money belt worn under your clothes, so you are not reaching into a back pocket in a crowd.
    • A carry-on travel pack if you move between cities often; our guide to the Peak Design Travel Backpack 45L covers how to choose one.
    • Water, a snack and a light layer, because tired and hungry feet hurt more.

    Common mistakes

    • Wearing new shoes on day one. Break them in at home first.
    • Choosing style over comfort for the main pair. Pick a comfortable main shoe and a stylish second pair for evenings.
    • Buying too small. Feet swell in heat and after flights; leave room at the toe.
    • Relying on flip-flops for long walks. They are for beaches and showers, not ten-hour city days.
    • Cotton socks on hot days. Choose moisture-wicking socks and change them daily.
    • Ignoring hot spots. Stop and deal with them before they become blisters.
    • Packing too many pairs. Two well-chosen pairs cover most trips and keep your bag light.

    Frequently asked questions

    What type of shoe is best for walking all day while traveling?

    For most people, a cushioned, supportive laced sneaker that fits well and has already been broken in. Leather sneakers work if you want a smarter look, and trail shoes suit trips with hiking.

    Are running shoes good for travel?

    Often, yes. Running shoes are designed for cushioning and comfort over many steps, which is exactly what a sightseeing day demands. Very soft, high-stack running shoes can feel wobbly on uneven cobblestones, so a moderately cushioned, stable model is usually a better choice.

    How many pairs of shoes should I pack?

    Two for most trips: a main walking shoe worn on travel days and a second pair suited to the destination. Add a third only for a specific need such as formal events, snow or water activities.

    How long should I break in new walking shoes?

    Aim for at least a week or two of regular wear, including at least one long walk, before you travel. Leather shoes may need a little longer.

    Are slip-on shoes good for travel?

    They are convenient for flights and casual days, and easy at security. They usually offer less support and adjustability than laced shoes, so they work best as a second pair or for trips with lighter walking.

    Do I have to take my shoes off at airport security?

    It depends on the country and airport. The United States ended its general shoes-off requirement at domestic checkpoints in 2025, but officers can still ask you to remove them, and other countries set their own rules. Check the security agency’s site for your departure airport before you fly.

    What socks are best for long walking days?

    Merino wool or synthetic blend socks that wick moisture and fit without wrinkles. They reduce the damp, soft skin that leads to blisters. Pack enough to change daily.

    Should I buy walking shoes online?

    You can, as long as you know your size in that brand and order early enough to exchange them. Wear them indoors first and check the return policy before you walk outside in them.

    With your feet sorted, plan the walking-heavy trip you have been thinking about. Compare fares on our flight search, including flexible dates, find a well-located hotel on our hotel search so you start each day close to the sights, and if the trip includes a road trip or national park, compare vehicles on our car rental search. For a city made for walking, start with a trip to Paris and our guide to things to do in Paris, and for the rest of your kit, see our main guide to travel luggage.

  • Travel Smarter: 10 Best Traveling Books for Kids

    Travel Smarter: 10 Best Traveling Books for Kids

    Every parent who has spent three hours in a car or a plane seat with a restless child knows how quickly the good mood runs out. Tablets help, until the battery dies or the downloads fail. Books are the quiet workhorse of family travel: no charging, no Wi-Fi, no volume to argue about, and the right one can hold a child’s attention for far longer than you would expect. The trick is choosing books that suit travel specifically, which is not the same as choosing good books. A beautiful hardcover with delicate pages, a stack of heavy picture books, or a sticker book that sheds pieces into the seat gap will make the trip harder, not easier. This guide covers what makes a book travel well, the best types by age, specific titles that are long-standing favorites, books that connect to where you are going, audiobooks, how to pack and ration them, and the mistakes that turn a reading plan into a mess.

    The short answer

    Pack light, durable books that reward repeat looking, and mix types. For toddlers, sturdy board books and lift-the-flap books about planes, trains and vehicles. For ages three to seven, search-and-find books like I Spy and Where’s Waldo?, picture books about airports and travel, and sticker and activity books. For confident readers, a chapter-book series they already love, plus an atlas or fact book about the world. Add a book about your destination, load a few library audiobooks for the car, and hold one new book back as a surprise for the hardest stretch of the trip.

    A boy lying down and reading a chapter book
    A chapter-book series a child already loves is the safest bet for a long flight (Photo: Wilfredor via Wikimedia Commons, CC0)

    What makes a book good for travel

    A good travel book passes a few practical tests on top of being a good read.

    • Durability. Board books, thick pages and wipe-clean covers survive juice, crumbs and being dropped in an airport. Save the heirloom hardcover for home.
    • Weight and size. Every book goes in someone’s bag. Paperbacks, slim activity books and compact formats win. A large-format atlas may be worth it for an older child on a long flight, but one is enough.
    • Replay value. Books children can look at again and again, like search-and-find books, detailed illustrated books and fact books, last far longer than a short story read once.
    • Few loose parts. Stickers and flaps are great; pop-up pieces, loose cards and books that come with small toys are easy to lose under a seat.
    • Low mess. Crayons roll, markers stain upholstery, and glitter is forever. Choose stickers, pencils or water-reveal pads for activity books.
    • Right level of independence. On a plane, a book the child can enjoy alone gives parents a break; a book that needs reading aloud is better for the car, where everyone can listen.

    Best types of travel books by age

    AgeBest typesWhy they travel well
    1 to 2Board books, touch-and-feel, lift-the-flapIndestructible, short, and good for pointing and naming
    3 to 5Picture books about travel and vehicles, search-and-find, sticker booksRepeatable, independent looking, and they explain what is happening at the airport
    5 to 7Activity books, early readers, flap books with factsMix of doing and reading; builds confidence on a long trip
    7 to 10Chapter-book series, puzzle books, illustrated atlasesLong enough to fill a flight; series mean the next book is always wanted
    10 to 12Longer novels, fact books, destination guides for kidsIndependent reading for hours; a way to prepare for the destination

    Toddlers: board books and flap books

    For children under three, the best travel books are sturdy, simple and about the things they will see. Board books about planes, trains, cars and trucks give a toddler words for the noisy, confusing world of an airport, and naming things on the page is an activity in itself.

    • My Big Train Book, a sturdy board book with big, bright photographs of trains, is ideal for pointing and naming and is durable enough for a bumpy ride.
    • Byron Barton’s Airport walks through a trip from arrival at the terminal to takeoff in bold, simple pictures, which can make a first flight feel less strange.
    • Lift-the-flap and touch-and-feel books keep small hands busy. Choose board-book flaps over paper ones, which tear.

    At this age, familiar favorites from home often work better than new books, because a toddler in an unfamiliar place finds comfort in the known. Bring one or two of those, plus one new travel-themed book.

    Ages three to seven: picture books, search-and-find, stickers

    This is the age where books do the most work on a trip, because children can look independently for long stretches but still love being read to.

    Picture books about travel

    • Usborne Look Inside an Airport is a flap book that shows what happens behind the scenes: check-in, baggage, security, the control tower and the plane. It answers a lot of questions before they are asked, and the flaps keep children busy at the gate.
    • Richard Scarry’s Cars and Trucks and Things That Go is a classic for road trips. The pages are packed with detail and running jokes, and children can pore over it for a long time, hunting for Goldbug on every spread.
    • National Geographic Little Kids First Big Book of the World introduces continents, animals, landmarks and people with big photographs and short, readable facts, roughly suited to ages four to eight. It is a good way to spark curiosity about where you are going. National Geographic Kids has more from the same family of books and games.

    Search-and-find books

    Search-and-find books may be the single best category for travel, because each page can take many minutes and children happily revisit them.

    • The I Spy books by Jean Marzollo and Walter Wick, with their photographed scenes and rhyming riddles, work for a wide age range, and siblings can compete to find objects first.
    • Where’s Waldo? by Martin Handford (published as Where’s Wally? in some countries) needs no reading at all, which makes it perfect for mixed ages.

    Sticker and activity books

    Sticker books are mess-free and absorbing. The Usborne Sticker Dolly Dressing series, with its many themed titles, is a long-running favorite, and there are sticker books on vehicles, dinosaurs, space and maps for every taste. Maze books, dot-to-dot books and simple puzzle books sized for travel are good for children around five to ten. Reusable water-reveal pads, where a water-filled pen reveals colors that fade as they dry, are a clever option for younger children, with nothing to spill beyond a few drops.

    Rows of economy seats in the cabin of an Air Canada Boeing 777
    On a plane, compact books a child can enjoy alone, kept in the bag under the seat, work best (Photo: jo3hug via Wikimedia Commons, CC BY 2.0)

    Ages seven to twelve: series, puzzles and atlases

    Older children who read independently are the easiest to entertain with books, as long as the book is one they actually want to read.

    Chapter-book series

    A series they already love is the safest bet: they know the characters, and finishing one book on the flight makes them want the next. Travel-themed series add to the excitement.

    • Mary Pope Osborne’s Magic Tree House series sends two siblings to a different place and time in each book, from ancient Rome to the rainforest. The books are short enough to finish on a flight, and there are many of them. The official Magic Tree House site lists the titles.
    • Jeff Brown’s Flat Stanley, about a boy flattened by a bulletin board who travels by mail, has inspired school projects around the world and is a natural travel read for early chapter-book readers.

    Atlases and fact books

    • Atlas of Adventures, illustrated by Lucy Letherland, is a large, beautifully illustrated atlas full of activities and adventures around the world, best for roughly seven to twelve. It is heavy, so bring it for a long flight rather than a day trip.
    • Maps by Aleksandra Mizielińska and Daniel Mizieliński is an oversized illustrated atlas of countries, packed with drawings of food, people, animals and landmarks. It is a book to linger over, ideal for a long-haul flight or a rainy afternoon at the hotel.
    • Fact books in the “weird but true” style from National Geographic Kids offer short, surprising facts that children love to read aloud to the rest of the car.

    Puzzle books

    Word searches, crosswords, logic puzzles and travel activity books with games and quizzes are ideal for children who find reading for long stretches tiring. Pack a pencil with a cap; pens leak in the cabin.

    Books about where you are going

    One of the most rewarding things you can pack is a book set in your destination. Reading about a place before and during the trip gives children something to look for, and seeing the real thing is thrilling.

    • Paris: Ludwig Bemelmans’s Madeline, about the little girl in the old house covered with vines, shows off Paris landmarks on every page. Planning the trip? Start with flights to Paris and our Paris guide.
    • London: Michael Bond’s A Bear Called Paddington begins at Paddington Station, which you can visit. See flights to London.
    • New York: Kay Thompson’s Eloise, the girl who lives at the Plaza Hotel, is a perfect before-the-trip read. See flights to New York and our New York guide.
    • Boston: Robert McCloskey’s Make Way for Ducklings is set in the Public Garden, where bronze statues of the duck family stand today. See flights to Boston.
    • Many cities: Miroslav Sasek’s classic This Is series, with titles including This Is Paris, This Is London, This Is New York and This Is Rome, offers illustrated tours of the great cities that older children and adults both enjoy.

    Your local librarian can suggest books for almost any destination, including picture books set in national parks and nonfiction about the history and animals of the place you are visiting.

    Books for first-time or nervous flyers

    For a child who has never flown, or one who is anxious about it, the unknown is often the hardest part. Books that walk through the whole journey, from packing and arriving at the airport to security, boarding, takeoff and landing, turn the unknown into a sequence they can picture. Read one several times in the week before the trip, and talk through each step: “This is where we give them our bags.” “This is the part where the plane goes fast and then lifts up.” On travel day, point out the things you saw in the book as you pass them. Many children find it reassuring to recognize the check-in desk, the X-ray belt and the jet bridge from the pages.

    It helps to be honest about the less pleasant parts, like waiting in lines, ears popping and the seat belt sign, so nothing comes as a shock. Pair the book with a plan for those moments: a snack or a drink during takeoff and landing, a favorite book for the wait at the gate, and a small reward when you land. Our guide on how early to get to the airport helps you build in enough time that travel day does not feel rushed, which keeps everyone calmer.

    Matching books to the kind of travel

    On a plane

    Planes suit independent reading and quiet activities: search-and-find books, sticker books, puzzle books and chapter books. Keep the books in the bag under the seat, not in the overhead bin, so you can reach them during taxi and turbulence when you cannot stand up. Choose compact formats that fit on a tray table.

    In a car

    Reading in a moving car makes many children feel sick. Children between about two and twelve are especially prone to motion sickness, according to the CDC’s guidance on motion sickness, which recommends looking at the horizon. If your child gets carsick, save books for stops and use audiobooks while driving, or choose picture books that need only a glance rather than long reading. Read-aloud from the front seat, where a parent reads to the whole car, works well for families who do not get sick.

    On a train

    Trains are the best of both: a table, space to spread out, and a smooth ride. Bring the big atlas, the activity book and the chapter book for a train journey.

    At the hotel

    A bedtime book from home helps children settle in an unfamiliar room. It is a small ritual that tells them the day is over, wherever you are. Our guide to booking hotels for family vacations covers choosing rooms where children can sleep while adults stay up.

    The interior of an Amtrak passenger car with rows of seats
    Trains are the best of both worlds for reading: space, a smooth ride and a view (Photo: CZmarlin — Christopher Ziemnowicz — photo credit is required if this image is used anywhere other than Wikipedia. via Wikimedia Commons, CC BY-SA 4.0)

    Audiobooks and e-readers

    Audiobooks are the best answer to the reading-in-the-car problem and a great way for a whole family to share a story. Many public libraries lend audiobooks and e-books free through apps like Libby and Hoopla; all you need is a library card. Borrow and download titles before you leave, because loans expire and you may not have a good signal on the road. A long series read aloud by a good narrator can carry a family across hundreds of miles.

    For older children, an e-reader holds dozens of books in the space of one paperback, with a long battery life. It is a good investment for a child who reads fast. For younger children, physical books are usually more engaging and easier to manage.

    How to pack and ration books

    • Give each child a pouch. A zippered pouch or small bag of their own books and activities keeps things organized and easy to grab.
    • Keep a surprise in reserve. One new book, wrapped or hidden, brought out at the hardest point of the journey, often at the end of a long flight, buys an hour of calm.
    • Rotate. Do not hand over everything at once. Offer one book, then an activity, then a snack, then a different book.
    • Mix ages for siblings. A book the younger child can look at while the older one reads it aloud keeps two children busy at once.
    • Weigh the bag. Books are heavy. Limit the number per child, and choose paperbacks and slim activity books.
    • Plan for the return. Pack one or two books that have not been seen yet for the trip home, when everyone is tired.

    Books go in the child’s own backpack or case; our guide to kids’ suitcases covers bags that children can manage themselves.

    Shelves of children's books in the children's section of a public library
    Your public library is the best place to stock up on travel and destination books before a trip (Photo: Micheal Kaluba via Wikimedia Commons, CC BY-SA 4.0)

    Making reading part of the trip

    • Ask questions as you read. “What would you pack if you went there?” “Which of these animals do you think we will see?” Books become a way to talk about the trip.
    • Start a travel journal. A small notebook where children draw what they saw, stick a ticket stub and write a sentence or two turns the trip into their own book to reread later.
    • Visit a bookstore or library on the trip. Choosing a book in a new city is a souvenir that lasts, and many city libraries have wonderful children’s rooms.
    • Use small rewards if they help. A sticker after a chapter, or choosing the next snack, can keep reluctant readers going. Keep it light.
    • Read yourself. Children notice when parents put down their phones and pick up a book.

    Where to find good books before you go

    You do not need to buy everything. Your public library is the best starting point, with children’s librarians who can recommend books for every age and destination. The Association for Library Service to Children publishes an annual list of notable children’s books, a reliable source of well-reviewed titles. Borrowing a stack of travel and destination books a couple of weeks before the trip builds anticipation, and the ones that are a hit can be bought for the journey itself.

    Common mistakes

    • Packing too many. Five books per child is plenty for most trips; the rest is weight.
    • Bringing only new books. Familiar favorites are comforting, especially for young children in an unfamiliar place.
    • Loose-piece books on planes. Pop-ups, puzzle pieces and card sets end up under the seats.
    • Markers and glitter. Crayons and markers stain upholstery and tray tables. Stick to stickers and pencils.
    • Forcing reading in the car. If a child feels sick, stop. Switch to an audiobook and look out of the window.
    • Not downloading audiobooks ahead. No signal in the mountains means no audiobook, unless you downloaded it at home.

    Frequently asked questions

    What are the best books for kids to take traveling?

    Durable, light books with high replay value: board books for toddlers, search-and-find and sticker books for preschoolers, activity books and a favorite chapter-book series for older children, and one atlas or fact book about the world.

    At what age should I start bringing books on trips?

    From the very first trip. Babies enjoy simple board books with high-contrast pictures, and a familiar book from home is a comfort at any age. The type of book changes as children grow.

    Are books better than tablets for long journeys?

    They complement each other. Books need no battery or signal, encourage imagination and give eyes a break from screens. Many families use both: books and activities first, a screen as a reward or for the final stretch.

    How do I choose the right travel book for a plane or train?

    Choose compact books a child can enjoy alone, like search-and-find, sticker and puzzle books, for planes. On a train, with more space and a smooth ride, larger books like atlases work well.

    How can kids read in the car without getting sick?

    Many cannot, and that is normal. Encourage looking at the horizon, try picture books that need only brief glances, and use audiobooks for long stretches. Stop if a child feels unwell.

    How many books should I pack for a child?

    Three to five for most trips: a favorite, a new travel-themed book, an activity or sticker book, and a surprise for the hardest part of the journey. Add a library audiobook or two.

    Can travel books also be educational?

    Yes. Atlases, fact books and books set in your destination teach geography, history and culture, and a book about airports helps children understand what is happening on travel day.

    With the reading sorted, the rest is the trip. Compare fares on flexible dates on our flight search, choose a family-friendly base on our hotel search, and if there is a road trip in the plan, price a car with room for everyone on our car rental search. For the bigger picture, read our guide on why a family vacation is worth the time off, and if you are traveling with a baby, our travel bottle warmer guide and family car rental guide cover the essentials.

  • Best First Aid Kit for Travel: What to Pack and How to Choose

    Best First Aid Kit for Travel: What to Pack and How to Choose

    Most travel health problems are small: a blister from new walking shoes, a cut from a broken shell on the beach, a scraped knee, a splinter, an upset stomach or a headache after a long flight. None of them should ruin a trip, but they can take a surprising chunk out of a day when you are hunting for a pharmacy in a city where you do not speak the language, late at night, with a child in tow. A small, well-chosen first aid kit means you can deal with minor problems in minutes and get back to your plans. This guide explains what a travel first aid kit is for and what it is not for, how to choose between a ready-made kit and building your own, which supplies to pack for different kinds of trips, what the official guidance says about medications and airport security, five kits from our original list, and how to find care abroad when something is more than a plaster can fix.

    Important: this guide is general travel packing information, not medical advice. It does not recommend specific medicines or doses. Talk to a doctor or pharmacist about prescription and destination-specific needs, about which over-the-counter products are right for you and your family, and about vaccines or preventive medicines for where you are going, ideally several weeks before you leave. In an emergency, call the local emergency number.

    The short answer

    For most trips, a compact, zippered first aid kit with a clear layout covers the basics: adhesive bandages in several sizes, blister dressings, gauze and tape, antiseptic wipes, tweezers and a pair of gloves. Add your prescriptions in their original labeled containers, any over-the-counter products your pharmacist suggests for your trip, and items specific to where you are going, such as insect repellent or sunscreen. A ready-made kit is a convenient base; most travelers then add a few personal items. Keep medications and the core kit in your carry-on, check expiry dates before each trip, and use the CDC’s Pack Smart list as a checklist.

    A compact first aid kit for leisure and travel laid out with its contents
    A small, organized kit you actually carry is worth more than a big one left in the hotel room (Photo: Friedrich Haag via Wikimedia Commons, CC BY-SA 4.0)

    What a travel first aid kit is for

    A travel kit is for minor, common problems and for keeping you comfortable until you can get proper care if you need it. It covers:

    • Small cuts, scrapes and blisters, which are by far the most common travel injuries for walkers, hikers and beachgoers.
    • Everyday discomforts such as a headache, a stuffy nose or an upset stomach, with over-the-counter products you already know work for you.
    • Splinters, insect bites and sunburn, with the simple tools and supplies to clean and cover.
    • Your own ongoing needs, such as prescriptions, glasses or contact lens supplies and any medical devices.

    It is not a substitute for medical care. Deep wounds, burns, head injuries, breathing problems, chest pain, high fevers, signs of an allergic reaction and anything that worries you need a medical professional. Part of preparing is knowing how you would find one at your destination, which we cover below.

    Ready-made kit or build your own?

    Ready-made kits

    A ready-made kit gives you an organized case with a sensible mix of basic supplies in one purchase. It is the easiest place to start, and the case alone is worth having because it keeps everything together and visible. The drawbacks: many kits pad their piece count with dozens of tiny bandages you will never use, some include items you do not need for a city trip, and almost none include the medications or personal items that matter most to you.

    Building your own

    Building your own kit in a small zippered pouch lets you pack exactly what you need in the sizes you like, and replace items as you use them. It takes a little more time, and it is easy to forget a basic item like tape or gloves if you do not work from a list.

    The best of both

    Most experienced travelers buy a compact ready-made kit, remove what they will not use, and add their own items: prescriptions, blister dressings in a larger size, a few over-the-counter products their pharmacist has suggested, and trip-specific extras. The result is small, organized and personal.

    What to look for in a ready-made kit

    • Size. Choose one that fits your daypack or personal item. A kit left in the hotel room does not help on a hike.
    • A clear layout. Clear pockets, labeled sections and elastic loops let you find tweezers or a blister dressing in seconds.
    • A durable case. Soft zippered cases pack easily; hard or water-resistant cases protect contents on boats, beaches and camping trips.
    • A contents list. A printed list lets you check what is inside and restock what you use.
    • Useful sizes. A range of bandage sizes, including larger ones, is more useful than a hundred identical small strips.
    • Latex-free options if anyone in your group is sensitive to latex.
    • Expiry dates. Wipes, ointments and any included medicines expire. Check them when the kit arrives and before each trip.

    Be wary of claims that a kit is “approved” by an airport security agency. Security agencies set rules for items, not certifications for kits, so what matters is whether the individual items in your kit meet the rules for your flight.

    A person applying an adhesive bandage to their foot
    Blisters are the most common walking-trip problem; cover hot spots early, before they turn into blisters (Photo: CauliflowerMoon via Wikimedia Commons, CC BY 4.0)

    Core supplies checklist

    These non-medication basics cover the most common minor problems for most trips:

    • Adhesive bandages in several sizes, including a few large ones
    • Blister dressings or moleskin, plus a small roll of tape for hot spots
    • Sterile gauze pads and a roll of medical tape
    • Antiseptic wipes or single-use packets of cleanser
    • Fine-tipped tweezers for splinters
    • Small scissors, if allowed for your flight, or pre-cut tape and dressings if not
    • Disposable gloves
    • An elastic bandage for support
    • A digital thermometer
    • Hand sanitizer; the CDC’s Pack Smart list suggests one containing at least 60% alcohol
    • A few safety pins and zip bags
    • A card with emergency contacts, allergies and your insurance details

    Medicines: what the official lists suggest

    The CDC’s Pack Smart page lists over-the-counter medicines that travelers may want to consider, including pain and fever medicine, an antihistamine, diarrhea medicine, an antacid, a mild laxative, cough and cold remedies and motion sickness medicine, alongside prescriptions in their original containers. It also notes that you may not need every item and that what you pack depends on your destination and your health.

    We are not recommending any particular product or dose. Which medicines suit you depends on your age, health, other medications, allergies and pregnancy status, and children need products and doses made for them. Ask a pharmacist or doctor what makes sense for you and your family, buy familiar products before you leave, and always follow the label or your prescriber’s directions. Keep medicines in their original packaging so the name, strength and directions stay with them.

    Traveling with prescription medications

    • Carry them in your carry-on. Checked bags can be delayed or lost. Canada’s guidance on travelling with medication advises keeping medications and medical supplies in your carry-on.
    • Keep original labeled containers, and bring a copy of your prescriptions, ideally showing generic as well as brand names, in case you need a refill abroad.
    • Bring a note from your doctor for medications that could draw questions, and for needles, syringes or medical devices.
    • Bring enough for the whole trip, plus a little extra in case of delays. Ask your pharmacist about refilling early if your trip overlaps a refill date.
    • Check whether your medicines are legal where you are going. Some medicines that are legal at home are restricted or banned elsewhere, or need permission in advance. The CDC’s traveling abroad with medicine page explains how to check, and Canada’s guidance suggests contacting the destination country’s government office.
    • Ask about time zones. If you take medication on a strict schedule, ask your doctor or pharmacist how to manage timing when you cross several time zones.

    Airport security rules for a first aid kit

    First aid supplies generally travel fine in carry-on bags, but a few items need attention. Rules change, so check the official pages before you fly.

    Liquids, gels and creams

    Ointments, liquid medicines, hand sanitizer and sunscreen count as liquids at security. In the US, the TSA’s liquids rule limits most carry-on liquids to small containers in one quart-sized bag. Medically necessary liquids are treated differently: the TSA’s page on disabilities and medical conditions explains how to declare them to the officer. In Canada, CATSA’s medication and medical items page explains what you can bring and how to present it at screening.

    Scissors and tweezers

    Tweezers are generally allowed in carry-on bags, and the TSA’s scissors page explains the rules for scissors, which are allowed or not depending on blade length. Check both the TSA and CATSA rules for your flight. If in doubt, pack scissors in checked luggage and carry pre-cut tape and dressings in the cabin.

    Screening tips

    Pack your kit where you can reach it if officers want a look, and keep medications together in one clear pouch. Final decisions rest with the screening officer.

    Adhesive bandages in several sizes, including a large elastic one
    A range of sizes, including a few large bandages, is more useful than dozens of identical small strips (Photo: Foto: Jonn Leffmann via Wikimedia Commons, CC BY 4.0)

    Five first aid kits from our original list

    The kits below were featured in the original version of this guide. Contents, piece counts and cases change between versions, and we have not tested them ourselves, so check the current contents list from the manufacturer or seller before you buy, and plan to add your own personal items to any of them.

    1. Band-Aid Travel Ready Portable Emergency First Aid Kit

    A compact travel kit from BAND-AID Brand, built around an assortment of adhesive bandages and basic wound-care supplies in a small case. It suits casual travelers, road trips and theme park days, when you mostly need to clean and cover small cuts and scrapes. Check the current contents before you buy, and add blister dressings if you plan to walk a lot.

    2. Waterproof hard-shell mini first aid kits

    The original list included a compact kit in a waterproof hard-shell case. This style suits active travelers who hike, camp, paddle or spend time on boats, because the case keeps contents dry and protected in a backpack or glove compartment. Check that the contents include what you need, such as blister care and tweezers, and not just a large number of small items.

    3. Compact multi-use mini kits

    The original list also included a small general-purpose kit with antiseptic towelettes, gauze and safety pins, organized for home, office, car or backpack use. A kit like this makes a good base that you can personalize for travel with prescriptions and trip-specific items.

    4. KeepGoing Travel First Aid Kit for Kids

    A kit designed for traveling families, with child-friendly bandages and a small case that fits a diaper bag, backpack or glove box. It suits parents who want bumps and scrapes covered quickly. Children’s medicines are not a substitute for this kit and are not something to guess at: ask a pharmacist or your child’s doctor which products and doses are appropriate for your child’s age and weight.

    5. PTEROMY Mini First Aid Kit

    A compact, organized kit aimed at outdoor and travel use, with a broader range of supplies than a basic bandage kit. It suits road trips, international travel and trekking where a pharmacy may not be close. Check the current contents list and remove anything you would not know how to use.

    Kits by trip type

    TripAdd to the core kitNotes
    City breakExtra blister dressings, hand sanitizerPharmacies are usually close; keep the kit small
    Beach and resortSunscreen, after-sun care, waterproof bandagesCover cuts from shells and coral promptly and keep them clean
    Hiking and outdoorsElastic bandage, larger dressings, emergency blanketTake a first aid course if you hike far from help
    Road tripLarger kit in the car, water, flashlightKeep the kit out of direct sun in a hot car
    Traveling with kidsChild-friendly bandages, thermometer, products your pharmacist suggestsNever give adult medicines to children without advice
    Remote or long-haulWater purification, insect repellent, items your travel clinic suggestsSee a travel health clinic well before departure

    Destination-specific planning

    Some destinations call for vaccines, preventive medicines or particular supplies. The CDC’s destination pages list health considerations by country, and the same site has a tool that helps US travelers find travel health clinics. Canadians can check the health section of each country page in the Government of Canada’s travel advice. Book an appointment with a doctor, pharmacist or travel clinic ideally several weeks before you leave, because some vaccines need time or more than one dose. Bring your kit list to the appointment and ask what to add or remove for your destination.

    Traveling with children

    Kids get more scrapes and bumps, and they are less patient about waiting for a pharmacy to open. Pack child-friendly bandages, a thermometer, a copy of their health card and any prescriptions. Ask your pharmacist or pediatrician which products, if any, to bring for your child, and how to use them; children’s dosing is based on age and weight and should never be guessed. Keep all medicines in child-resistant packaging and out of reach in hotel rooms. To keep little ones busy on the way, see our guide to travel books for kids.

    Finding care abroad

    • Know the emergency number. It is 911 in the US and Canada and 112 across the European Union; check the number for your destination before you go.
    • Pharmacies are a good first stop for minor problems in many countries, and pharmacists can often advise on local products.
    • Ask your hotel. Front desks usually know the nearest pharmacy, clinic and hospital, and whether staff speak your language.
    • Carry insurance details. Medical care abroad can be expensive. The CDC’s travelers’ health site has a section on travel insurance, and Canada’s medication guidance recommends insurance that covers care abroad.
    • Canadians abroad can find consular help through the Government of Canada’s emergency assistance page.
    The front of a neighborhood pharmacy in a city
    In many countries a local pharmacy is a good first stop for minor problems; ask your hotel where the nearest one is (Photo: Félix An via Wikimedia Commons, CC BY 4.0)

    Where to keep your kit

    Split your supplies so the right things are always with you. Keep medications and a small core kit in your personal item on the plane. Carry a mini kit in your daypack on sightseeing and hiking days: a few bandages, blister dressings, wipes and any medicine you might need during the day. Leave bulkier items in your suitcase or car. An anti-theft backpack or a hiking backpack with a small outside pocket makes the day kit easy to reach.

    Preventing the most common problems

    • Blisters. Break in new shoes before the trip and treat hot spots early. Our guide to comfortable walking shoes helps you pick the right pair.
    • Long flights. Move around, stay hydrated and ask your doctor whether compression socks make sense for you; see our guide to compression socks for long flights.
    • Sleep and jet lag. Light, routines and seat choice help more than most gadgets. Our guide to sleeping better on flights covers the basics, and medication decisions belong with your doctor or pharmacist.
    • Food and water. Follow local advice on tap water, wash or sanitize hands before eating, and be cautious with street food if you have a sensitive stomach.
    • Sun and heat. Sunscreen, a hat, shade at midday and plenty of water prevent most heat and sun problems.

    Keeping your kit ready

    After each trip, restock anything you used and check expiry dates on wipes, ointments and medicines. Once a year, empty the kit completely, throw out anything expired or damaged, and replace it. Keep the contents list inside the case, and update it when you add or remove items. A kit that is ready to go means you will actually take it.

    Common mistakes

    • Buying a huge kit and leaving it behind. A small kit you carry beats a big kit in the hotel.
    • Packing medications in checked luggage. Keep them in your carry-on.
    • Decanting prescriptions into unlabeled pill boxes. Keep original labeled containers for travel, especially across borders.
    • Not checking local rules. Some common medicines are restricted in some countries.
    • Guessing children’s doses. Ask a pharmacist.
    • Letting everything expire. Check the kit before each trip.
    • Relying on the kit for serious problems. Know how to get real care at your destination.

    Frequently asked questions

    What should be in a travel first aid kit?

    Basics include bandages in several sizes, blister dressings, gauze, tape, antiseptic wipes, tweezers, gloves and a thermometer, plus your prescriptions. The CDC’s Pack Smart list is a good checklist; ask a pharmacist which over-the-counter products suit you.

    Can I bring a first aid kit on a plane?

    Generally yes, in carry-on or checked bags, but individual items must follow security rules. Liquids, gels and some scissors have limits, and medically necessary liquids have their own process. Check TSA or CATSA guidance before you fly.

    Should I pack medicine in my carry-on?

    Yes. Keep prescriptions and essential medicines in your carry-on, in their original labeled containers, with copies of your prescriptions.

    Are my medicines legal in other countries?

    Not always. Some medicines that are legal at home are restricted elsewhere. Check with the destination country’s government office and see the CDC and Government of Canada guidance before you go.

    How often should I update my travel kit?

    Restock after every trip and check expiry dates before each departure. Do a full clear-out at least once a year.

    Do I need a different kit for international travel?

    Often you need extras, depending on where you are going. Check the CDC destination pages or Government of Canada travel advice, and see a doctor, pharmacist or travel clinic several weeks before departure.

    Is a ready-made kit good enough?

    It is a good base. Most travelers add prescriptions, larger blister dressings and trip-specific items, and remove things they will not use.

    With a small kit in your bag, you can focus on the trip itself. Compare fares across flexible dates on our flight search, find a hotel close to the sights (and a pharmacy) on our hotel search, and pick up a car for the road trip on our car rental search. If you are heading somewhere sunny, our guide to things to do in Cancun is a good start. For the rest of your travel gear, including the bag your kit will ride in, see our main guide to travel luggage bags.

  • 7 Must-Have 3 in 1 Apple Chargers That Make Charging Effortless

    7 Must-Have 3 in 1 Apple Chargers That Make Charging Effortless

    If you travel with an iPhone, an Apple Watch and AirPods, you know the nightly ritual: three cables, two or three bricks, a hunt for enough outlets behind the hotel bed, and at least one device that did not charge because its cable slipped out. A 3-in-1 Apple charger replaces all of that with one stand or pad that charges your phone, your watch and your earbuds at the same time from a single outlet. For travelers that is a real improvement: less to pack, less to forget at checkout and a tidy spot on the nightstand where everything goes every evening. Not every 3-in-1 charger is a good travel charger, though. Some are heavy desk stands, some charge slowly, some leave you to find your own power adapter, and some do not charge an Apple Watch properly at all. This guide explains how these chargers work, what to look for when you buy one for travel, the seven styles from our original list and who each one suits, how to use one abroad, and the rules that apply when you fly with chargers and power banks. It is part of our travel gear series, which starts with our main guide to choosing travel luggage.

    The short answer

    For travel, choose a foldable 3-in-1 charger that closes to pocket size, with magnetic alignment for the iPhone (MagSafe or Qi2), a proper Apple Watch charging puck from a certified module, and a pad or cradle for AirPods with a wireless case. Make sure you know which power adapter it needs and whether one is included, and pick one that runs from a USB-C adapter that accepts 100 to 240 volts, so all you need abroad is a plug adapter. Leave the heavy, weighted desk stands at home. And if you also carry a power bank, remember that power banks travel in the cabin only, never in checked bags.

    A round magnetic MagSafe charging puck with its USB-C cable
    Magnetic alignment is what makes wireless phone charging reliable on a hotel nightstand (Photo: James Tamim via Wikimedia Commons, CC BY-SA 4.0)

    How 3-in-1 Apple chargers work

    A 3-in-1 charger combines three different chargers in one housing, powered from one cable:

    • The iPhone charger is a wireless charging pad, usually magnetic. Most iPhone models from the iPhone 12 onward support MagSafe, Apple’s magnetic wireless charging system (Apple’s MagSafe guide lists the exact models), and newer iPhones also support Qi2, the magnetic wireless charging standard from the Wireless Power Consortium. Magnets hold the phone in the right spot, which matters because wireless charging is sensitive to alignment.
    • The Apple Watch charger is a separate magnetic puck. Apple Watch does not charge on an ordinary phone wireless pad; it needs its own charger. Apple recommends chargers made by Apple or chargers that have completed its MFi certification and carry the “Made for Apple Watch” badge, and it explains how to spot them on its page about identifying authentic and certified Apple Watch chargers.
    • The AirPods charger is usually a small wireless pad or cradle. It works with AirPods cases that support wireless charging; a case that charges only by cable will not charge on the pad.

    The whole unit then draws power from a wall adapter, usually through a USB-C cable. The adapter matters more than people realize: an underpowered adapter can make everything charge slowly, or leave one device not charging at all.

    MagSafe, Qi2 and plain Qi

    These labels cause more confusion than anything else on charger listings:

    • MagSafe is Apple’s magnetic wireless charging for iPhone. Apple’s own MagSafe Charger guide lists the iPhone models it supports and the adapter wattage it recommends for the fastest charging.
    • Qi2 is an open standard from the Wireless Power Consortium that adds magnetic attachment to Qi wireless charging. Certified Qi2 chargers are designed to work with recent iPhones in much the same way as MagSafe, and the consortium keeps a database of certified products.
    • Qi is the older, non-magnetic wireless standard. It still charges an iPhone, but without magnets the phone can slip out of position, and charging is generally slower.
    • “MagSafe-compatible” on a third-party product usually means it has magnets that attach to an iPhone, not that it is certified by Apple or charges at the same speed as Apple’s own charger. Look for Qi2 certification or official MagSafe certification if speed matters to you.

    Who needs a 3-in-1 charger, and who does not

    A 3-in-1 makes the most sense if you carry all three devices every day and travel often enough that packing three separate chargers has become a chore. Frequent business travelers, people who wear an Apple Watch to track sleep or workouts on the road, and couples who share one nightstand in a hotel room get the most out of one. It makes less sense if you do not own an Apple Watch or wireless-charging AirPods, since a 2-in-1 or a single magnetic charger will be smaller and cheaper. It also makes less sense if you mostly charge in the car or at your desk by cable, or if you are happy with a single multi-port USB-C charger and three short cables, which is lighter still. Be honest about your routine before you buy.

    What to look for in a travel 3-in-1 charger

    Folded size and weight

    The biggest difference between a travel charger and a desk charger is how it packs. Foldable 3-in-1 chargers close into a flat square or a small block that fits in a cable pouch. Weighted desk stands are stable on a nightstand but heavy and awkward in a bag. For travel, folded size and weight matter more than looks.

    Charging speed

    Speed is set by the charger’s rating, its certification and the adapter you plug it into. Watch and earbud chargers are slower by design. For most travelers, overnight charging is what matters, and nearly any decent 3-in-1 fills everything by morning. Faster charging helps if you top up during a short hotel stop or an airport lounge visit.

    Power adapter included or not

    Some 3-in-1 chargers come with a wall adapter, others only with a cable. If an adapter is not included, check the minimum wattage the maker recommends and make sure the adapter you already carry meets it. Using an underpowered adapter is the most common reason a 3-in-1 charger seems slow or unreliable.

    Apple Watch module

    Check that the watch puck supports your watch model and, ideally, that the charger is MFi-certified for Apple Watch. Some chargers let the puck tilt to a flat position so the watch can sit in nightstand mode on its side, which is a nice touch in a dark hotel room.

    Case compatibility

    Magnetic chargers work best with the phone bare or in a case designed for MagSafe. Thick, rugged or non-magnetic cases can weaken the magnetic hold and slow charging or stop it entirely. Remove card wallets before charging; Apple warns not to put credit cards, security badges, passports or key fobs between an iPhone and a MagSafe charger because it can damage magnetic strips or chips.

    Stand or flat pad

    A stand holds the phone upright so you can see notifications, use it as a bedside clock or take a video call while it charges. A flat pad packs thinner. Many foldable designs manage both, with a panel that props up or lies flat.

    Heat and safety

    Wireless charging creates heat. Good chargers include temperature protection, and iPhones manage battery heat themselves; Apple notes that if the battery gets too warm, software might limit charging above 80 percent. Charge on a hard surface with some air around it, not under a pillow or on a bed, and do not charge in direct hot sun.

    FeatureWhy it matters for travelWhat to check
    Foldable designPacks flat in a cable pouchFolded size and weight
    MagSafe or Qi2 for iPhoneMagnetic alignment and faster wireless chargingCertification, not just “compatible”
    Apple Watch puckCharges the watch without a separate cableMFi “Made for Apple Watch” badge, model support
    AirPods padCharges wireless-charging casesYour case supports wireless charging
    Included adapterOne less thing to buy and matchWattage, plug type, 100 to 240 V input
    USB-C inputShares a cable and adapter with other gearCable length for hotel outlets
    Stand modeBedside clock, video callsStability when you tap the screen
    Temperature protectionSafer overnight chargingMaker’s stated protections
    An Apple Watch resting on an iPhone on a bamboo mat
    iPhone and Apple Watch charge differently, so a 3-in-1 needs a proper watch puck as well as a phone pad (Photo: SimonWaldherr via Wikimedia Commons, CC BY-SA 4.0)

    Seven styles from our original list

    The original version of this guide featured seven chargers. Most were listed by description rather than by brand and model, so we have kept them as styles, with what each is good for. Two were Anker MagGo models, which we describe below. Designs change and third-party listings change often, so check the current details from the maker before you buy.

    1. Foldable magnetic 3-in-1 dock

    A tri-fold or bi-fold magnetic dock that charges iPhone, Apple Watch and AirPods and closes flat for packing. This is the classic travel 3-in-1: small enough for a cable pouch, quick to set up on a nightstand. It suits frequent flyers and minimalist packers. Check the certification for the iPhone pad, whether the watch puck is certified, and whether an adapter is included.

    2. Desk charging station

    A heavier stand with the phone held upright, the watch on an arm and AirPods on a base. It keeps a desk tidy and makes notifications easy to see, which is why the original list included one for workstations. It is a better fit for a home office than a suitcase, but worth it if you split time between home and a regular second base, such as a company apartment.

    3. Anker MagGo 3-in-1 charging station

    Anker’s MagGo line includes several 3-in-1 chargers for iPhone, Apple Watch and AirPods built around Qi2 wireless charging for the phone. Anker makes both stand-style and foldable versions, so look at the current range on Anker’s official product page and compare the folded size, the included accessories and the watch models listed as compatible. A MagGo station suits Apple users who want a charger from a well-known accessory brand with Qi2 certification rather than a generic “magnetic” label.

    4. Slim charger for the nightstand

    A low-profile charger designed to look tidy on a bedside table, often with indicator lights. It suits people who want one charger for home and occasional trips. If you want it for travel, check that the indicator lights can be dimmed or are not too bright; a glowing charger in a dark hotel room is surprisingly distracting.

    5. Foldable magnetic dock for travel

    A compact folding dock sold specifically as a travel charger, with magnetic alignment for the phone and room for the watch and earbuds. It is aimed at the same traveler as the first style but usually prioritizes the smallest folded size. Small chargers can be light enough to be pulled off a nightstand by a cable, so check how stable it feels with the phone attached.

    6. Anker MagGo foldable Qi2 charger

    The original list also featured a foldable Anker MagGo charger. On Anker’s product page, the MagGo Wireless Charging Station (Foldable 3-in-1) is listed with Qi2 charging for the iPhone, separate charging for Apple Watch and AirPods, a folding design, and a USB-C wall charger and cable in the box. It is a strong fit for travelers who want a certified, foldable 3-in-1 with the adapter included, so there is nothing extra to match. Check the compatibility list on the product page for your watch and earbud models.

    7. Travel 3-in-1 charger with a night light

    A magnetic 3-in-1 charger with a built-in soft light. In an unfamiliar hotel room, a gentle light by the bed is genuinely useful for finding the bathroom at night without switching on the room lights. It also makes a practical gift for a frequent traveler. Check that the light can be turned off completely for people who sleep better in full darkness.

    Travel plug adapters and power strips hanging on a store display
    With a 100 to 240 volt USB-C adapter, all you need abroad is the right plug (Photo: Grandmaster Huon via Wikimedia Commons, CC0)

    Using a 3-in-1 charger abroad

    Most of the work is in the adapter, not the charger:

    • Check the adapter’s input rating. Apple says its USB power adapters are designed for power sources from 100 to 240 volts at 50 to 60 hertz, which covers most of the world. Many third-party USB-C adapters are similar, but check the small print on yours.
    • Bring a plug adapter, not a converter. If the power adapter accepts 100 to 240 volts, you only need the right plug shape for the country.
    • Consider a multi-port USB-C charger with swappable plugs. One well-made charger can run the 3-in-1 and your laptop, and replace several bricks.
    • Pack a longer cable. Hotel outlets are often behind the bed or across the room. A cable long enough to reach the nightstand saves you from charging on the floor.

    For the rest of your tech kit, from adapters to cable pouches, see our guide to laptop travel accessories.

    Flying with chargers and power banks

    A 3-in-1 wireless charger has no battery of its own, so it is simply an electronic accessory. Magnetic power banks and other battery packs are different, because they contain lithium batteries. The principles:

    • Power banks and spare lithium batteries go in your carry-on only. They are not allowed in checked baggage. If your carry-on is gate-checked, take them out first.
    • Watt-hours set the limits. Most phone power banks fall well under the common 100 Wh threshold. Larger batteries generally need airline approval, and there is an upper limit beyond which they are not allowed.
    • Protect the terminals by keeping spares in their packaging, a case or a separate bag, away from keys and coins.
    • Airlines can be stricter. Some carriers have added their own rules about using or charging power banks during flights, so check your airline before you fly.
    • Damaged or swollen batteries should not fly.

    Official guidance: the FAA’s PackSafe page on lithium batteries, the TSA’s power banks entry and CATSA’s guidelines for batteries for Canadian airports. Rules change, so confirm before each trip.

    Several phones plugged into a public charging station at an airport
    Treat airport charging stations as a bonus and arrive with everything charged (Photo: Tomwsulcer via Wikimedia Commons, CC0)

    Charging on the move: airports, planes and hotels

    At the airport

    Airport charging stations and seat outlets are handy, but they are often crowded or broken. Arrive with everything charged and treat airport outlets as a bonus. Use your own adapter and cable in public outlets rather than unknown cables left at a station.

    On the plane

    Seat power varies by aircraft. Some seats have USB ports that deliver limited power, some have AC outlets and some have nothing. A 3-in-1 charger is not practical on a tray table; a short cable or a small magnetic power bank is better in the air.

    At the hotel

    Set up the charger on the nightstand as soon as you arrive, and make it the one place your phone, watch and earbuds go every night. That habit alone stops most lost-charger and dead-watch mornings. When you check out, the charger is the last thing you pack, and one quick look at the nightstand tells you if you have left anything behind.

    On a road trip

    In a rental car, a magnetic car mount and a single USB-C cable are more useful than a 3-in-1. Save the 3-in-1 for the hotel. If you are planning a driving trip, our car rental search helps you compare options.

    Building a smaller charging kit

    A 3-in-1 charger is one part of a lighter, simpler travel kit. A good all-Apple setup might be: a foldable 3-in-1 for the nightstand, one multi-port USB-C adapter with swappable plugs, one USB-C cable for the laptop, one short cable for the phone in transit and a small power bank for long days. Keep it all in one cable pouch in your personal item. If you work on the road, add a folding travel keyboard, and if your tech bag is heavy, a rolling laptop bag keeps it off your shoulders. For long flights, noise-cancelling headphones are the other piece of tech most travelers are glad they packed. And for keeping the pouch safe in busy places, our guide to anti-theft backpacks covers bags that make pickpocketing harder.

    Common mistakes

    • Buying a desk stand for travel. Weighted stands are great at home and heavy in a bag.
    • Using a weak adapter. An underpowered adapter makes all three devices charge slowly or not at all.
    • Assuming “MagSafe-compatible” means certified. Look for Qi2 or official MagSafe certification if speed matters.
    • Forgetting the watch puck matters. Uncertified watch chargers can charge slowly or unreliably.
    • Charging through a thick case or a card wallet. Take them off, or use a MagSafe case.
    • Packing a power bank in a checked bag. Power banks are cabin only.
    • Leaving it on the nightstand. Make the charger the last thing you pack.

    Frequently asked questions

    Are 3-in-1 Apple chargers safe?

    Chargers from reputable brands with proper certification, such as Qi2 for the phone and MFi for the Apple Watch module, and with temperature protection are designed to charge safely. Use the recommended adapter, charge on a hard surface and avoid uncertified no-name chargers.

    Will a 3-in-1 charger work with my Apple Watch?

    Only if it has a proper Apple Watch charging puck that supports your model. Apple Watch does not charge on a standard phone wireless pad. Check the compatibility list and look for the “Made for Apple Watch” badge.

    Can I charge my iPhone through a case?

    Usually, if the case is designed for MagSafe or is thin and non-metallic. Thick or rugged cases can weaken the magnets and slow or stop charging. Remove card wallets, badges and key fobs before charging.

    Do I need a voltage converter to use a 3-in-1 charger abroad?

    Usually not. If your USB-C power adapter accepts 100 to 240 volts, as Apple’s adapters do, you only need a plug adapter. Check the rating printed on your adapter.

    Do 3-in-1 chargers come with a power adapter?

    Some do and some do not. Check the box contents on the maker’s page and make sure your adapter meets the recommended wattage.

    Can I bring a 3-in-1 charger on a plane?

    Yes. A wireless charger with no built-in battery is an ordinary electronic accessory. Power banks and other battery packs are different: they must travel in the cabin, not in checked baggage.

    Will it charge AirPods?

    Yes, if your AirPods case supports wireless charging. Cases that charge only by cable will not charge on the pad.

    Is Qi2 the same as MagSafe?

    They are different names from different organizations, but both use magnetic alignment for wireless charging, and recent iPhones support both. Qi2 is the open standard; MagSafe is Apple’s own system.

    With your charging kit down to one pouch, all that is left is the trip. Compare fares on our flight search, find a hotel on our hotel search and, for road trips, compare rentals on our car rental search. Planning a long weekend? Flights to New York and our guide to things to do in New York will keep your phone busy all day, and your new charger busy all night. For bags and the rest of your gear, start with our main guide to travel luggage.

  • Top 10 Traveling Jewelry Cases for Stylish and Organized Jetsetters

    Top 10 Traveling Jewelry Cases for Stylish and Organized Jetsetters

    Jewelry is small, light and easy to pack, which is exactly why it causes so much trouble on a trip. Fine chains knot themselves into tangles in a toiletry bag, earring backs vanish into suitcase linings, a ring left on a hotel sink disappears down the drain or into housekeeping’s towels, and a favorite necklace comes home scratched from rattling against a watch. A travel jewelry case solves most of that: every piece has its own slot, nothing touches anything else, and the whole case goes into your carry-on and then into the room safe. This guide covers the main types of travel jewelry cases and when each makes sense, what matters in size, lining, closures and structure, how to pack different kinds of jewelry so they arrive untangled, what to know about airport security, customs and checked bags, and ten cases from our original list, from keychain ring capsules to roll-up organizers and watch cases.

    The short answer

    For most trips, a small zippered case with a soft lining, ring rolls, earring slots and a separate section for necklaces is the most useful travel jewelry case. It protects pieces from each other, fits a carry-on or handbag and is easy to lock in a safe. If you pack only a ring or two and studs, a keychain-sized capsule is enough. If you pack a lot of necklaces, a roll-up organizer with hooks or separate pouches keeps chains apart. Whatever you choose, keep jewelry in your carry-on, never in a checked bag, bring less than you think you need, and leave irreplaceable pieces at home.

    A night market stall with trays of sparkling jewelry and accessories
    Small, shiny and easy to lose: jewelry needs a case where every piece has its own slot (Photo: PattayaPatrol via Wikimedia Commons, CC BY-SA 4.0)

    Why a dedicated case beats a sandwich bag

    • It prevents tangles. Separate hooks, sleeves or pouches keep fine chains apart, which saves a frustrating half hour with a pin in your hotel room.
    • It prevents scratches. Softer metals, pearls and some gemstones can be scratched by harder stones or metal watch bands. A lined case keeps pieces from rubbing.
    • It keeps small parts together. Earring backs, spare links and tiny studs go missing easily in a suitcase. Dedicated slots make it obvious if something is missing.
    • It makes the safe easy. One case goes into the room safe every morning. Scattered pieces tend to stay on the dresser.
    • It speeds up packing. Everything has a home, so packing and unpacking takes seconds and nothing gets left behind in a hotel drawer.

    The main types of travel jewelry cases

    Zippered boxes with compartments

    A small, structured box, often square or rectangular, that zips closed and opens to reveal ring rolls, earring slots, a necklace section and sometimes a mirror. The structure protects pieces from being crushed, and the zipper keeps everything inside. This is the best all-round choice for most travelers.

    Roll-up organizers

    A fabric roll with zipped pockets, ring bands and necklace snaps that folds or rolls flat. It is light and packs into small gaps in a suitcase. It suits travelers with more necklaces and bracelets, and anyone who packs light. The trade-off is less crush protection than a structured box.

    Flat organizers and folios

    Flat cases that open like a book, with clear zip pockets and elastic loops. They slide into a laptop sleeve or a suitcase lid pocket and let you see everything at a glance. Good for business travelers who carry a few pieces for different outfits.

    Keychain and capsule cases

    Tiny hard capsules sized for a ring or two and a pair of studs. You clip them to a keyring, bag strap or gym bag. They are ideal for protecting a wedding or engagement ring while you swim, work out, wash your hands in a public restroom or apply sunscreen, and for minimalist travelers who wear only a couple of pieces.

    Pouch sets

    A set of small padded or velvet pouches, sometimes stored inside a larger case. One piece or one set per pouch keeps everything separate and flexible. This style suits people who travel with a lot of pieces for events such as weddings.

    Watch cases and rolls

    A padded case or roll with a cushion or pillow for one or more watches. Watches are heavy and can scratch other jewelry or be scratched themselves, so a dedicated case is worth it if you travel with a good watch or two.

    TypeBest forTrade-off
    Zippered compartment boxMost travelers, mixed jewelryTakes a little more space
    Roll-up organizerMany necklaces, light packersLess crush protection
    Flat folioBusiness trips, a few piecesLimited room for bulky items
    Keychain capsuleRings and studs, active daysHolds very little
    Pouch setWeddings, events, large collectionsEasy to lose one pouch
    Watch case or rollOne or more watchesOnly for watches

    What to look for

    Size

    Match the case to what you actually pack, not to your whole collection. A weekend away with one pair of earrings, a necklace and your everyday rings needs a small case; a wedding trip with outfits for several events might need a medium case or a roll plus pouches. A case that fits your handbag or personal item is one you will keep with you.

    Lining

    Soft linings such as velvet, suede-like fabrics or microfiber protect polished metal and stones. Some cases add anti-tarnish lining or a pocket for anti-tarnish strips, which helps with silver in humid places.

    Structure

    A semi-rigid or hard shell protects pieces from being crushed in a packed bag. Soft cases pack flatter. If you travel with delicate pieces, choose structure.

    Closures

    Zippers keep small pieces from escaping if the case tips over. Snaps and magnetic flaps are quicker but less secure. For keychain capsules, a screw or twist closure keeps a ring from falling out.

    Necklace storage

    Look for snaps, hooks or individual sleeves that hold each chain straight. A single open necklace compartment defeats the purpose.

    Ring rolls and earring slots

    Ring rolls should be firm enough to hold rings in place. Earring sections should include holes or slots for studs and a separate space for hoops and drops.

    Mirror and extras

    A small mirror in the lid is handy in hotels with poor lighting. Removable trays and small zip pockets for spare earring backs are useful extras.

    A historic jewelry case from a museum collection
    Jewelry cases have always done the same job: give each piece its own protected place so nothing rubs or tangles (Photo: Auckland Museum Collections from Auckland, Aotearoa New Zealand via Wikimedia Commons, CC BY 2.0)

    How to pack different kinds of jewelry

    Necklaces and fine chains

    Fasten the clasp and hang or snap each necklace separately. If your case lacks hooks, thread a fine chain through a drinking straw and fasten the clasp outside it, or lay it flat on a folded tissue and roll it up. Never let chains share a pocket.

    Rings

    Slide rings onto a ring roll or into individual slots. Stack delicate rings separately from rings with raised stones that can scratch them.

    Earrings

    Push studs through a slot or a piece of card and replace the backs. Hang hoops and drops on a bar or keep them in a small pouch each. Pack a few spare earring backs; they are the item most often lost on trips.

    Bracelets and bangles

    Soft bracelets can go into a zip pocket. Bangles and cuffs can slip around a rolled scarf in your bag to keep their shape and avoid knocking into other pieces.

    Watches

    Store watches on a cushion or in their own case, with the face protected. If you travel with a mechanical watch you do not wear daily, keep it in a padded case and away from heavy items.

    Pearls and delicate pieces

    Many jewelers advise keeping pearls in a soft pouch rather than an airtight plastic bag and keeping them away from perfume and sunscreen. When in doubt, ask the jeweler who sold you the piece how they recommend storing it.

    Ten travel jewelry cases from our original list

    The cases below were featured in the original version of this guide. They cover different styles rather than a strict ranking. Colors, sizes and features change between versions, and we have not tested them ourselves, so check the current details from the manufacturer or seller before you buy.

    1. Benevolence LA Plush Velvet Jewelry Box

    A compact, velvet-covered jewelry box from Benevolence LA with multiple compartments and a built-in mirror. It suits short trips and weekend getaways, and it is a popular choice as a gift. The soft lining helps protect delicate pieces from rubbing.

    2. Lion Latch Travel Jewelry Case

    Lion Latch makes small, keychain-sized travel jewelry cases meant for rings and small earrings. The idea is simple: clip it to a gym bag, keys or carry-on and drop your rings in before a workout, swim or hand wash. It suits active travelers and minimalists who wear only a few pieces. The original list also included a second Lion Latch design; the brand offers several variations, so check which size and style suit the pieces you carry.

    3. BELALIFE Foldable Jewelry Storage Roll

    A roll-up organizer with space for necklaces, rings and earrings that folds flat for packing. It suits travelers who want something light and roomy that keeps everything visible and separated, on both long vacations and business trips.

    4. BAGSMART Travel Jewelry Organizer

    BAGSMART is a travel bag and organizer brand, and its travel jewelry organizer is a small, soft case with ring bands, necklace hooks and a zip pocket. It suits light packers and weekend trips when you want a compact case that fits a handbag or carry-on.

    5. CONBOLA Rotating Layered Jewelry Box

    A multi-layer box whose trays rotate out to reveal rings, earrings and bracelets. It is more of a vanity organizer than a pure travel case, so it suits road trips, longer stays and people who want one box for home and travel. For flying, a flatter zippered case is usually easier to pack.

    6. Oirlv Leather Travel Watch Case

    A leather travel watch case designed to hold a watch securely during travel. It suits men and women who travel with a watch they care about and want to keep it apart from other jewelry and away from knocks.

    7. Mini portable jewelry travel boxes

    The original list included a small, inexpensive zippered jewelry box with slots for rings and earrings and room for a necklace. This style is ideal for short trips and handbags, and it is a practical first travel case if you are not sure how much you will use one.

    8. Vlando Jewelry Organizer with Zipper Pouches

    A case that holds several small zipper pouches inside a larger travel case, so each set or piece has its own pouch. It suits travelers with larger collections, wedding guests with outfits for several events and anyone who likes to grab one pouch per day.

    9. LANDICI Small Jewelry Box

    A compact box with a leather-look exterior and an interior laid out to keep pieces organized and untangled. It suits travelers who want an entry-level, tidy case for their everyday pieces.

    10. A simple pouch set for minimalists

    If you pack only two or three pieces, a set of small soft pouches, one per piece, inside a zipped toiletry pocket is a perfectly good travel jewelry case. It costs little, weighs nothing and keeps pieces apart. Upgrade to a structured case if you start packing more.

    Airport security, checked bags and customs

    Carry jewelry on, never check it

    Checked bags are sometimes delayed, opened for inspection or lost, and many airlines limit their liability for jewelry and other valuables packed in checked luggage. Read your airline’s conditions of carriage for its rules, but the simple rule is to keep jewelry in your carry-on or personal item, ideally in a bag that stays under the seat in front of you.

    Security screening

    Jewelry is generally allowed through security, but large metal pieces can set off the walk-through detector and lead to extra screening. Many travelers put rings, watches and chunky bracelets into their case and into their carry-on before they reach the checkpoint rather than loose in a tray. Check the TSA’s What Can I Bring? tool in the US and CATSA’s what can I bring page in Canada for current screening rules, and watch your tray until your bag comes out of the scanner.

    Customs and valuable pieces

    If you travel abroad with expensive jewelry or watches, especially pieces made in another country, customs officers at home may ask about them on your return. US travelers can find guidance on registering items before a trip on CBP’s Know Before You Go page. Canadian residents can ask the Canada Border Services Agency about identifying valuables before departure so they can be brought back without question. Keep receipts or appraisals for important pieces.

    A self-winding wristwatch seen from its transparent case back
    Watches are heavy and can scratch other jewelry, so give a good one its own padded case (Photo: Petar Milošević via Wikimedia Commons, CC BY-SA 4.0)

    Keeping jewelry safe at your destination

    • Use the room safe. Lock the case in the safe every time you go out. If there is no in-room safe, ask whether the front desk has one. Filtering for rooms with a safe is easy on our hotel search.
    • Do not leave rings by the sink. Hotel sinks, shared bathrooms and beach showers are where rings get lost. Put them straight into a case.
    • Dress down in busy places. In crowded markets, metros and tourist hot spots, flashy jewelry can attract attention. Canada’s travel advice and advisories describe local theft risks by country.
    • Take rings off for the beach and pool. Cold water shrinks fingers and rings slip off; sand and chlorine can also damage some pieces.
    • Keep a list and photos. A photo of each valuable piece helps with police reports and insurance claims.
    • Check your insurance. Home or travel insurance may or may not cover jewelry away from home, and may have limits per item. Check before you go.

    How much jewelry to bring

    The best travel jewelry kit is small. A simple approach that works for most trips:

    • Everyday pieces you wear: the rings, studs or watch you wear daily.
    • One or two versatile extras: a necklace and a pair of earrings that go with most of your outfits.
    • Event pieces, only if needed: for a wedding, gala or business dinner, bring the specific pieces for that event and keep them in the safe until then.
    • Nothing irreplaceable: family heirlooms and pieces with deep sentimental value are safer at home. Many travelers bring good-looking costume jewelry instead.

    Jewelry on specific kinds of trips

    Beach and resort holidays

    Salt water, sunscreen and chlorine are hard on jewelry. Pack a few simple pieces, keep a capsule case in your beach bag for rings, and leave anything valuable in the safe. If you are planning a beach escape, our guide to things to do in Cancun covers where to go.

    Weddings and events abroad

    Bring a structured case or a pouch set with each outfit’s pieces labeled, and carry it on the plane. Our guide to planning a honeymoon in the Cayman Islands is a good read if the event is your own.

    Business trips

    A slim folio or small zippered case with a watch, a pair of earrings and a necklace covers most meetings and dinners. Pack it in your laptop bag so it never leaves your side.

    Adventure and hiking trips

    Leave most jewelry at home. A silicone band or a capsule for your wedding ring keeps it safe while you hike, climb or paddle. See our guide to hiking backpacks for the rest of your trail kit.

    Caring for jewelry while you travel

    Put jewelry on last, after sunscreen, perfume and hair products, and take it off first. Wipe pieces with a soft cloth before you pack them away each night. In humid destinations, a small anti-tarnish strip or a silica gel packet in the case helps silver stay bright. If a clasp or setting feels loose before the trip, have a jeweler check it; loose settings are how stones are lost.

    Common mistakes

    • Packing jewelry in checked luggage. Keep it in your carry-on.
    • Throwing chains into one pouch. Separate every necklace.
    • Bringing too much. Plan pieces around your outfits and leave the rest.
    • Leaving it on the dresser. Make the safe part of your routine.
    • Taking heirlooms. Bring pieces you could live without.
    • No record. Photograph valuable pieces and keep receipts.
    An electronic safe inside a hotel room closet
    Make the room safe part of your routine: the jewelry case goes in every time you go out (Photo: TaurusEmerald via Wikimedia Commons, CC BY-SA 4.0)

    Where a jewelry case fits in your packing

    A jewelry case belongs in your personal item alongside the other things you never want to be separated from: your passport, wallet, medications and electronics. A passport holder and a slim travel wallet keep documents and money organized next to it, and a small travel first aid kit fits in the same bag. If you carry a daypack around the city, an anti-theft backpack with a hidden pocket is a good place for anything you wear out and take off later. For choosing the carry-on itself, see our main guide to travel luggage.

    Frequently asked questions

    What is the best way to pack jewelry for travel?

    Use a lined case with separate slots for rings, earrings and necklaces, fasten every clasp, and keep the case in your carry-on. Thread fine chains through a straw if your case has no hooks.

    Can I bring jewelry through airport security?

    Generally yes. Large metal pieces may trigger extra screening, so many travelers pack them in a case in their carry-on before the checkpoint. Check TSA or CATSA guidance for current rules.

    Should I put jewelry in checked luggage?

    No. Checked bags can be delayed, opened or lost, and airlines often limit liability for valuables in checked bags. Keep jewelry in your carry-on.

    Are velvet-lined cases better?

    A soft lining such as velvet or microfiber helps prevent scratches. The layout, with separate spaces for each piece, matters just as much.

    Are jewelry rolls better than hard cases?

    Rolls are light and flexible; hard or semi-rigid cases protect better against crushing. Choose a roll for many necklaces and light packing, a structured case for delicate pieces.

    What size travel jewelry case do I need?

    One that fits the pieces you are actually taking and the bag you will carry it in. For most trips, a small case that fits a handbag or personal item is enough.

    Can I use a travel jewelry case at home?

    Yes. Many travel cases work well for daily storage, which also means your case is already packed when you leave.

    How do I keep silver from tarnishing on a trip?

    Keep it dry and apart from other pieces, wipe it before storing it, and add an anti-tarnish strip or silica gel packet to the case in humid places.

    With your jewelry packed, the fun part is the trip. Compare fares across flexible dates on our flight search, choose a hotel with an in-room safe on our hotel search, and if your trip is a city break, our guide to things to do in Paris is a lovely excuse to wear your favorite pieces. For the rest of your kit, start with our main guide to travel luggage bags.